Set up the online application form
Publish the public form people use to apply for membership, choose who can apply and how they pay, and decide which fields the form and the register record.
Where to find it: Event admin › Membership › Settings › Application Form
The application form is a public page where people apply for membership. You publish it from the membership settings and share its link. Each application then arrives in Applications for you to review. The fields decide what the form asks and what the register records.
Before you start#
- Switch Membership on. See Get started with Membership.
- Your organisation needs a URL name, which the form's address is made from. Set it on your organisation's Profile. See Organisations and roles.
- Set up at least one membership type that's offered on the public form. See Membership types.
Publish the form#
- In the membership menu, open Settings › Application Form.
- Under Publishing, turn on Publish the online application form.
- Set the other cards, below.
- Click Save application form. The page says Application form saved. It is published.
- Under Public link, click Copy to share the address, or Open to see the form.
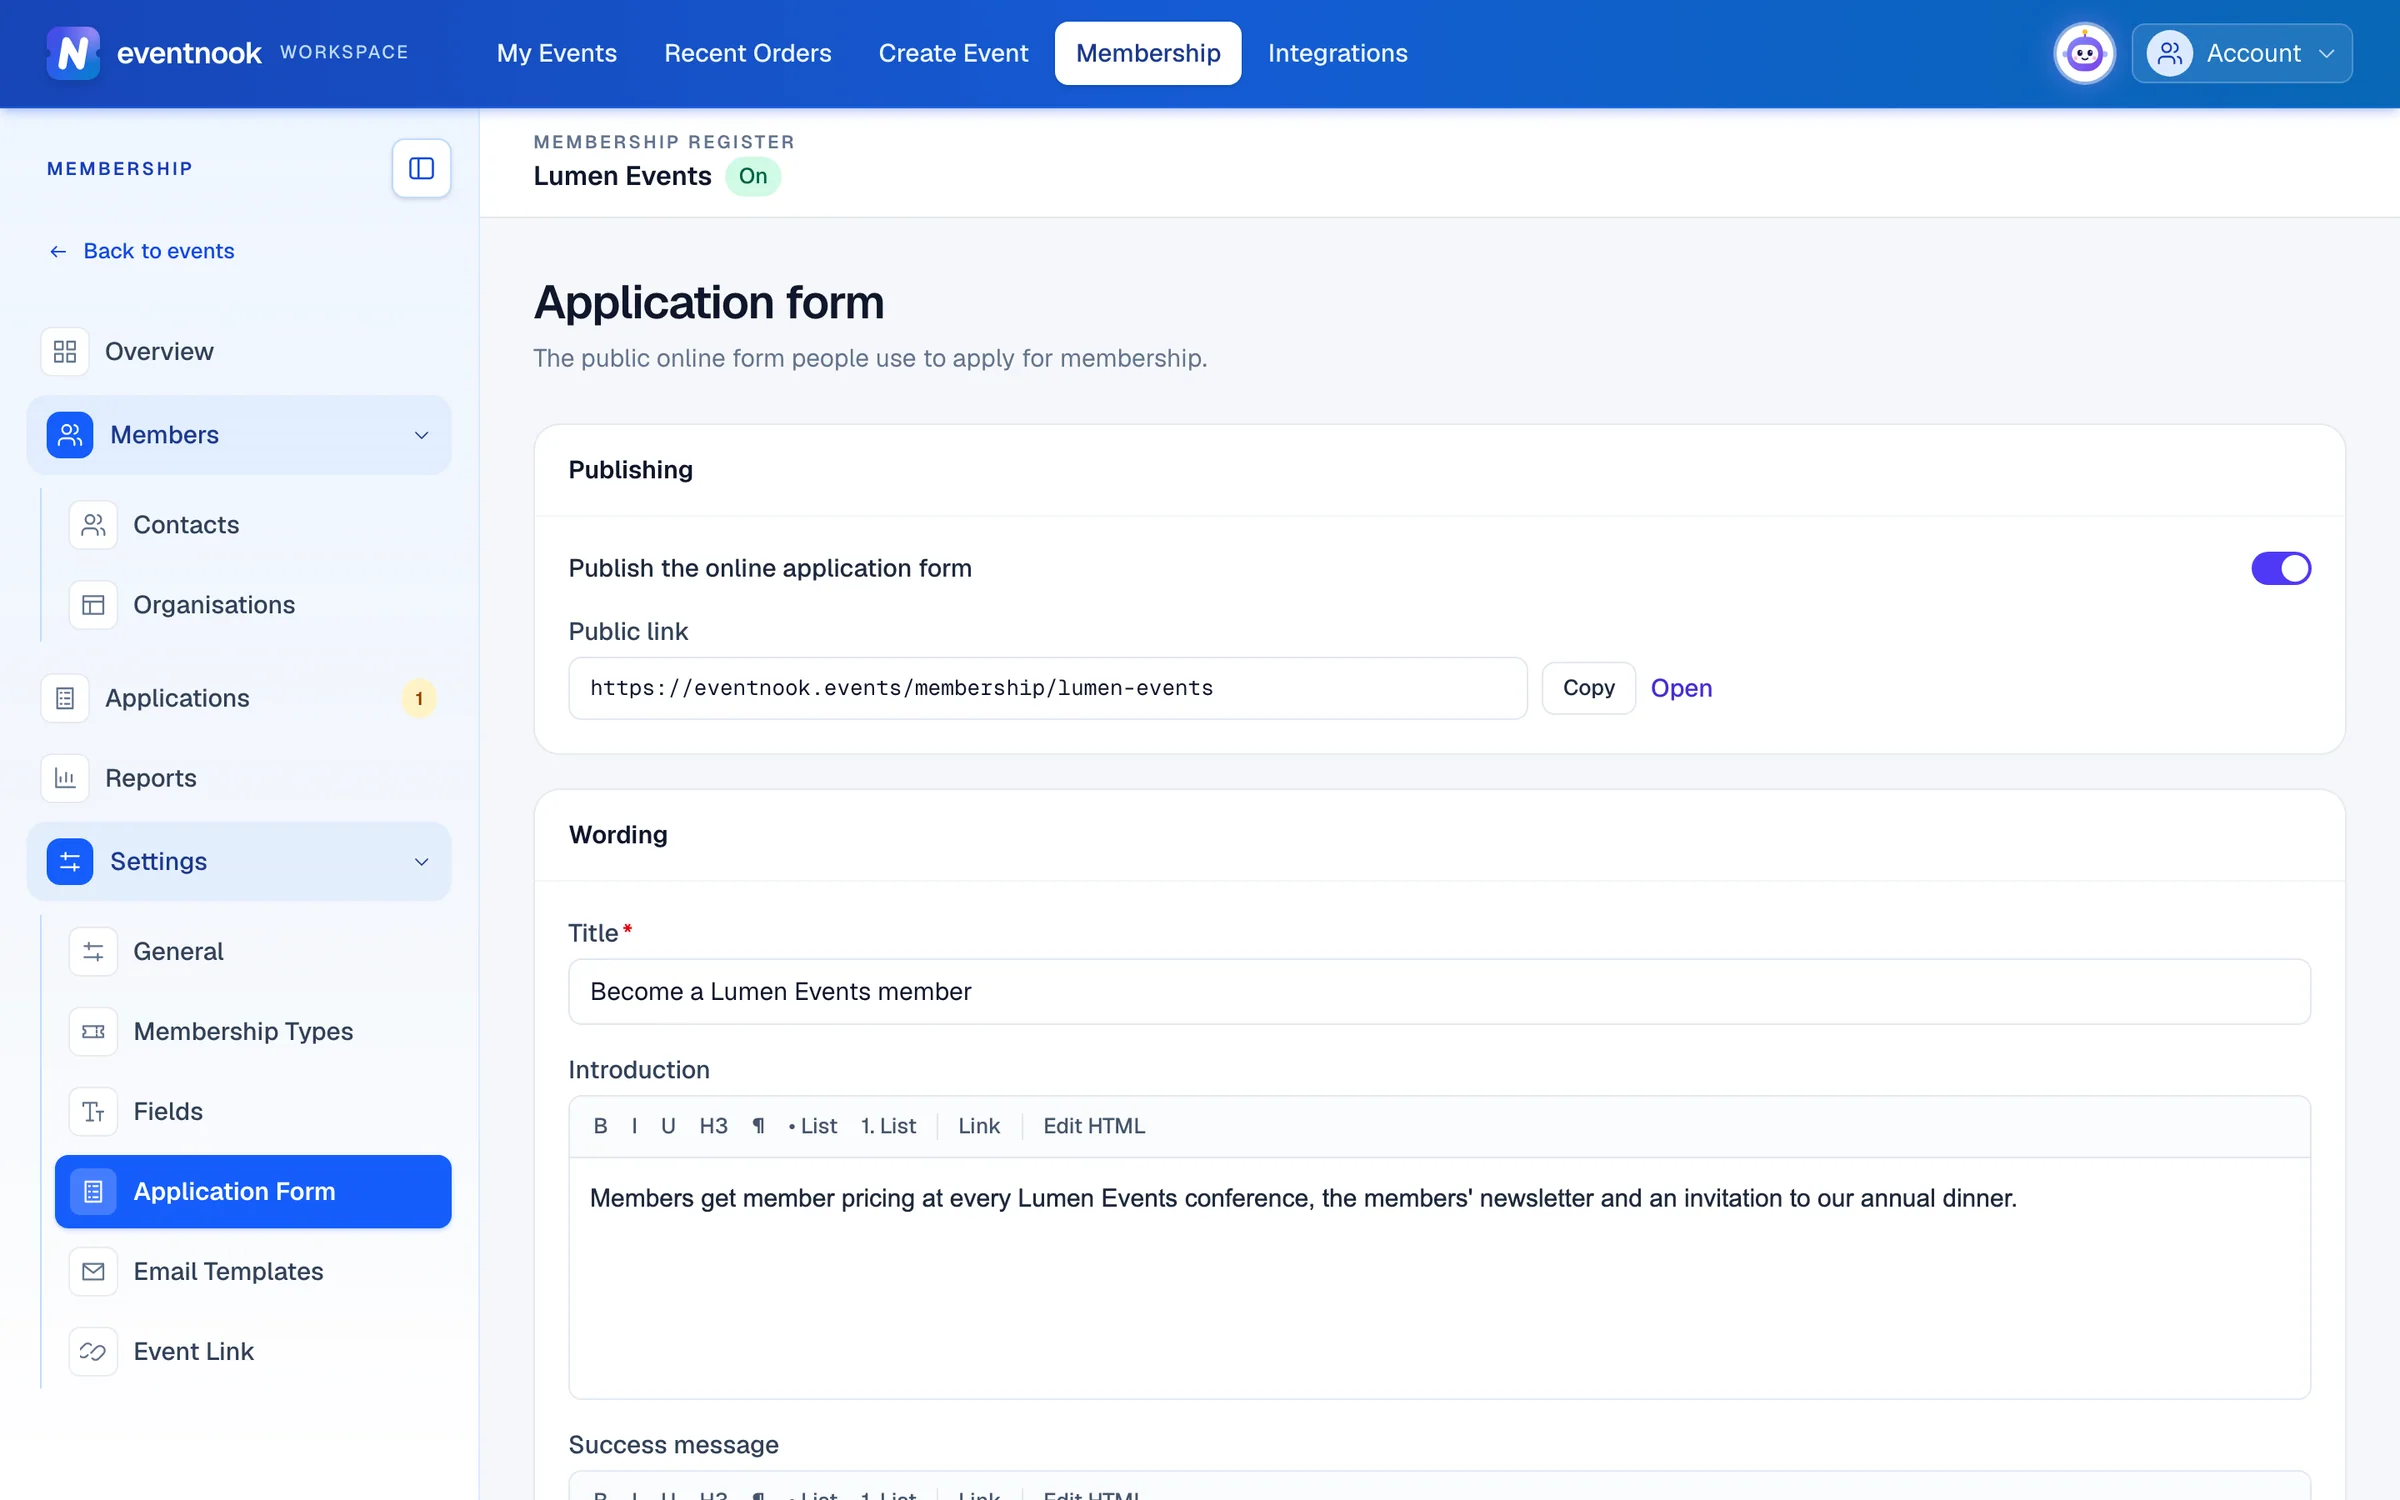
- 1Turn on, then save, to open the form to the public
- 2The form's address, to share or put on your website
Until the form is published and saved, its link answers "not found". If the page says The form cannot be published yet, it lists what's missing.
| Card | What you set |
|---|---|
| Wording | The form's Title, an Introduction shown above it, and the Success message shown after someone applies. |
| Who can apply, and for what | The Applicant kinds: Individuals, Organisations or both. An organisation's application collects its details and one contact, who becomes its primary contact. Then the Membership types offered. None ticked means every active public type is offered, including ones you add later. |
| Terms | The Terms text, and Applicants must tick a box to accept the terms. |
| Payment | Asked only when the chosen type has a fee. The Payment methods offered, and the Offline payment instructions shown to someone who chooses bank transfer, cheque, cash or other. |
| Notifications | Up to 10 staff email addresses told about each new application. |
What applicants see#
The form shows your title and introduction, then asks Who is applying? (if you accept both kinds), the Membership type, the organisation's details and Your details, and the terms. Its button says Submit application, or Continue to payment when the type has a fee.
After applying, the applicant gets a page for their application, with its Application number, type and payment. It tells them where it stands: for example Application received, or Choose how to pay to complete your application when a fee is still due. They're asked to keep that page's link.
Choose what you record#
Settings › Fields shapes the contact and member-organisation records. The order of the fields is the order on the record, on the application form and in exports.
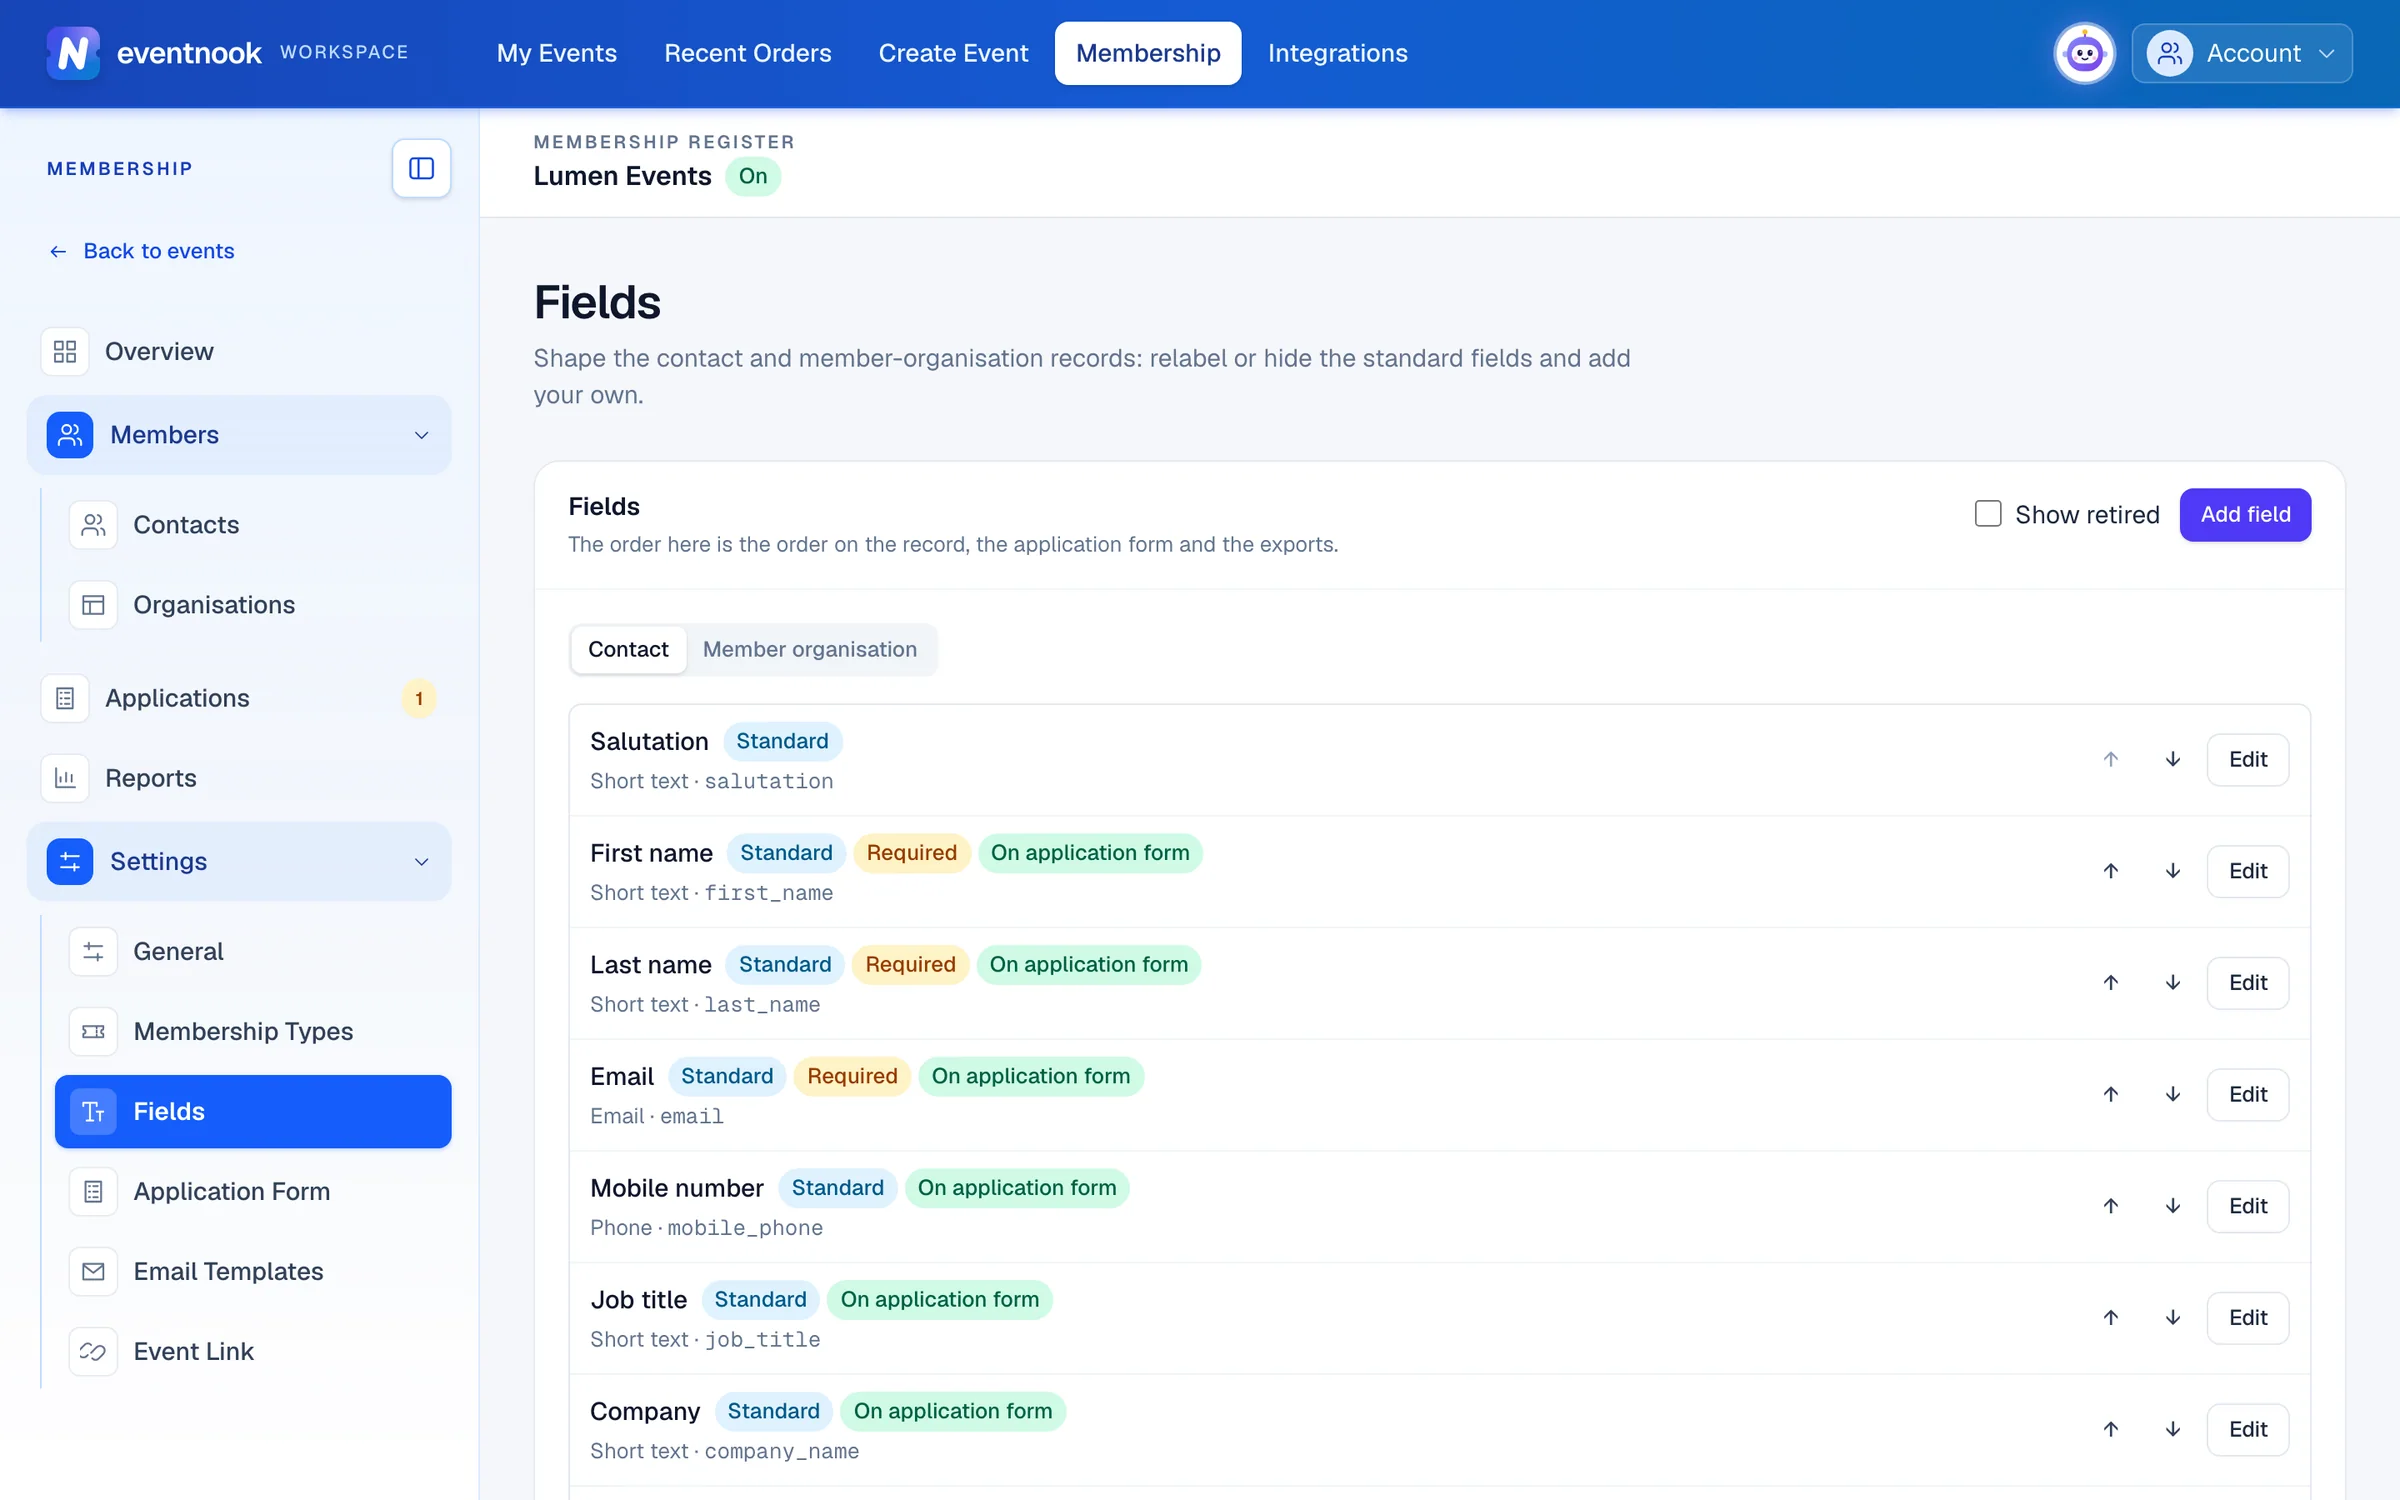
- 1The contact record or the member-organisation record
- 2Add your own question
- Choose the record at the top: Contact or Member organisation.
- To change a field, click Edit. You can change its Label, Help text and Placeholder, and tick Required, Hidden or Show on the application form. Click Save.
- To add your own, click Add field, type the Label, choose the Type, and click Add field. For a list of choices, add each one with Add option.
- To change the order, use the up and down buttons on each field.
Each field is marked Standard or Custom, and Required, Hidden or On application form when that applies.
- Hidden keeps the field on the record but leaves it off the forms and screens.
- A field's key is made from its first label and never changes, so relabelling a field never loses its answers.
- A standard field's type can't change. A custom field's type can't change once a record holds an answer.
To take away a field you added, click Remove. It's retired: it leaves every form, including the application form, but the answers already given are kept. Tick Show retired to see retired fields.
If something looks wrong#
- "Switch the membership module on before publishing the form". Turn Membership on under Settings › General.
- "Give the organisation a web address (slug) before publishing the form". Set the organisation's URL name on its profile.
- "Offer at least one active, public membership type that applies to an accepted applicant kind". Tick Offer on the public application form on a type that fits the applicant kinds you accept.
- "Choose at least one payment method: a membership type on this form has a fee". Tick a payment method under Payment.
- "Enter the terms applicants must accept". Type the Terms text, or turn off the tick box.
- Card payment isn't on the form. Your organisation has no default Stripe account that can take payments.
- The link says "not found". The form isn't published, or wasn't saved after publishing.
Who can do this#
Organisation owners and admins can change the application form and the fields.
Related guides
- Review membership applicationsApprove or reject applications to join, record a fee paid by bank transfer, cheque or cash, and enter an application on someone's behalf.
- Membership settingsSet the membership currency, numbering and renewal reminders, define your membership types, word the membership emails, and link members to your events.
- Connect a payment accountConnect your organisation's Stripe or PayPal account so buyers' payments go straight to you, choose the default for new events, and see what you pay EventNook.
- Organisations and rolesSee the organisations you belong to, switch between them, create one, edit its profile, manage its members and their roles, and check its plan, activity and security log.
Still stuck? In EventNook, ask HeyNook. It knows the page you're on and your event, and can take you straight to the right setting.