Create your first event
Create an event from a short form, or describe it to the event assistant and review the setup it proposes, then carry on setting it up.
Where to find it: Event admin › Create Event
There are two ways to create an event. The form asks for the essentials: a title, dates and whether it's free or paid. The event assistant reads a description or your event brief and proposes the whole setup, from tickets to the confirmation email, for you to review. Either way the event starts as a draft: nobody can see it or register until you publish it.
Before you start#
- You need to be an owner or admin of your organisation.
- If your organisation is on a trial plan, every event you create is a test event. See Publish your event and go live.
Create an event with the form#
- Click Create Event in the top bar, or Create event on My Events.
- Under Organisation, check Create in shows the right organisation. Your plan's allowance is shown below it, such as "2 of 5 live events used on your plan".
- Type the event's Title and choose its Timezone. Dates and times are always in this timezone.
- Set the Start date and Start time, then the End date and End time. Tick All-day event if it has no times. A sentence below the dates reads them back, so you can check them at a glance.
- Under Tickets, choose Free event or Paid event. For a paid event, choose the currency you'll sell tickets in.
- Optional: under Venue, type the Venue name, Address, City, Postcode and Country. Leave it empty for an online event.
- Optional: under Options, tick This is a test event to try things out first.
- Click Create event. The event opens on Event details, where you carry on setting it up.
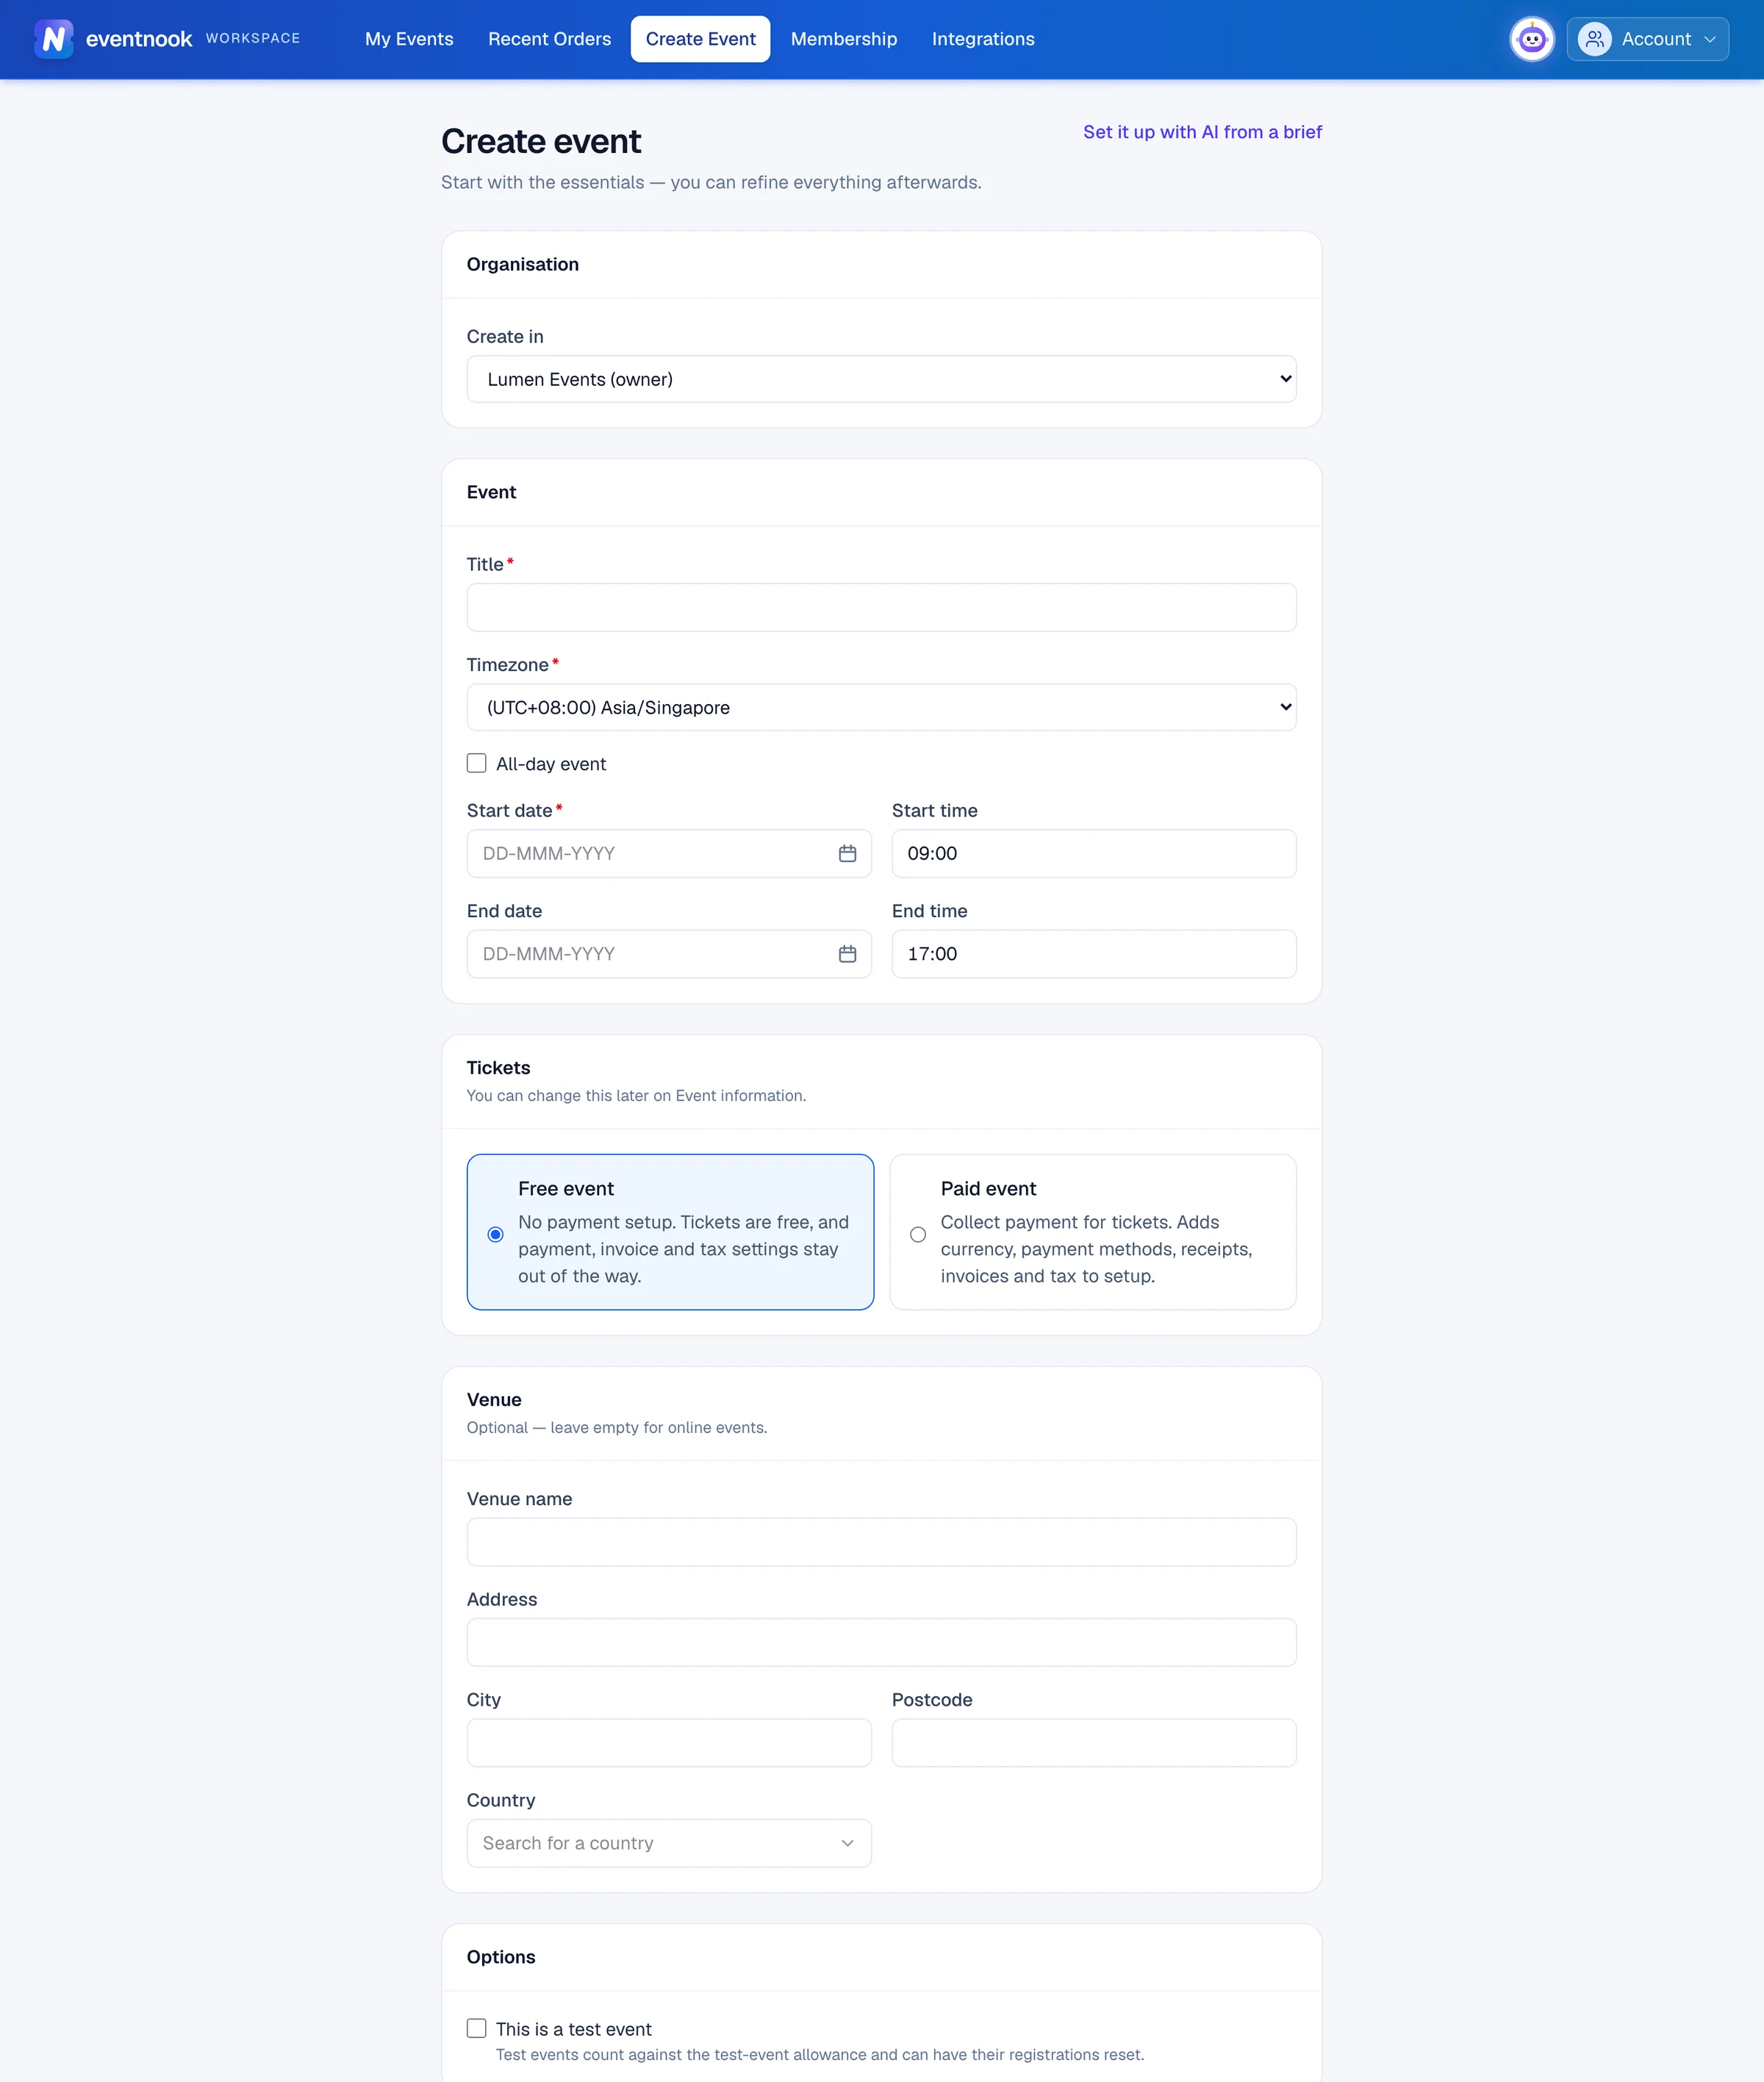
- 1The organisation the event belongs to
- 2Free or paid. You can change it later
- 3Try things out before taking real registrations
- 4Describe the event and let the assistant draft it
| Choice | What it means |
|---|---|
| Free event | Tickets are free. Currency, payment methods, invoices and tax stay out of the menu. |
| Paid event | Tickets have prices. Adds currency, payment methods, receipts, invoices and tax to the setup. You can change the currency until money has been taken. |
| This is a test event | Emails go to a sandbox, so nobody receives them, and orders are marked as test. Counts against your plan's test-event allowance. |
You can switch between free and paid later, on Event details. See Change your event's details.
Create an event with AI#
- Click Create with AI on My Events, or Set it up with AI from a brief on the Create event page.
- Describe the event in the box: what it is, when and where, who it's for, and whether it's free or paid. Or paste your event brief, or click Attach a brief to add a PDF or text file of up to 10 MB.
- Click Send. The assistant replies, and Your setup plan appears on the right: event details, tickets, registration questions, settings, the home page and the confirmation email.
- Check the plan, starting with anything under Please check and Assumed: the things the assistant wasn't sure about.
- Ask for changes in the chat, such as "add a dietary question" or "make it free", or edit the plan directly.
- Type the Organiser email on the plan. Contact details are hidden from the assistant, so it can't fill them in.
- Click Create event and wait for each step to tick. The event is created as a draft. Nothing is published or emailed.
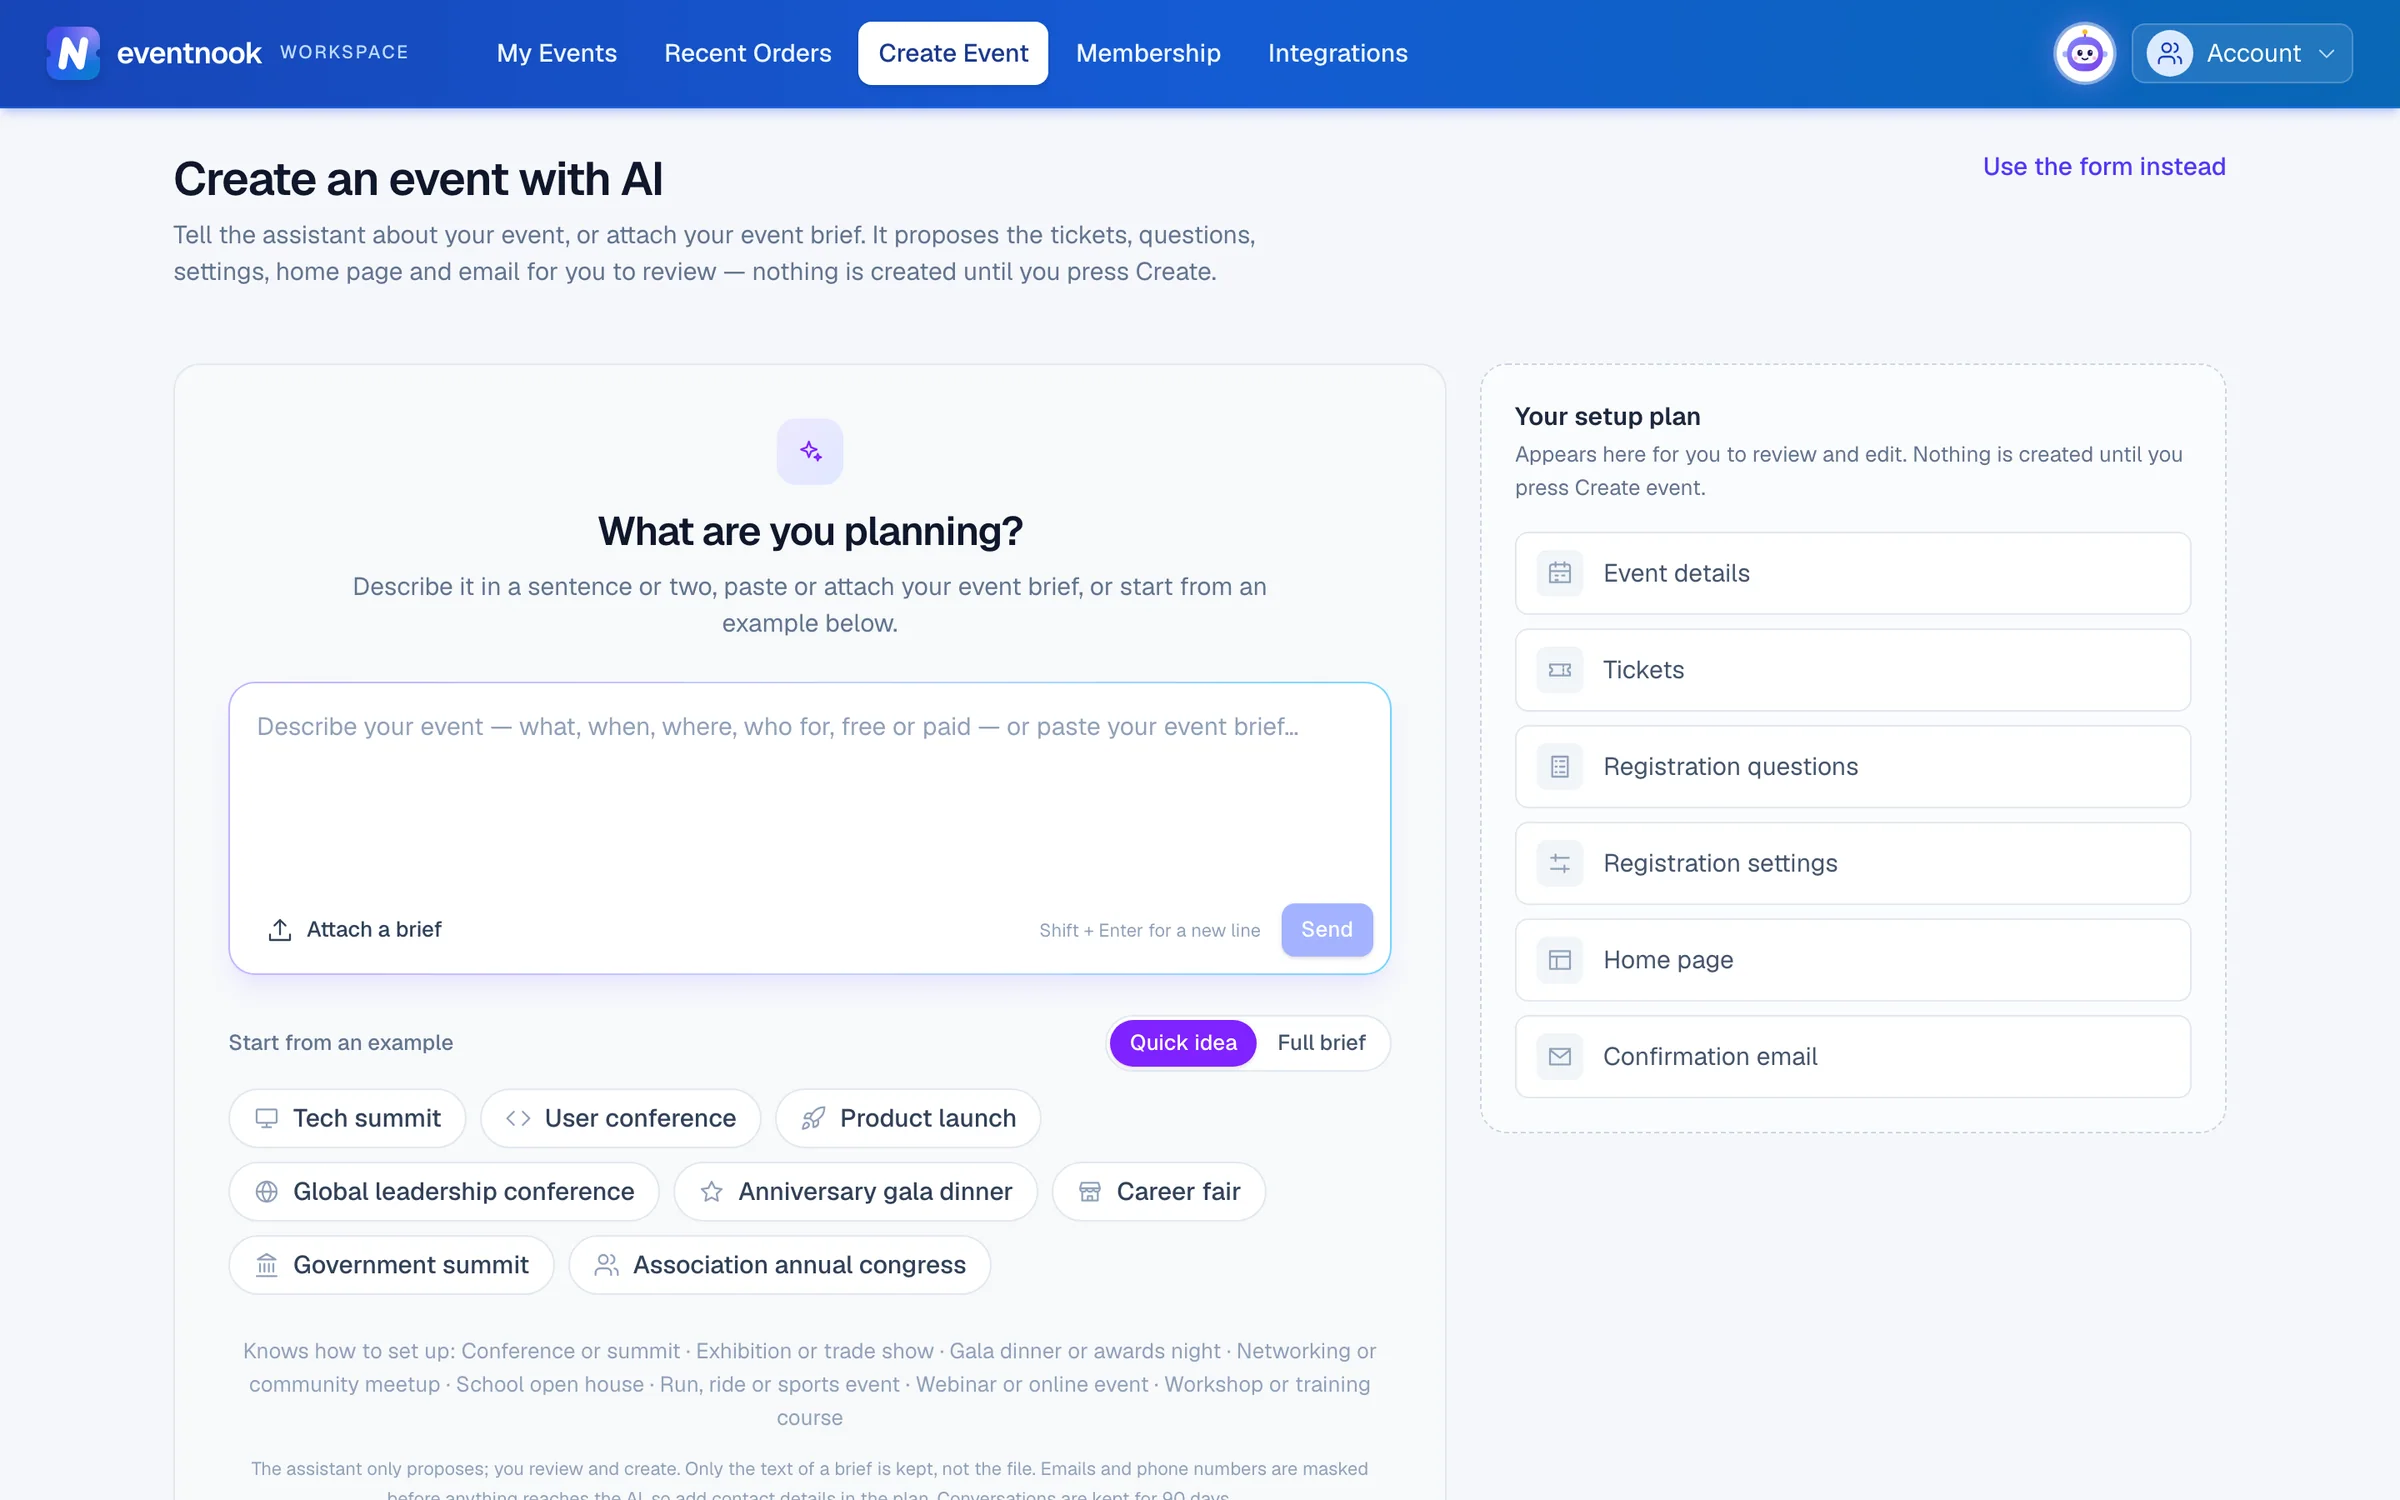
- 1Describe the event, or paste your event brief
- 2Add a PDF or text file of your brief
- 3The proposed setup appears here for you to check
No brief to hand? Pick an example under Start from an example, such as a tech summit or a gala dinner. Choose Quick idea for a sentence or two, or Full brief for a complete brief. The example fills the box, so change the names, dates and prices to yours before you send it.
When it's done, click Open the event, Review the website, or What's left to do? to ask the event's assistant what remains before you go live.
To come back to a conversation, choose it under Conversation at the top of the page.
What to set up next#
Work through Event setup › Start here in the event menu, top to bottom:
- Event details: dates, venue, organiser contact and images. See Change your event's details.
- Tickets & pricing: what people choose when they register. See Create tickets and set prices.
- Registration form: what you ask each attendee. See Build the registration form.
- Currency & payment, on a paid event: how buyers pay. See Currency and payment.
- Email templates and QR code e-ticket: what people receive. See Email templates.
Then design the pages under Website, and publish the event.
If something looks wrong#
- "You cannot create events in this organisation. Ask an owner or admin." Your role in that organisation can't create events. Choose another organisation in Create in, or ask an owner or admin.
- Create event stays greyed out. Check the end is after the start, and that a paid event has a currency.
- "The event assistant isn't available". AI features are off for your organisation, or not part of your plan. An organisation owner can turn them on; otherwise contact EventNook. You can still create the event with the form.
- "This PDF has no readable text." The PDF is a scanned image. Paste the key details into the chat instead.
- A step failed while creating the event. The reason is shown under the step. Click Retry, or Skip this step and finish that part on the event's own page.
- "Your plan allows … events and this organisation already has …" Your plan's event allowance is used up. Contact EventNook to change your plan.
Who can do this#
Organisation owners and admins can create events, with the form or with AI. Members of an organisation can't create events.
Related guides
- Publish your event and go liveFinish the pre-launch checklist, publish the event so people can see it and register, and take a test event live when you're ready for real registrations.
- Change your event's detailsEdit the event's name, dates, registration window, venue, organiser details and images, and switch it between a free and a paid event.
- Create tickets and set pricesAdd the tickets people choose when they register, set their prices and limits, and stop selling one when you need to.
- Build the registration formChoose the questions attendees and buyers answer when they register, set each one up, ask some only for certain tickets, and publish the form.
Still stuck? In EventNook, ask HeyNook. It knows the page you're on and your event, and can take you straight to the right setting.