Publish your event and go live
Finish the pre-launch checklist, publish the event so people can see it and register, and take a test event live when you're ready for real registrations.
Where to find it: Event admin › Event setup › At a glance › Dashboard
Two switches decide what the public sees. Publishing puts the event site online, so people can find the event and, while registration is open, register. Going live applies to a test event: it ends testing, so emails reach real inboxes and orders count as real. A new event is a draft until you publish it, and if it was created as a test event it stays one until you go live.
| The event is… | What it means |
|---|---|
| Draft | Only your team can see it. Preview in the top bar opens the draft site in a new tab. Nobody can register. |
| Published | The site is online. People can register while registration is open. The top bar shows Registration open, Not open yet or Registration closed. |
| Test event | Emails go to a sandbox, so nobody receives them, and their subjects start with [Test Event]. Orders are marked as test. |
| Live event | Emails reach people's inboxes, and orders count in reports and totals. |
Finish the pre-launch checklist#
While the event is a draft, its Dashboard shows the Pre-launch checklist. The same checklist is on Event details.
- Open the event. The dashboard shows how many required steps are left.
- Under Required before publishing, click the button on each item, such as Set up tickets or Review payments, and fix what it says.
- Back on the dashboard, click Refresh checks. Each item you fixed moves to Completed.
- Optional: work through Recommended improvements, such as the confirmation email or the e-ticket. Click Skip for now on any you don't need. Skipped items wait under Skipped, where you can restore them.
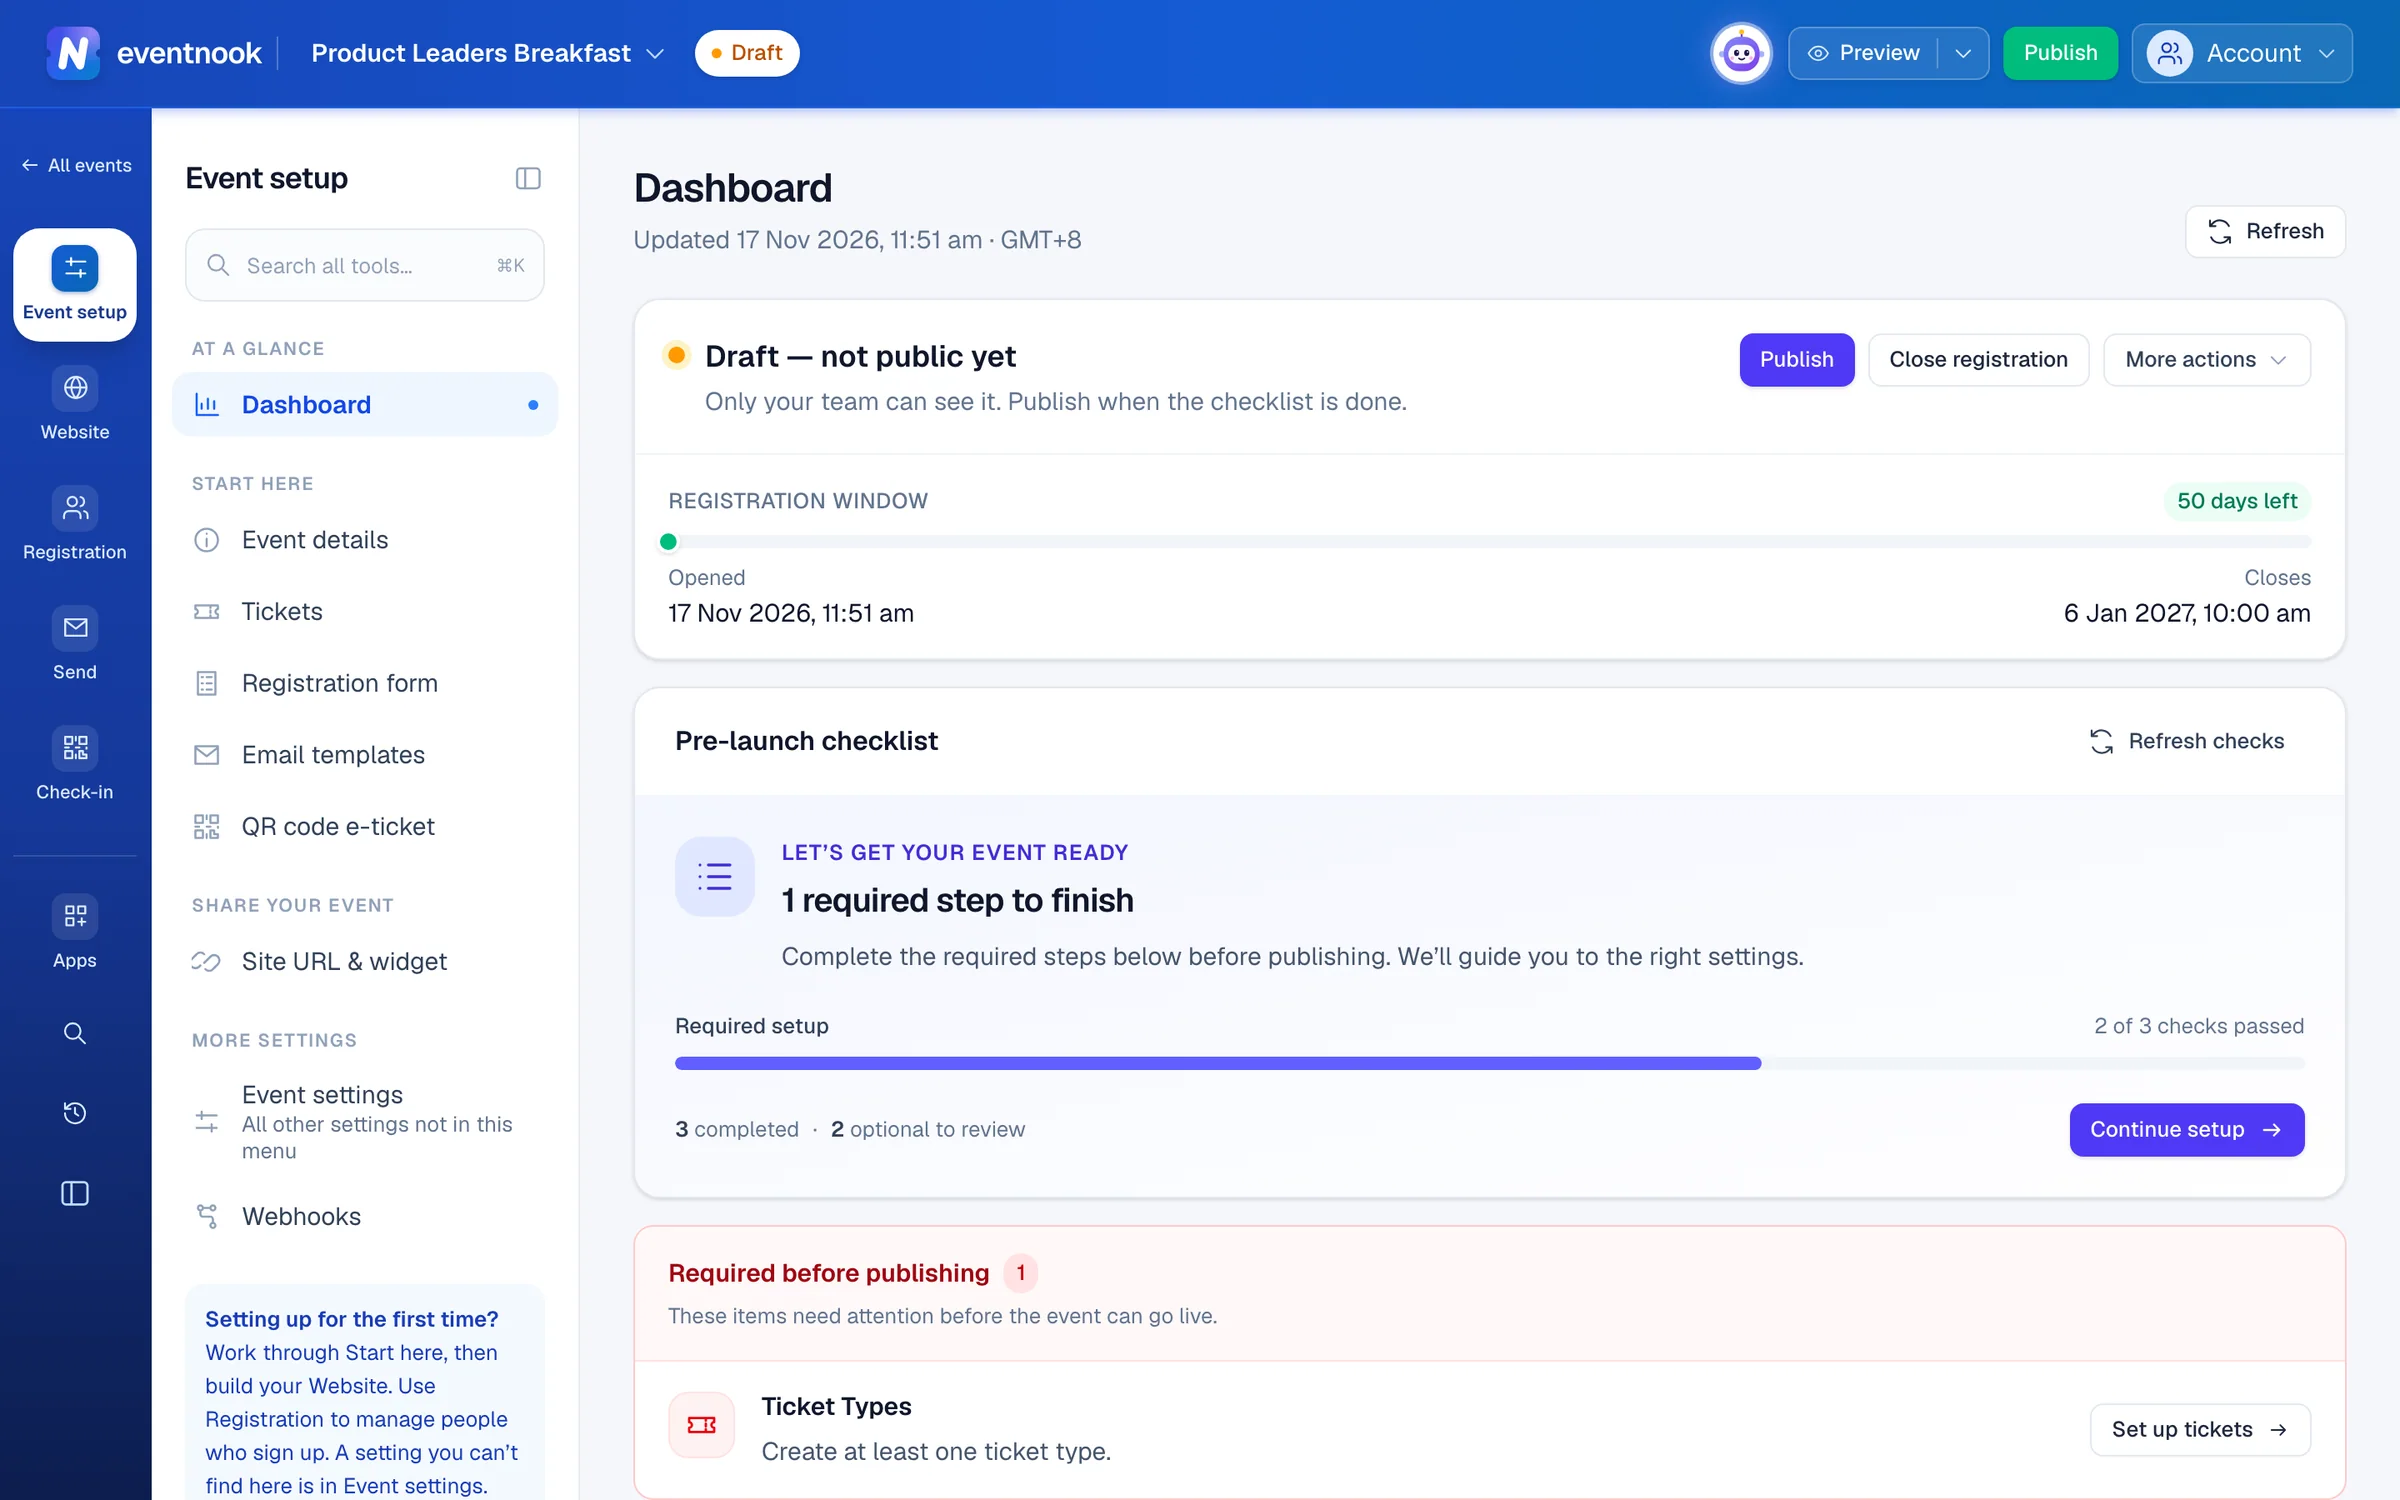
- 1How many of the required checks have passed
- 2Check again after you've changed something
- 3Publish once every required check passes
| Required before publishing | What it checks |
|---|---|
| Event Information | The event has a title, a start, a timezone, and an end after its start. |
| Ticket Types | At least one ticket type exists. |
| Currency & Payment | With paid tickets: a currency and at least one working payment method. Not needed when every ticket is free. |
| Registration Setting | The registration settings exist, and registration doesn't close before it opens. |
Publish the event#
- Click Publish in the top bar. It's there while the event is a draft.
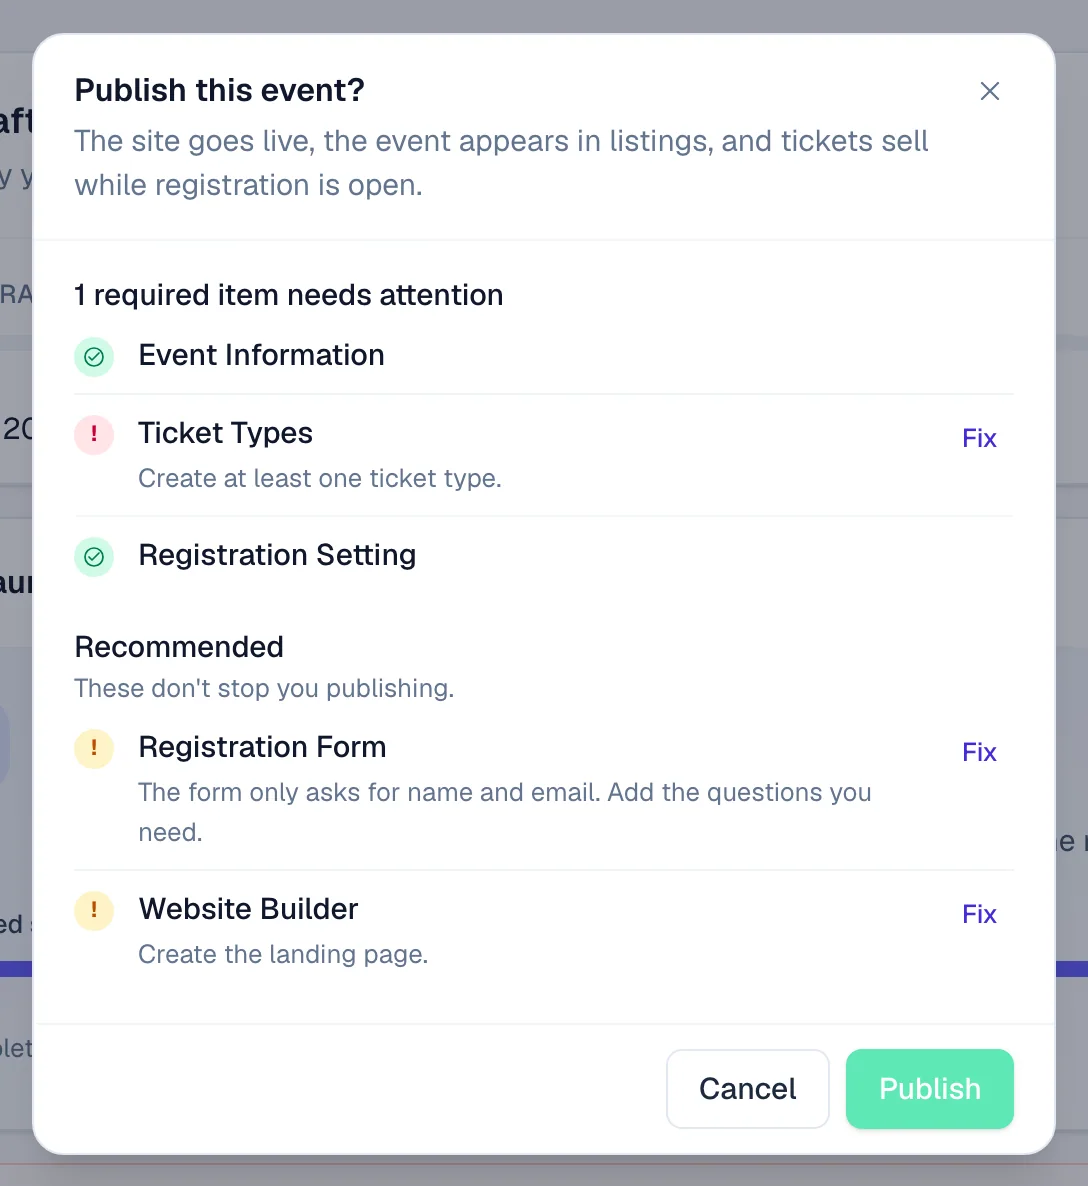
- Read the checks in the dialog. If an item needs attention, click it to go and fix it.
- Click Publish. EventNook checks the list once more, then the dialog says Your event is live and shows the event site's address.
- Click View site to open it, or copy the address to share it. Manage the address & domain takes you to the event's link settings.
If the dialog says Registration isn't open yet, people can see the site but can't register. Click Open registration there, or later from the menu beside View site in the top bar.
Once published, share the event: see Share your event and Site URL and widget.
Take a test event live#
A test event lets you try registering yourself, see the emails and check the reports, without anything being real. When you're ready, go live.
- Click Go live: on the Test event tag in the top bar, on the This is a test event card on the dashboard, or on Test or live on Event details.
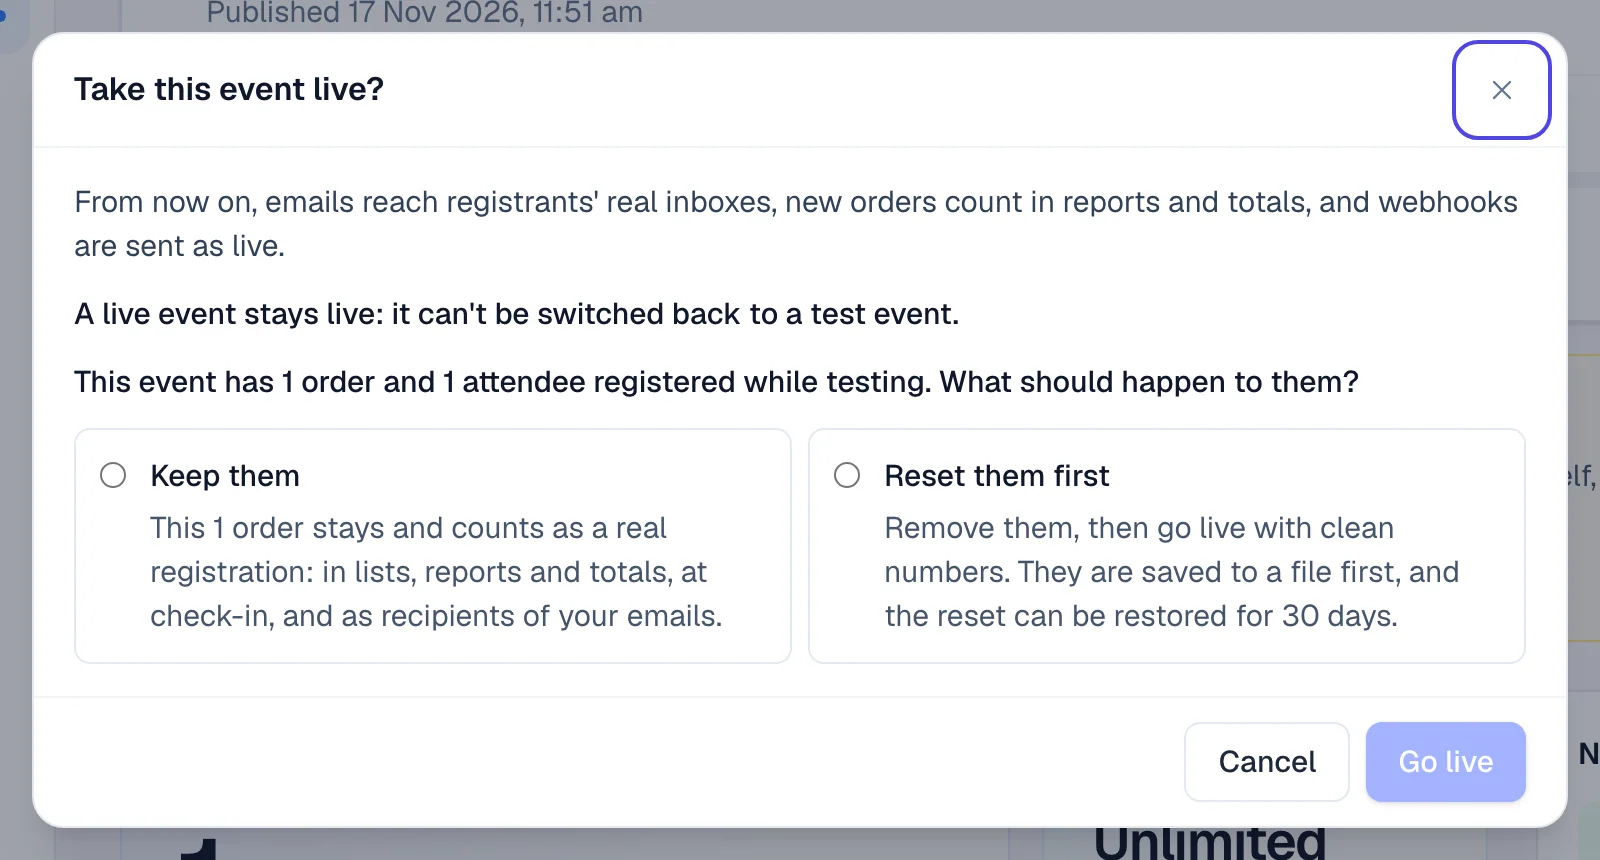
If the event already has orders made while testing, choose what happens to them:
- Keep them: they stay and count as real registrations, in lists, reports and totals, at check-in and as recipients of your emails.
- Reset them first: they're removed, so you go live with clean numbers. They're saved to a file first, and the reset can be restored for 30 days. You confirm it the same way as on Reset registration data.
- Click Go live, Keep them and go live or Reset and go live. The dialog says This event is live.
What changes once the event is live#
- Emails reach registrants' real inboxes.
- New orders count in reports and totals.
- Payments go through the payment accounts the event uses. A payment taken through a test or sandbox payment account moves no real money, even though its order shows as paid.
- Webhooks, if you use them, are sent as live.
To stop sales for a while, click Close registration in the menu beside View site. To take the site offline, use Deactivate in the same menu. See Move an event to the Archive or reset it.
If something looks wrong#
- The Publish button is greyed out in the dialog. A required item still fails. Fix it, then publish again.
- "Your organisation is on a trial or lapsed plan, which runs test events only. Upgrade the plan to go live." Contact EventNook to change your plan. Until then, the event can be published as a test event.
- "Your plan allows … live events and this organisation already has …" Your plan's live-event allowance is used up. Contact EventNook.
- There's no Go live button. The event is already live, or your role can't publish. Ask the event's admin or an organisation owner.
- "Reset them first" can't be chosen. Only the organisation's owner or an admin can reset registration data. Choose Keep them, or ask one of them.
- "A reset of this event's registration data did not finish." Click Retry in the dialog, then go live.
- People see the site but can't register. Registration isn't open. Open it, or check the ticket sales dates on Tickets & pricing.
Who can do this#
Publishing, going live, and opening or closing registration need the Event Admin role on the event, or the organisation's owner or admin role.
Related guides
- Create your first eventCreate an event from a short form, or describe it to the event assistant and review the setup it proposes, then carry on setting it up.
- Change your event's detailsEdit the event's name, dates, registration window, venue, organiser details and images, and switch it between a free and a paid event.
- Archive, reset or delete an eventMove an event you've finished with to the Archive, clear the registrations made while testing, or delete an event you no longer need.
- Share your eventChoose the right link for each place you promote your event, print its QR code, put registration on your website and point registrants to their own pages.
- Share your event's links and embed the registration widgetChange the event's web address, copy its links and QR codes, put the registration widget on your own website, and make private, pre-filled and custom-domain links.
Still stuck? In EventNook, ask HeyNook. It knows the page you're on and your event, and can take you straight to the right setting.