Change your event's details
Edit the event's name, dates, registration window, venue, organiser details and images, and switch it between a free and a paid event.
Where to find it: Event admin › Event setup › Start here › Event details
Event details is the event's own record: its name, when it happens, when registration opens and closes, where it is, who runs it, and its cover image and logo. Every date and time on the page is in the event's time zone.
The description and page content attendees read are not here. You edit those in the website builder.
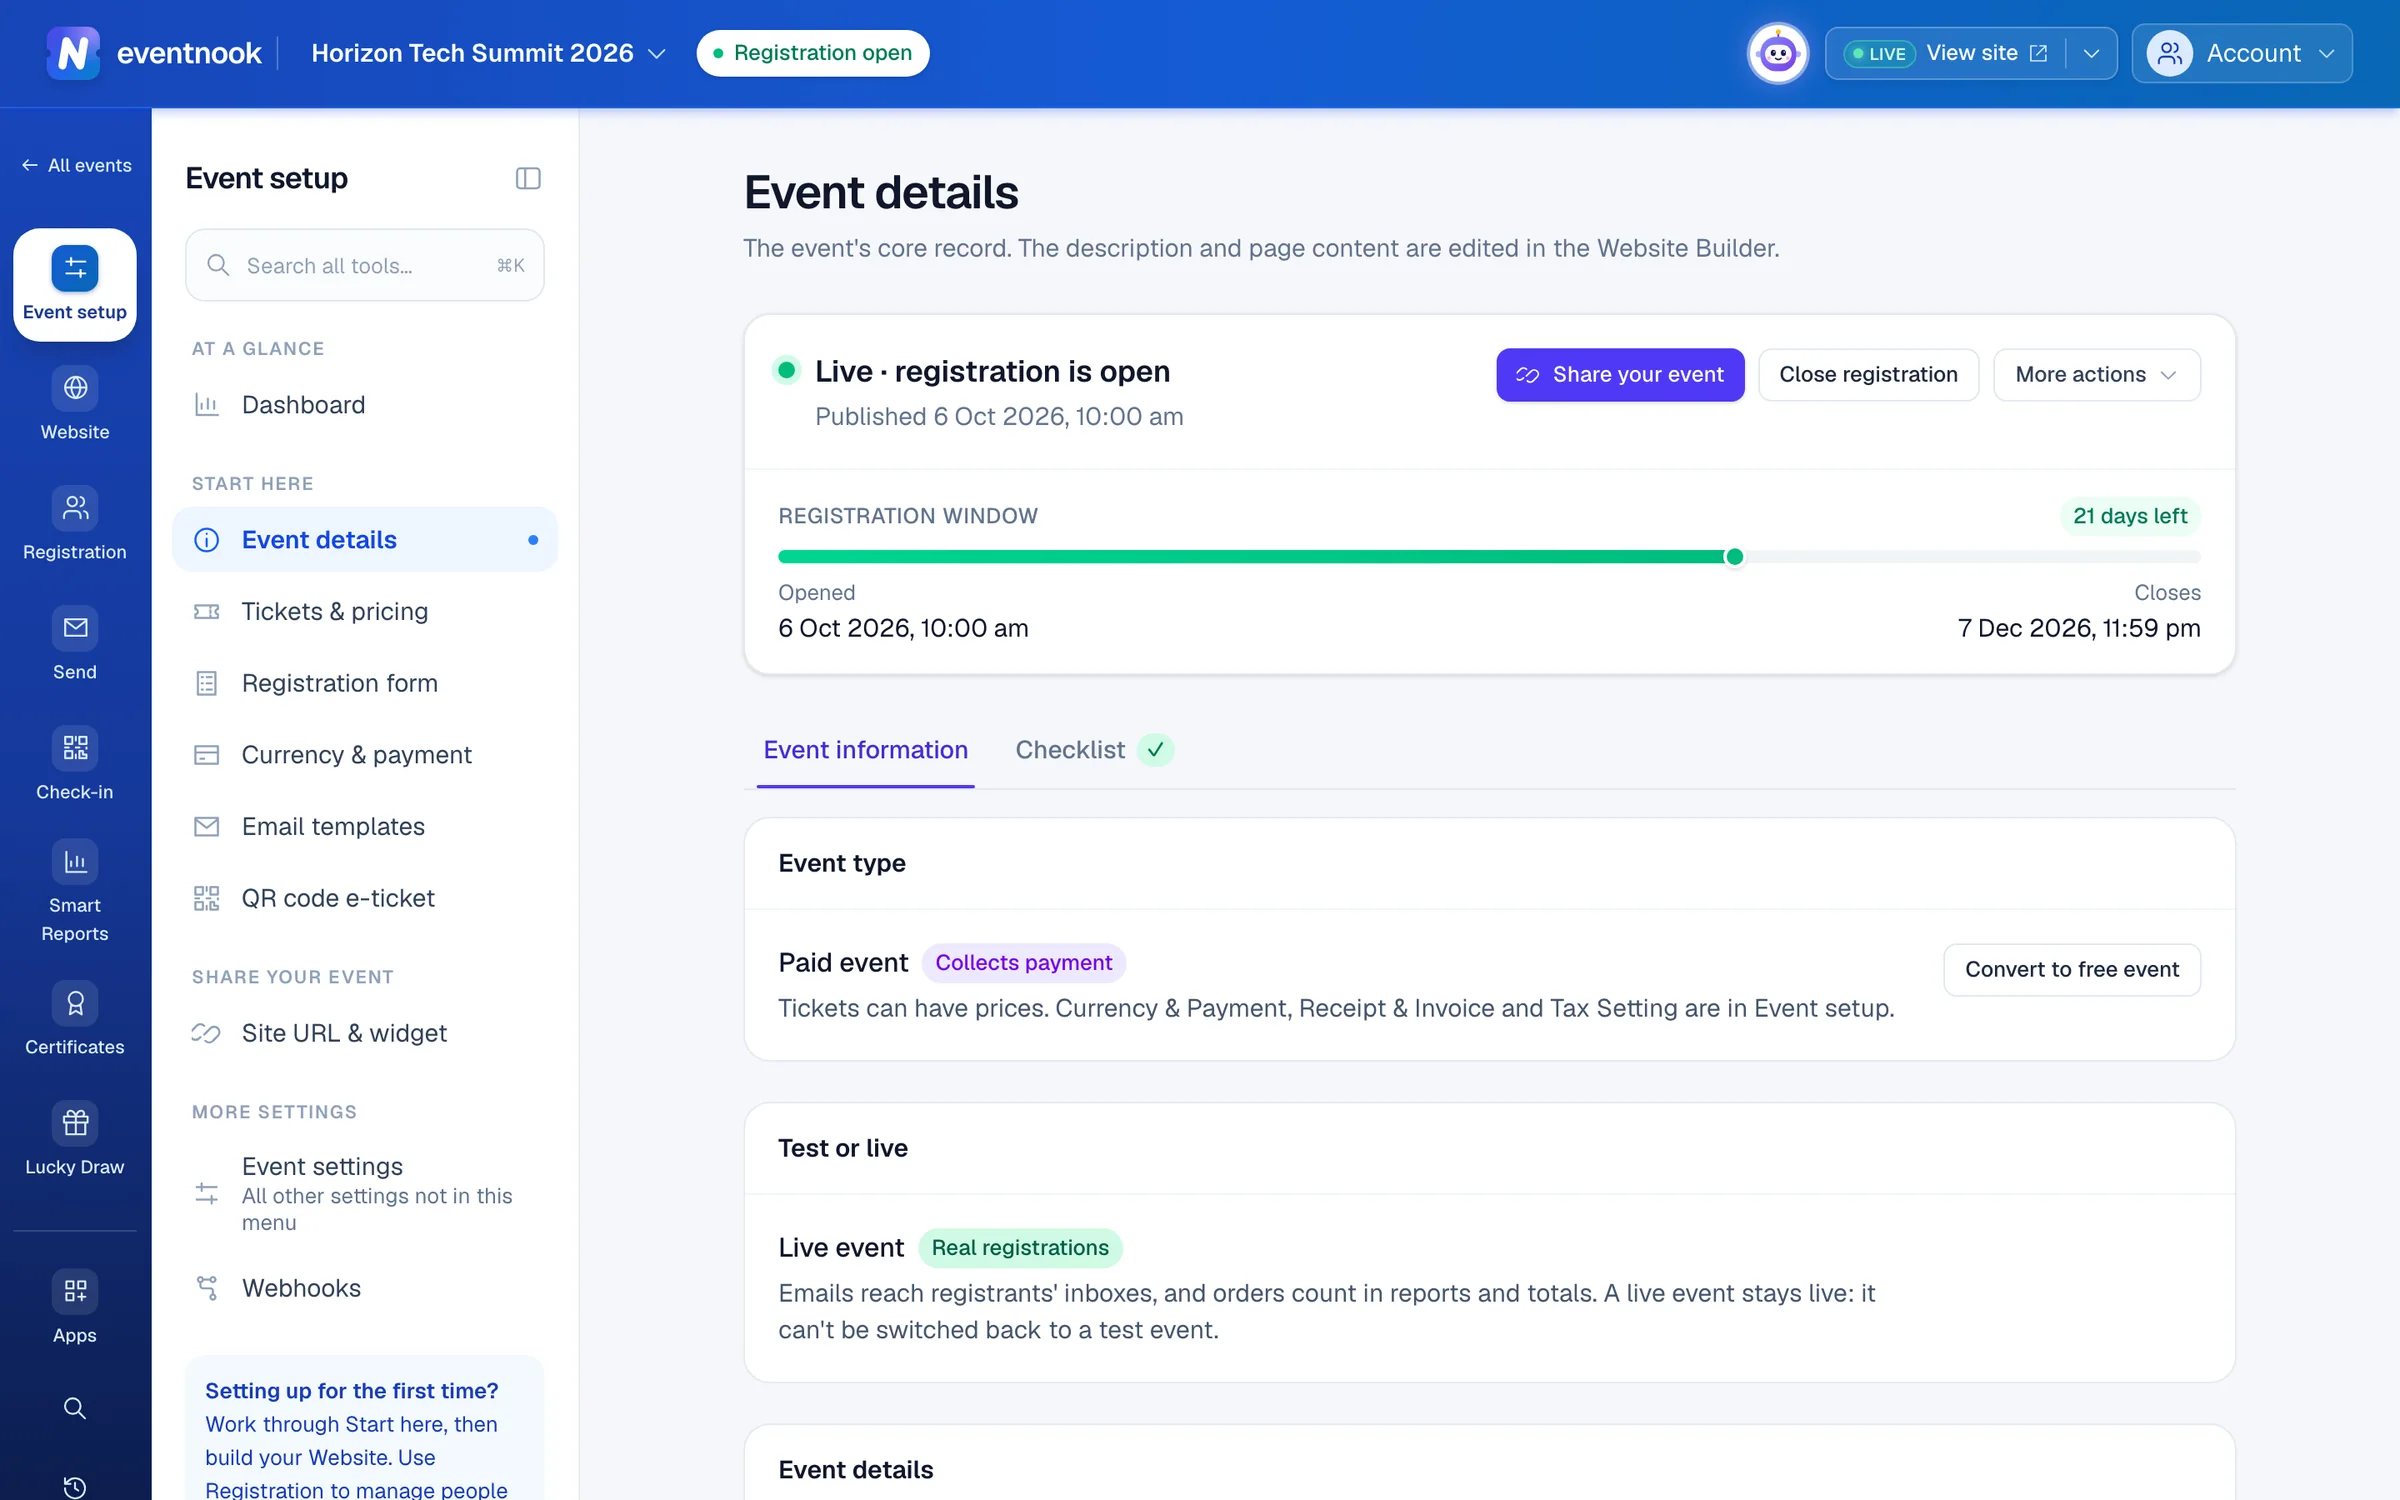
- 1The event's links and QR codes, once it is published
- 2Stop new registrations straight away
- 3Deactivate the site, move the event to the Archive or delete it
- 4Switch between a paid and a free event
Change the name, dates or venue#
- Open Event details.
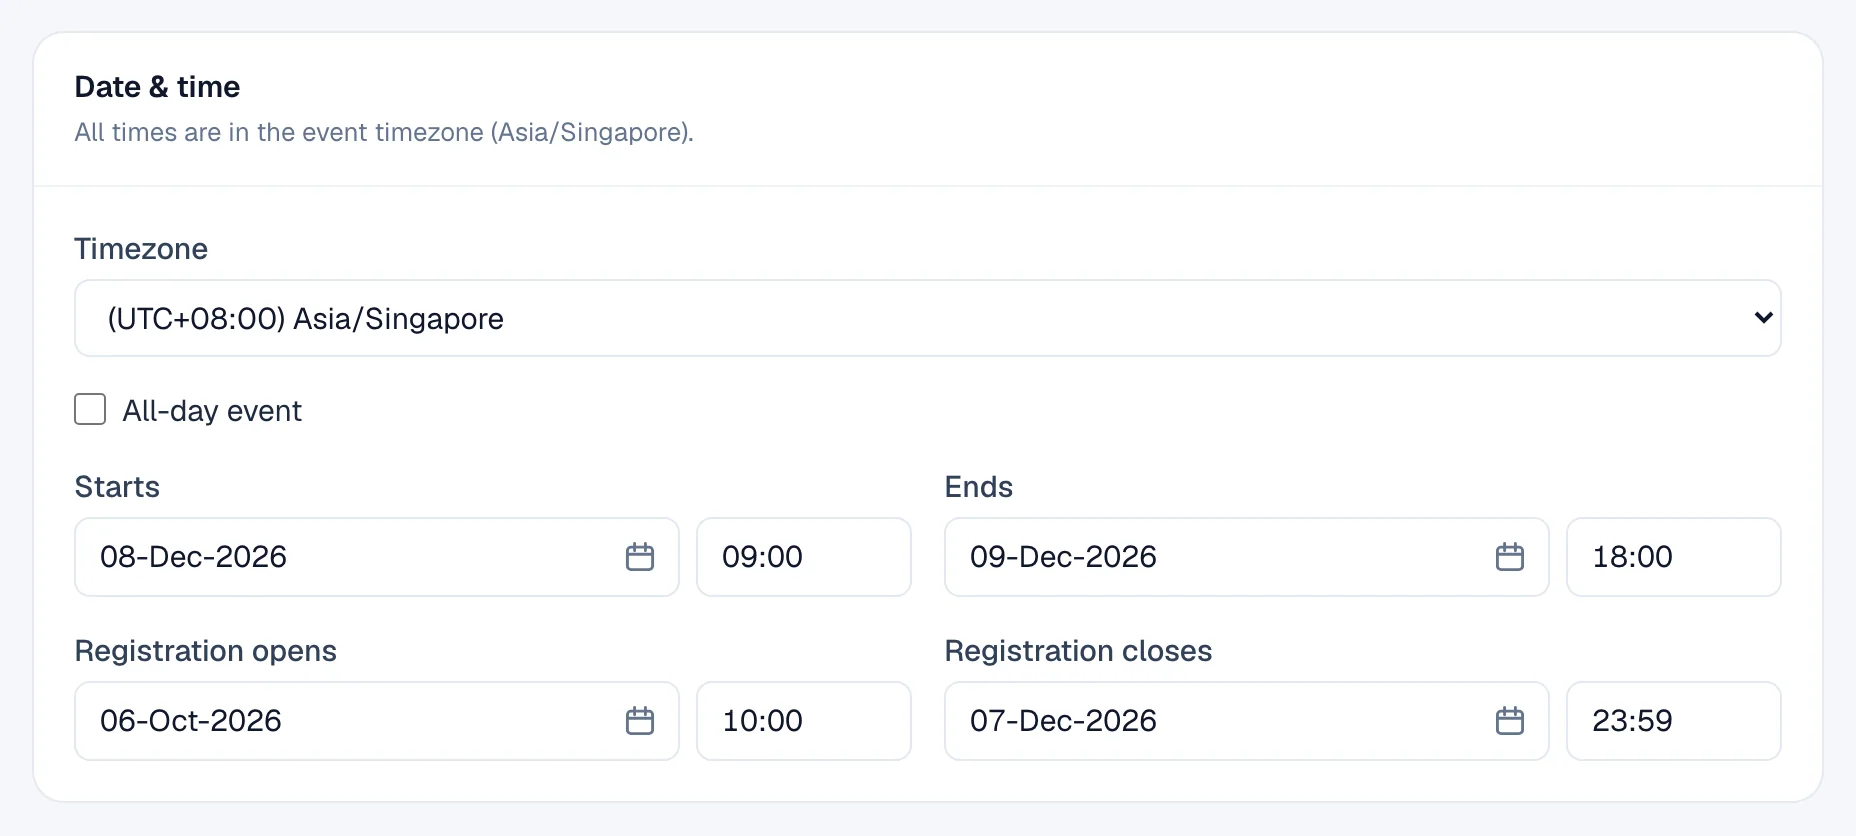
- Change what you need in Event details, Date & time, Venue or Organiser & links.
- Click Save changes at the bottom of the page. Everything on the form saves together.
| Setting | What it does |
|---|---|
| Title | The event's name, up to 150 characters. |
| Event type | Registration, Booking (date & session) or Check-in only. |
| Category and Tagline | Describe the event. The tagline is a short line, up to 200 characters. |
| Calendar description | The notes of the entry Add to calendar makes, and of the calendar invites in emails. The event link is added below it. Left empty, entries carry the event's name and link. |
| All-day event | Keeps only the dates, no times. |
| Starts and Ends | When the event happens. It can't end before it starts. |
| Registration opens and Registration closes | When people can register. Leave Registration opens empty to take registrations as soon as the event is published, and Registration closes empty for no end date. |
| Venue | Venue name, address, Country, and optionally Latitude and Longitude. |
| Organiser & links | Organiser name, Organiser email, Contact number, Website and the event's Facebook links. |
Change the time zone#
- In Date & time, choose a new Timezone.
- Click Save changes. A dialog lists every time that will move.
- Click Change timezone and save.
Each time keeps its clock time in the new zone: an event starting at 9:00 am still starts at 9:00 am, now in the new zone. Emails and reminders already sent are not touched.
Open or close registration now#
The status card at the top says where the event stands, such as Live · registration is open, and shows the registration window with the time left.
- To stop new registrations at once, click Close registration and confirm. Existing orders are not affected.
- To start taking registrations, click Open registration. Optional: set Close registration at. If registration already closed on its end date, you must choose a new close time.
Opening registration on a draft or deactivated event doesn't make it sell: it still has to be published. To publish an event, see Take your event live.
More actions holds Deactivate, Move to Archive and Delete. See Archive an event or reset its registrations.
Switch between a free and a paid event#
A free event takes no money: its tickets have no price, and Currency & payment, Receipt & invoice, Tax settings and Discount codes are not in its menu. A paid event can put prices on tickets.
To start charging:
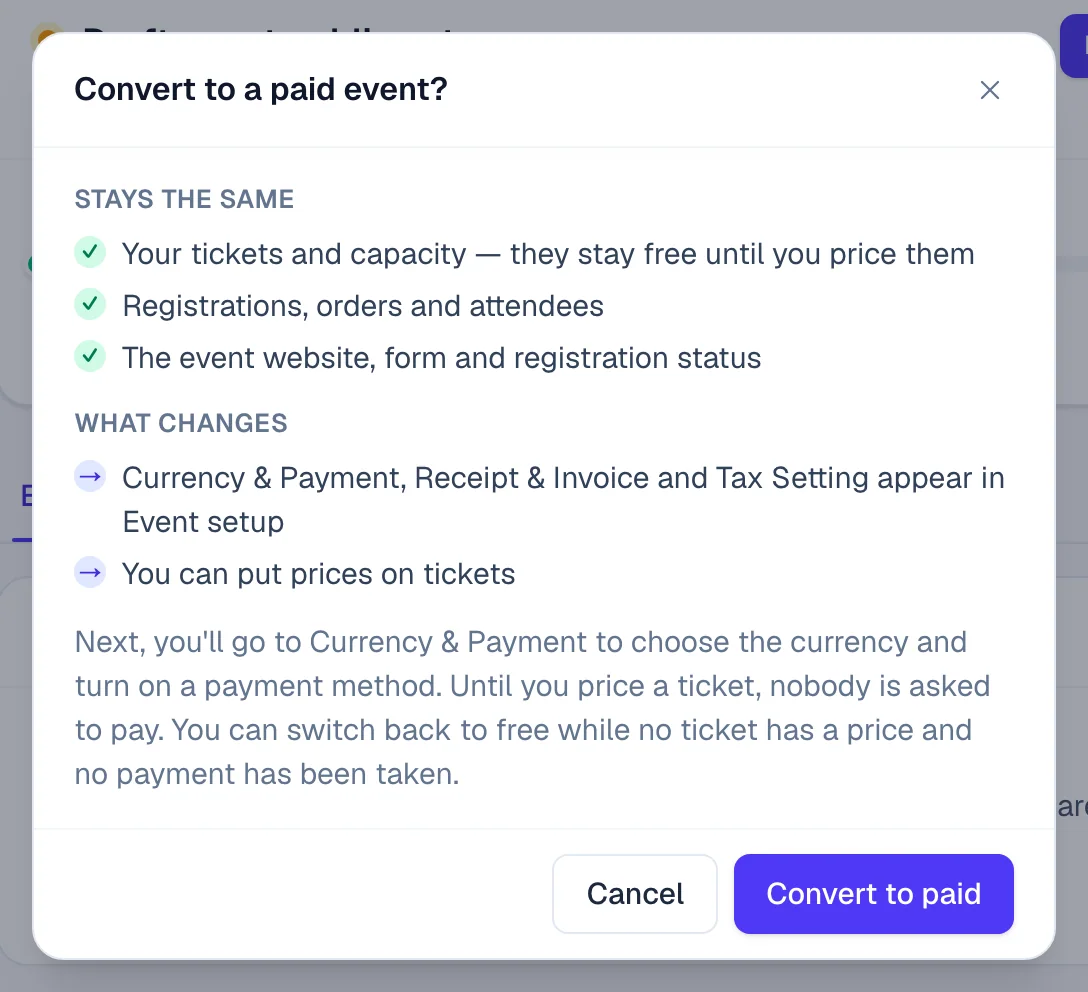
- Under Event type, click Convert to paid event.
- Read what stays the same and what changes, then click Convert to paid.
- You go to Currency & payment. Choose the currency and turn on a way to pay. See Set the currency and how buyers pay.
Your tickets, orders and website stay as they are. Tickets stay free until you give them a price, so nobody is asked to pay until then.
To make a paid event free, click Convert to free event and then Convert to free. This works only while no ticket has a price or takes donations, pricing is back to basic, and no payment has been taken. If something is still in the way, the dialog lists it under This event can't be free yet.
Add a cover image and logo#
- Under Images, click Upload for the Cover image or the Logo. Use a JPEG, PNG, WebP or GIF up to 10 MB.
- To change one, click Replace. To take it off, click Remove.
The cover image appears at the top of the event site. The logo appears in the site header and in emails. Images save as soon as you upload them.
Test or live#
Test or live says whether the event is a test. A Test event sends its emails to a sandbox, so nobody receives them, and marks its orders as test. Click Go live to take real registrations; see Take your event live. A live event stays live: there is no switch back to test.
If something looks wrong#
- "Registration must close after it opens." The close time is before the open time. Change one of them and save again.
- "The event cannot end before it starts." Check Starts and Ends, including the times.
- The fields are greyed out and there is no Save changes. You can view the event but not change it. Ask an Event Admin or Event Editor.
- There is no Convert button under Event type. Switching between free and paid needs payment access as well. Ask an Event Admin, or the organisation's Owner or Admin.
- Someone else saved while you were editing. The page says the record changed since you loaded it. Reload the page and make your change again.
Who can do this#
Everyone with access to the event can see this page. Event Admin and Event Editor can change the details and images. Switching between free and paid, and opening or closing registration, need an Event Admin, or the organisation's Owner or Admin. Who can archive or delete an event is in Archive an event or reset its registrations.
Related guides
- Set the currency and how buyers payChoose the event's currency, turn on card, PayPal, bank transfer and other payment methods, and confirm, refund and export payments.
- Share your event's links and embed the registration widgetChange the event's web address, copy its links and QR codes, put the registration widget on your own website, and make private, pre-filled and custom-domain links.
- Archive, reset or delete an eventMove an event you've finished with to the Archive, clear the registrations made while testing, or delete an event you no longer need.
- Build your event's landing pageDesign the home page of your event site by typing on the page or describing it to AI, add sections such as the agenda and speakers, and publish it.
Still stuck? In EventNook, ask HeyNook. It knows the page you're on and your event, and can take you straight to the right setting.