Send a welcome email on check-in
Switch on the email each guest gets as they are checked in, write and design it with or without AI, and send yourself a test.
Where to find it: Onsite › Check-in › Rules & automation › Welcome Email
The welcome email greets each guest by email as they are checked in to the event. It is sent once per guest, whichever door, kiosk or manual check-in admits them. It is off until you switch it on.
Open Check-in › Rules & automation › Welcome Email in Onsite. The email opens in the email editor, titled Welcome on check-in, with Not sending or Sending beside the title.
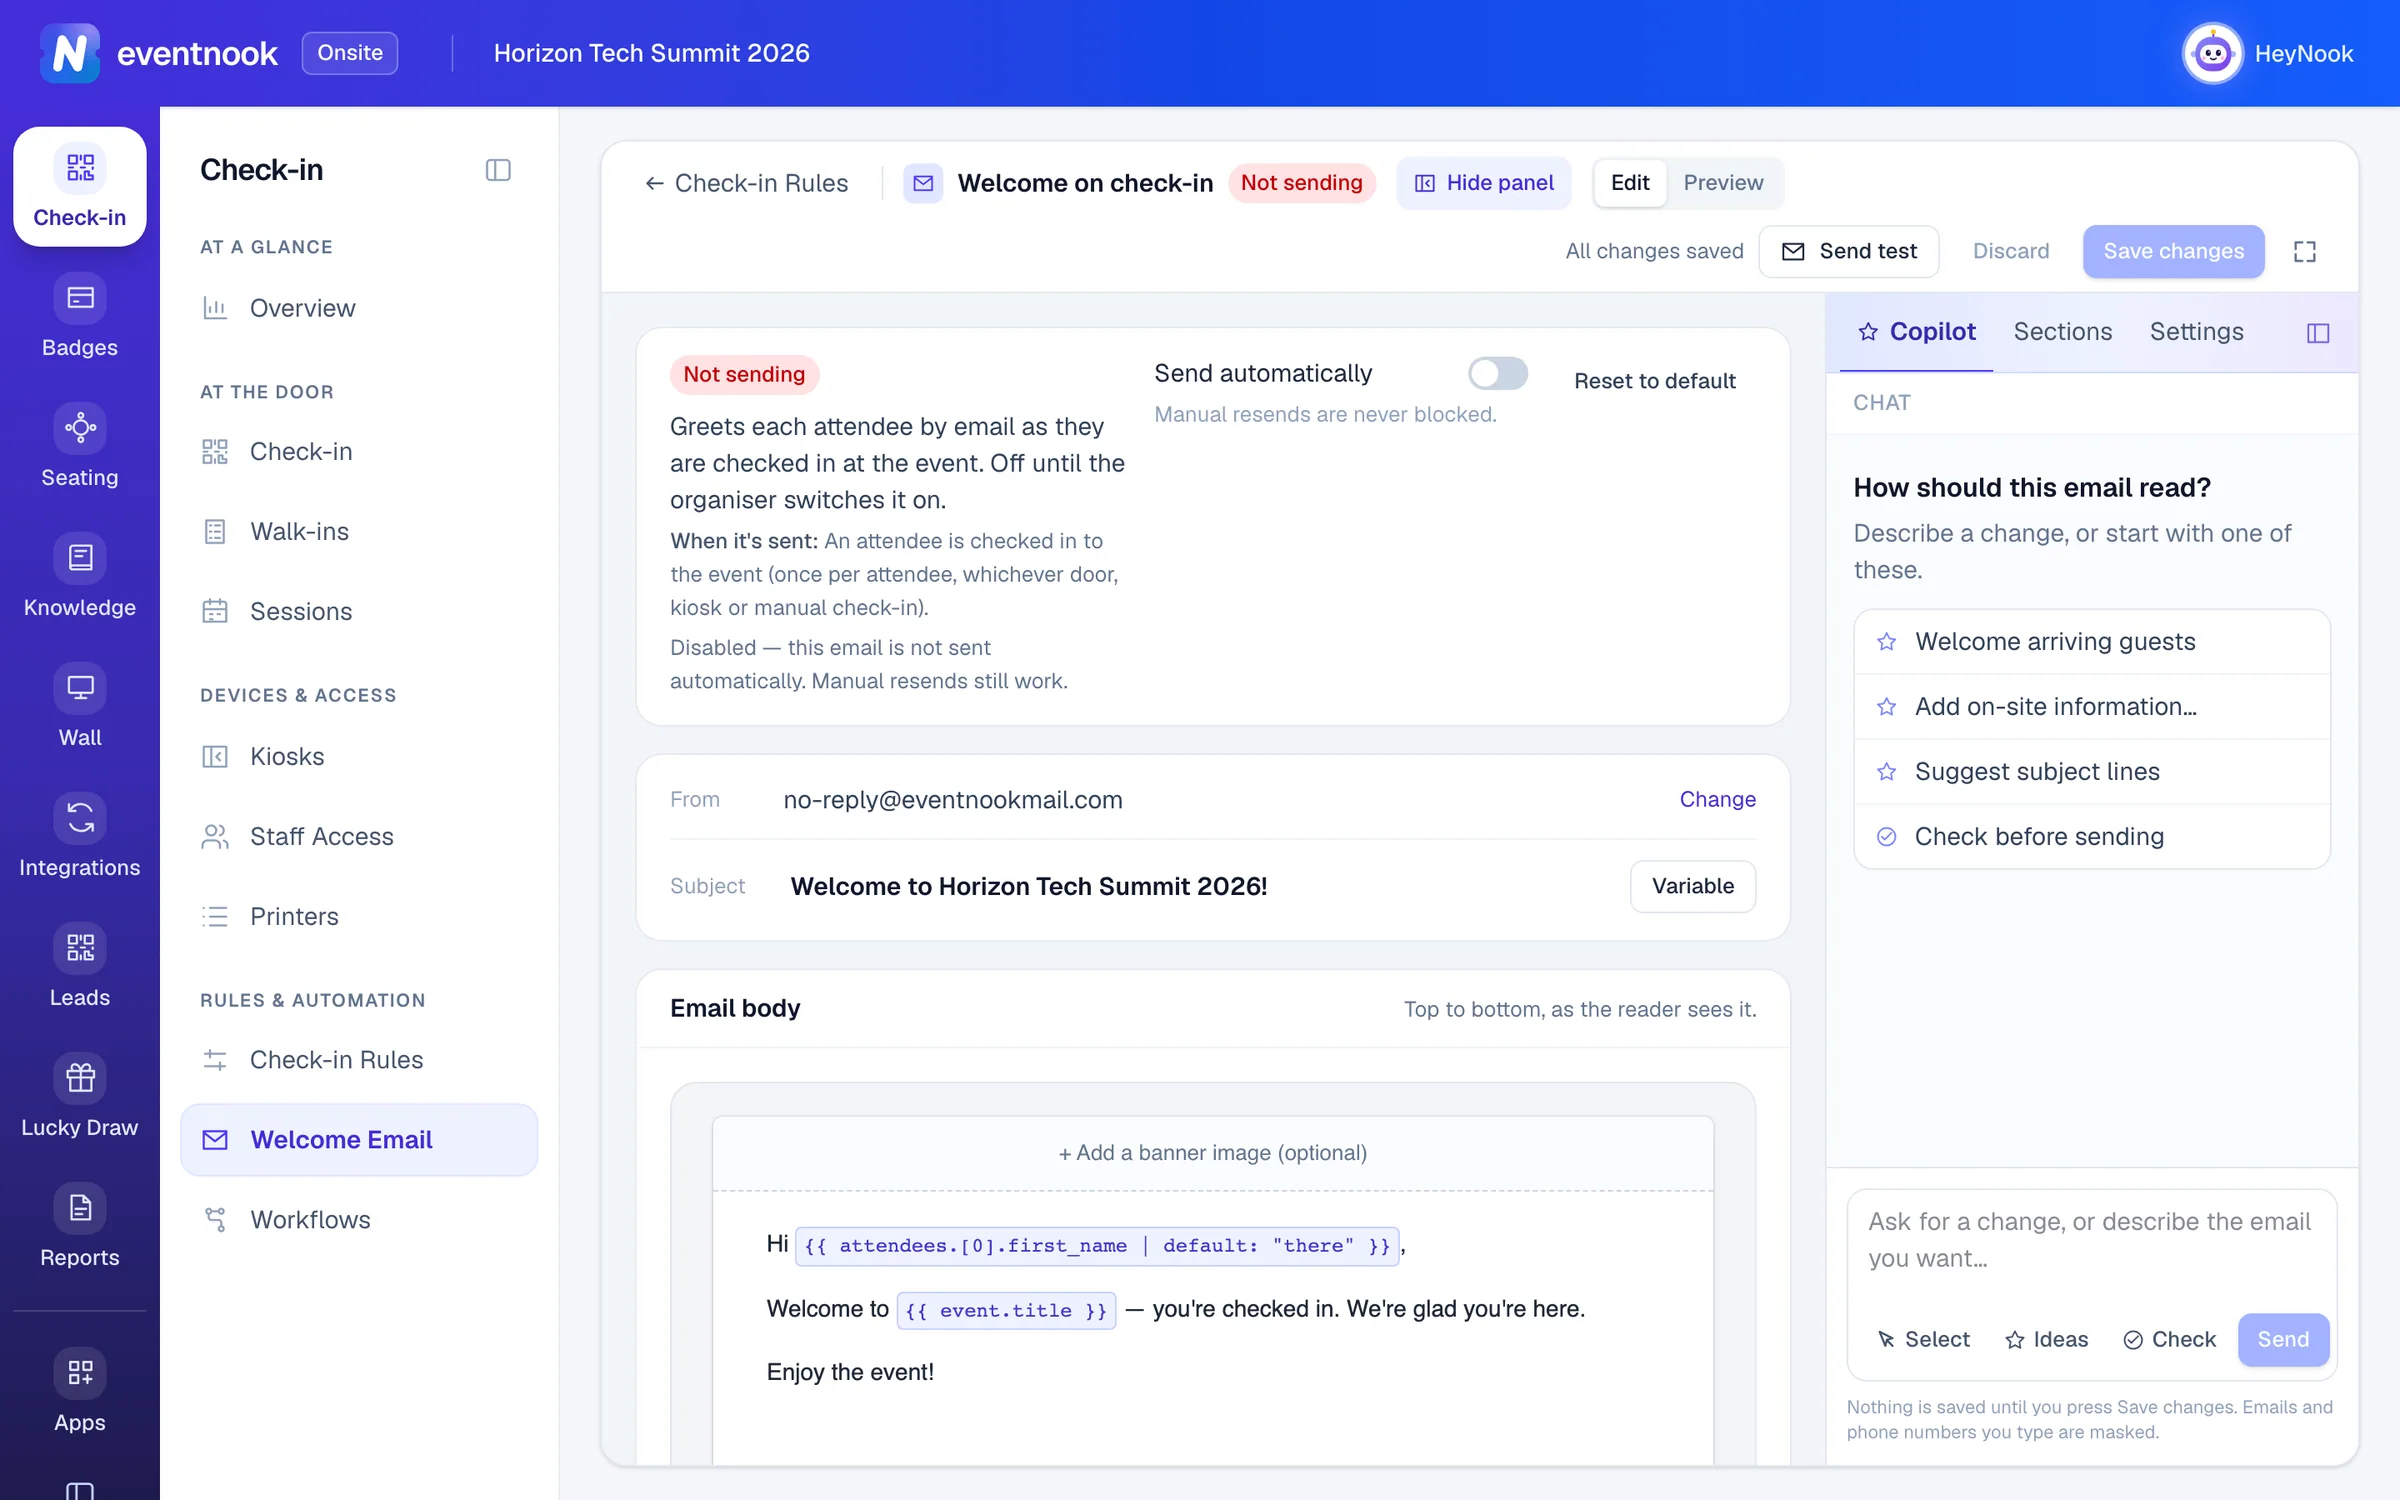
- 1Switch the welcome email on or off
- 2Ask AI to write or change the email
- 3See the email as guests get it
- 4Send yourself a test with sample data
- 5Save the email and whether it is sent
Switch it on#
- Open Welcome Email.
- Turn on Send automatically. The badge changes to Sending.
- Click Save changes (or press
⌘ S/Ctrl S).
From then on, each guest checked in to the event gets it at their own email address. To stop it, turn Send automatically off and save.
Write the email#
The email starts with the subject "Welcome to" and your event's name, and a short message telling guests they're checked in. Change it to say what guests need on arrival, such as where to go first or the Wi-Fi details.
- Click the Subject to change it. Variable inserts details such as the event's name.
- Click the message to edit it in place.
- Optional: in the side panel, open Sections to add, remove or reorder parts of the email, and Settings to change the sender and other options.
- Click Save changes. Discard throws away what you haven't saved.
The email starts with the message, About the event and the Powered-by footer. The message always comes first. You can add Ticket information, QR code only, Attendee details and Document links.
Write it with AI#
Open Copilot in the side panel and describe the change you want, or start from a suggestion such as Welcome arriving guests or Add on-site information. The copilot changes the draft; nothing is sent or saved until you click Save changes.
Check it before guests get it#
- Switch from Edit to Preview at the top to see the email as guests get it.
- Click Send test, type an address and send. The test uses sample data and includes your unsaved changes.
Reset to default puts back the platform's default subject, message, sections and design.
Where else it appears#
The welcome email is one of the event's emails. You can also edit it in Event admin with the other emails: see Email templates. To go back to the other Onsite rules, click Check-in Rules at the top left of the editor.
If something looks wrong#
- The editor shows "View only". Your role can see the event's emails but not change them. Ask the event's owner.
- A guest didn't get the welcome email. Check that the badge says Sending, that the guest has an email address, and that they were checked in to the event, not only to a session. A guest who was checked in before you switched it on doesn't get it.
- "Someone else saved this email while you were editing." Click the button in the notice to reload the latest version. Your unsaved changes are lost, so copy any text you want to keep first.
Who can do this#
Everyone who can see the event's settings can open the welcome email. Owners, Admins, Event Admins and Event Editors can change it and switch it on. A Custom role can if its grid lets it edit settings.
Related guides
- Set the check-in rulesDecide which tickets get in at the event check-in, whether pending registrations are admitted, badges and photos at the door, how long staff may undo, and what staff devices hold.
- Check in attendeesScan tickets or find guests by name on the Check-in screen, read the verdict, undo a mistake, and keep checking in when the venue Wi-Fi drops.
Still stuck? In EventNook, ask HeyNook. It knows the page you're on and your event, and can take you straight to the right setting.