Get started with Onsite
Open Onsite for your event, find your way around its menu, and see how the doors are doing on the Overview.
Where to find it: Onsite › Check-in › At a glance › Overview
Onsite is EventNook's app for the event day. You check people in, print badges, run kiosks and sessions, and watch arrivals as they happen. It uses your EventNook account and the event you built in Event admin, so there is nothing to import.
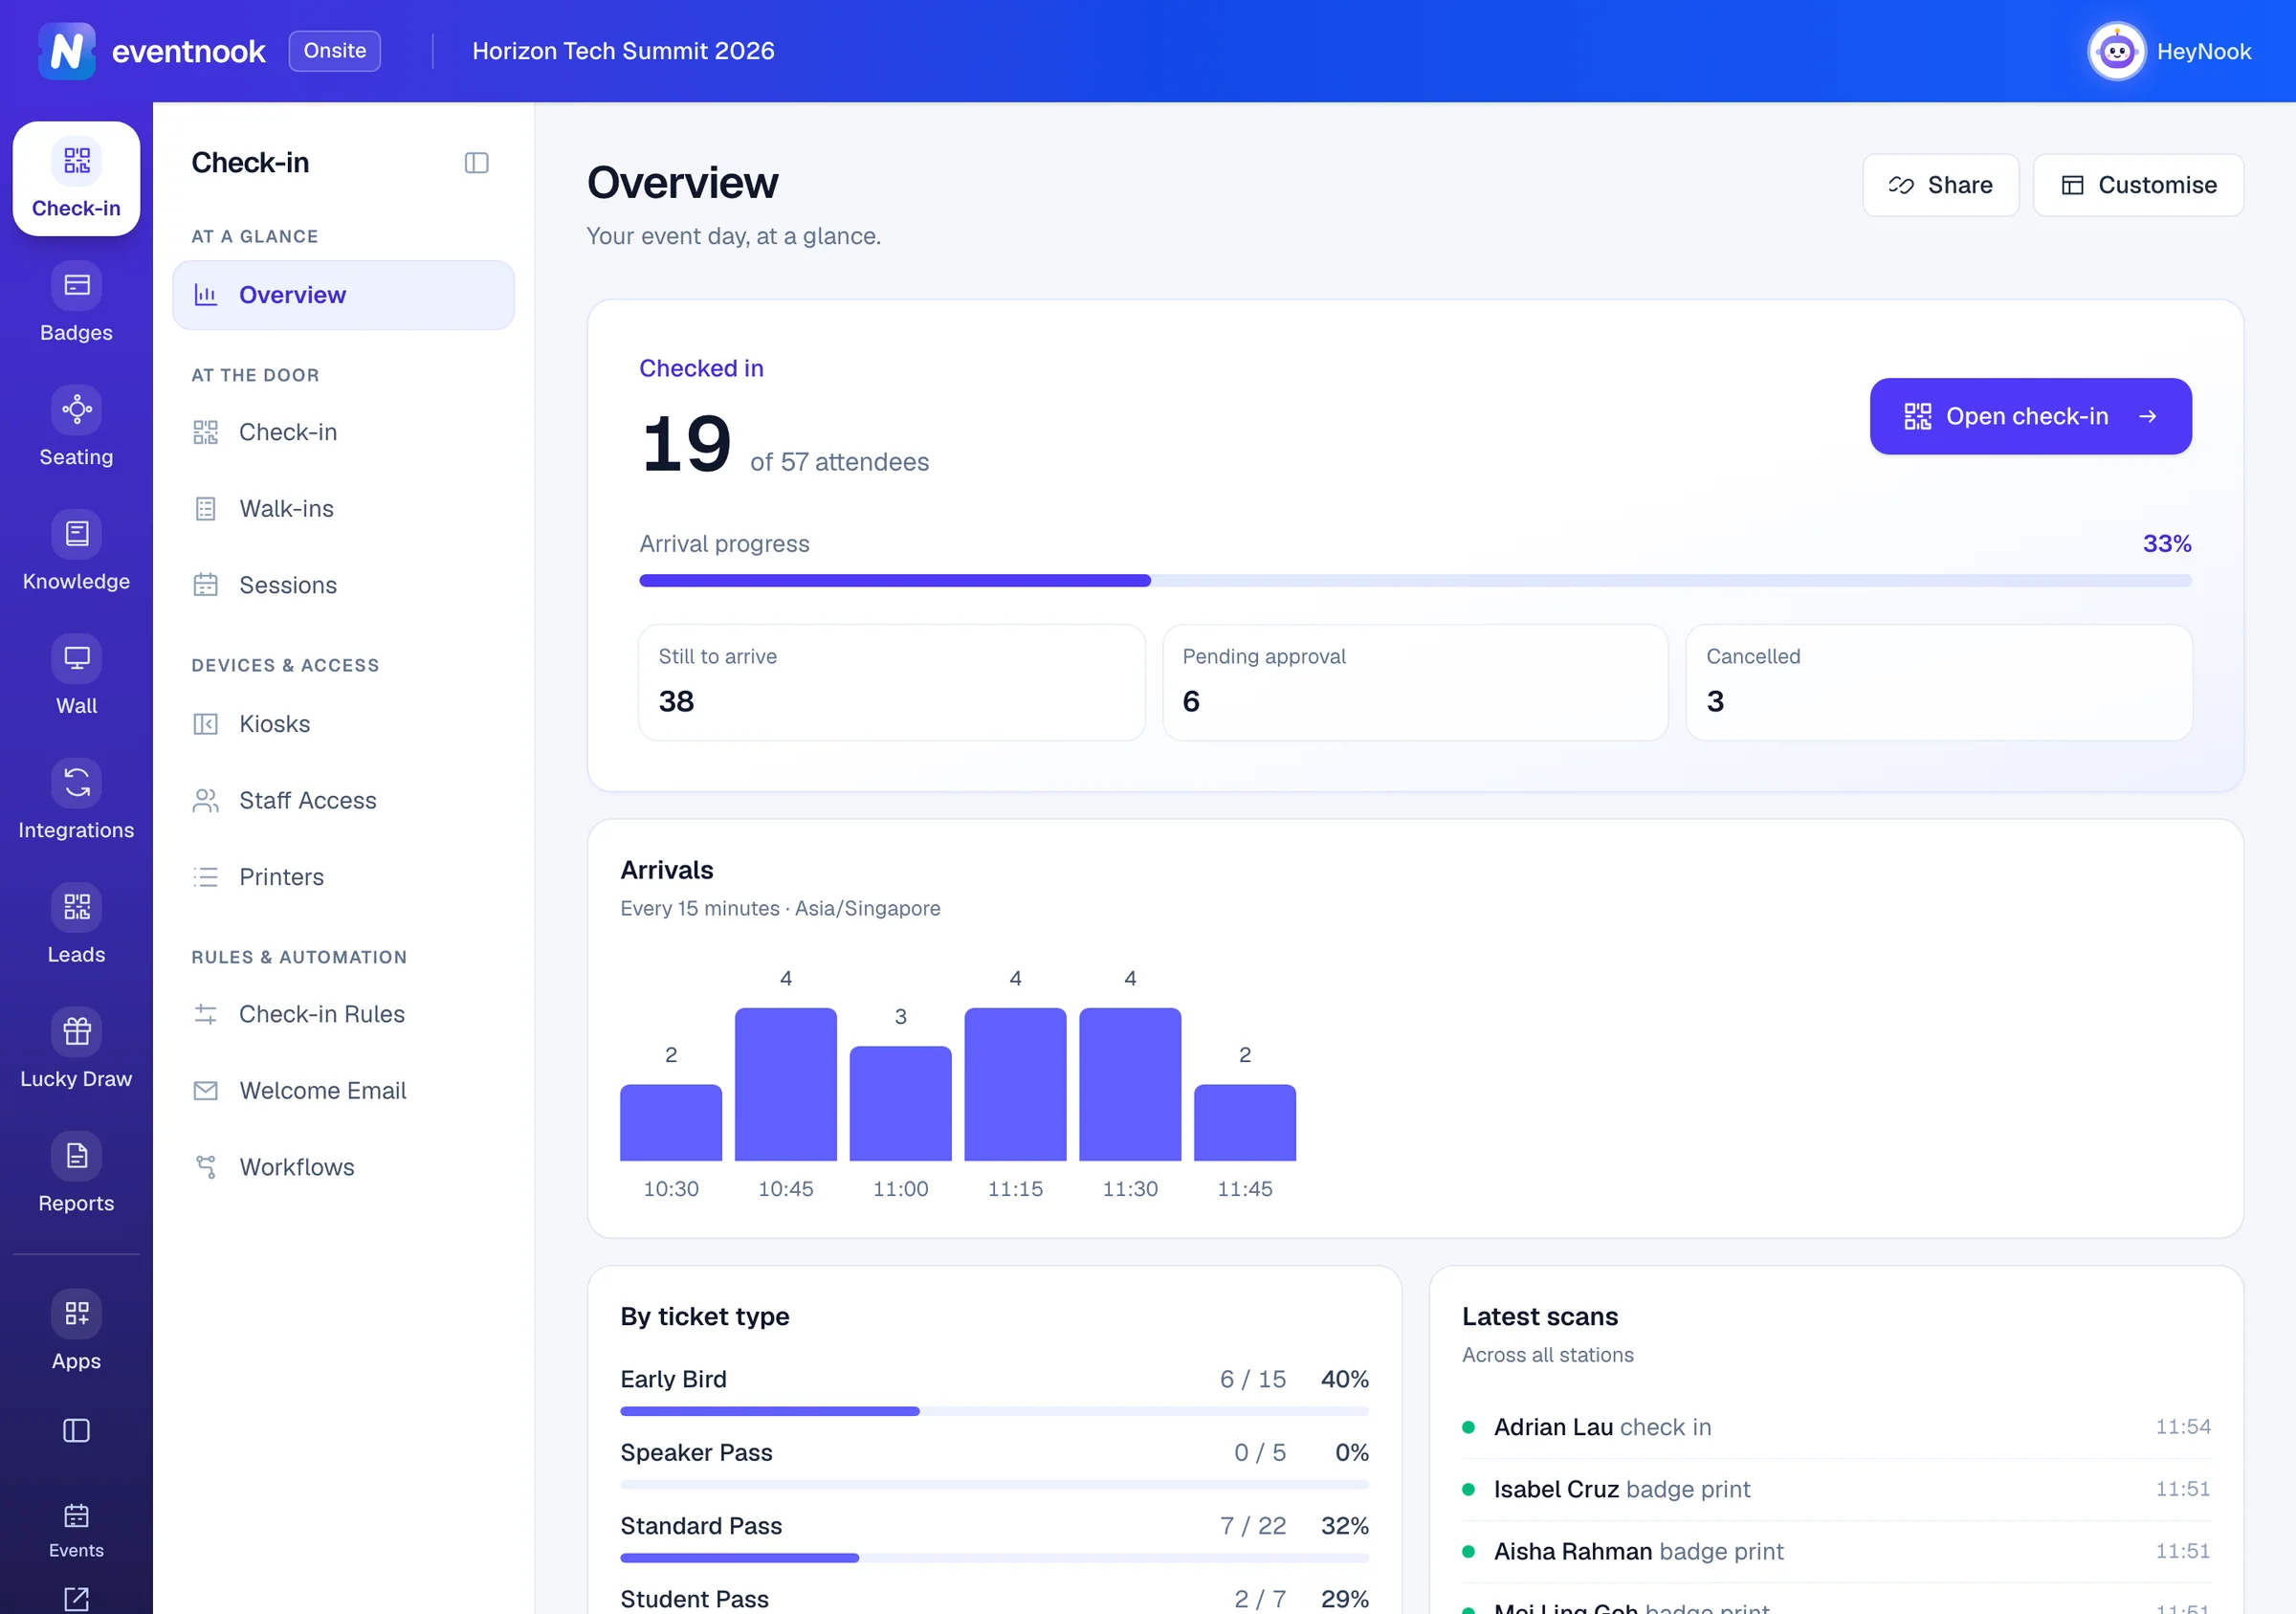
- 1One tile for each job of the day; drag a tile to move it
- 2The pages of the area that is open
- 3Go to the check-in screen
- 4Ask HeyNook, or talk with your team
Open Onsite from Event admin#
- In Event admin, open the event and click Check-in in the event menu.
- Click Start checking in to go straight to the check-in screen, or Open Onsite to open the event's Overview.
Onsite opens in its own tab, signed in as you. Each tool listed under Onsite tools opens its own page in Onsite.
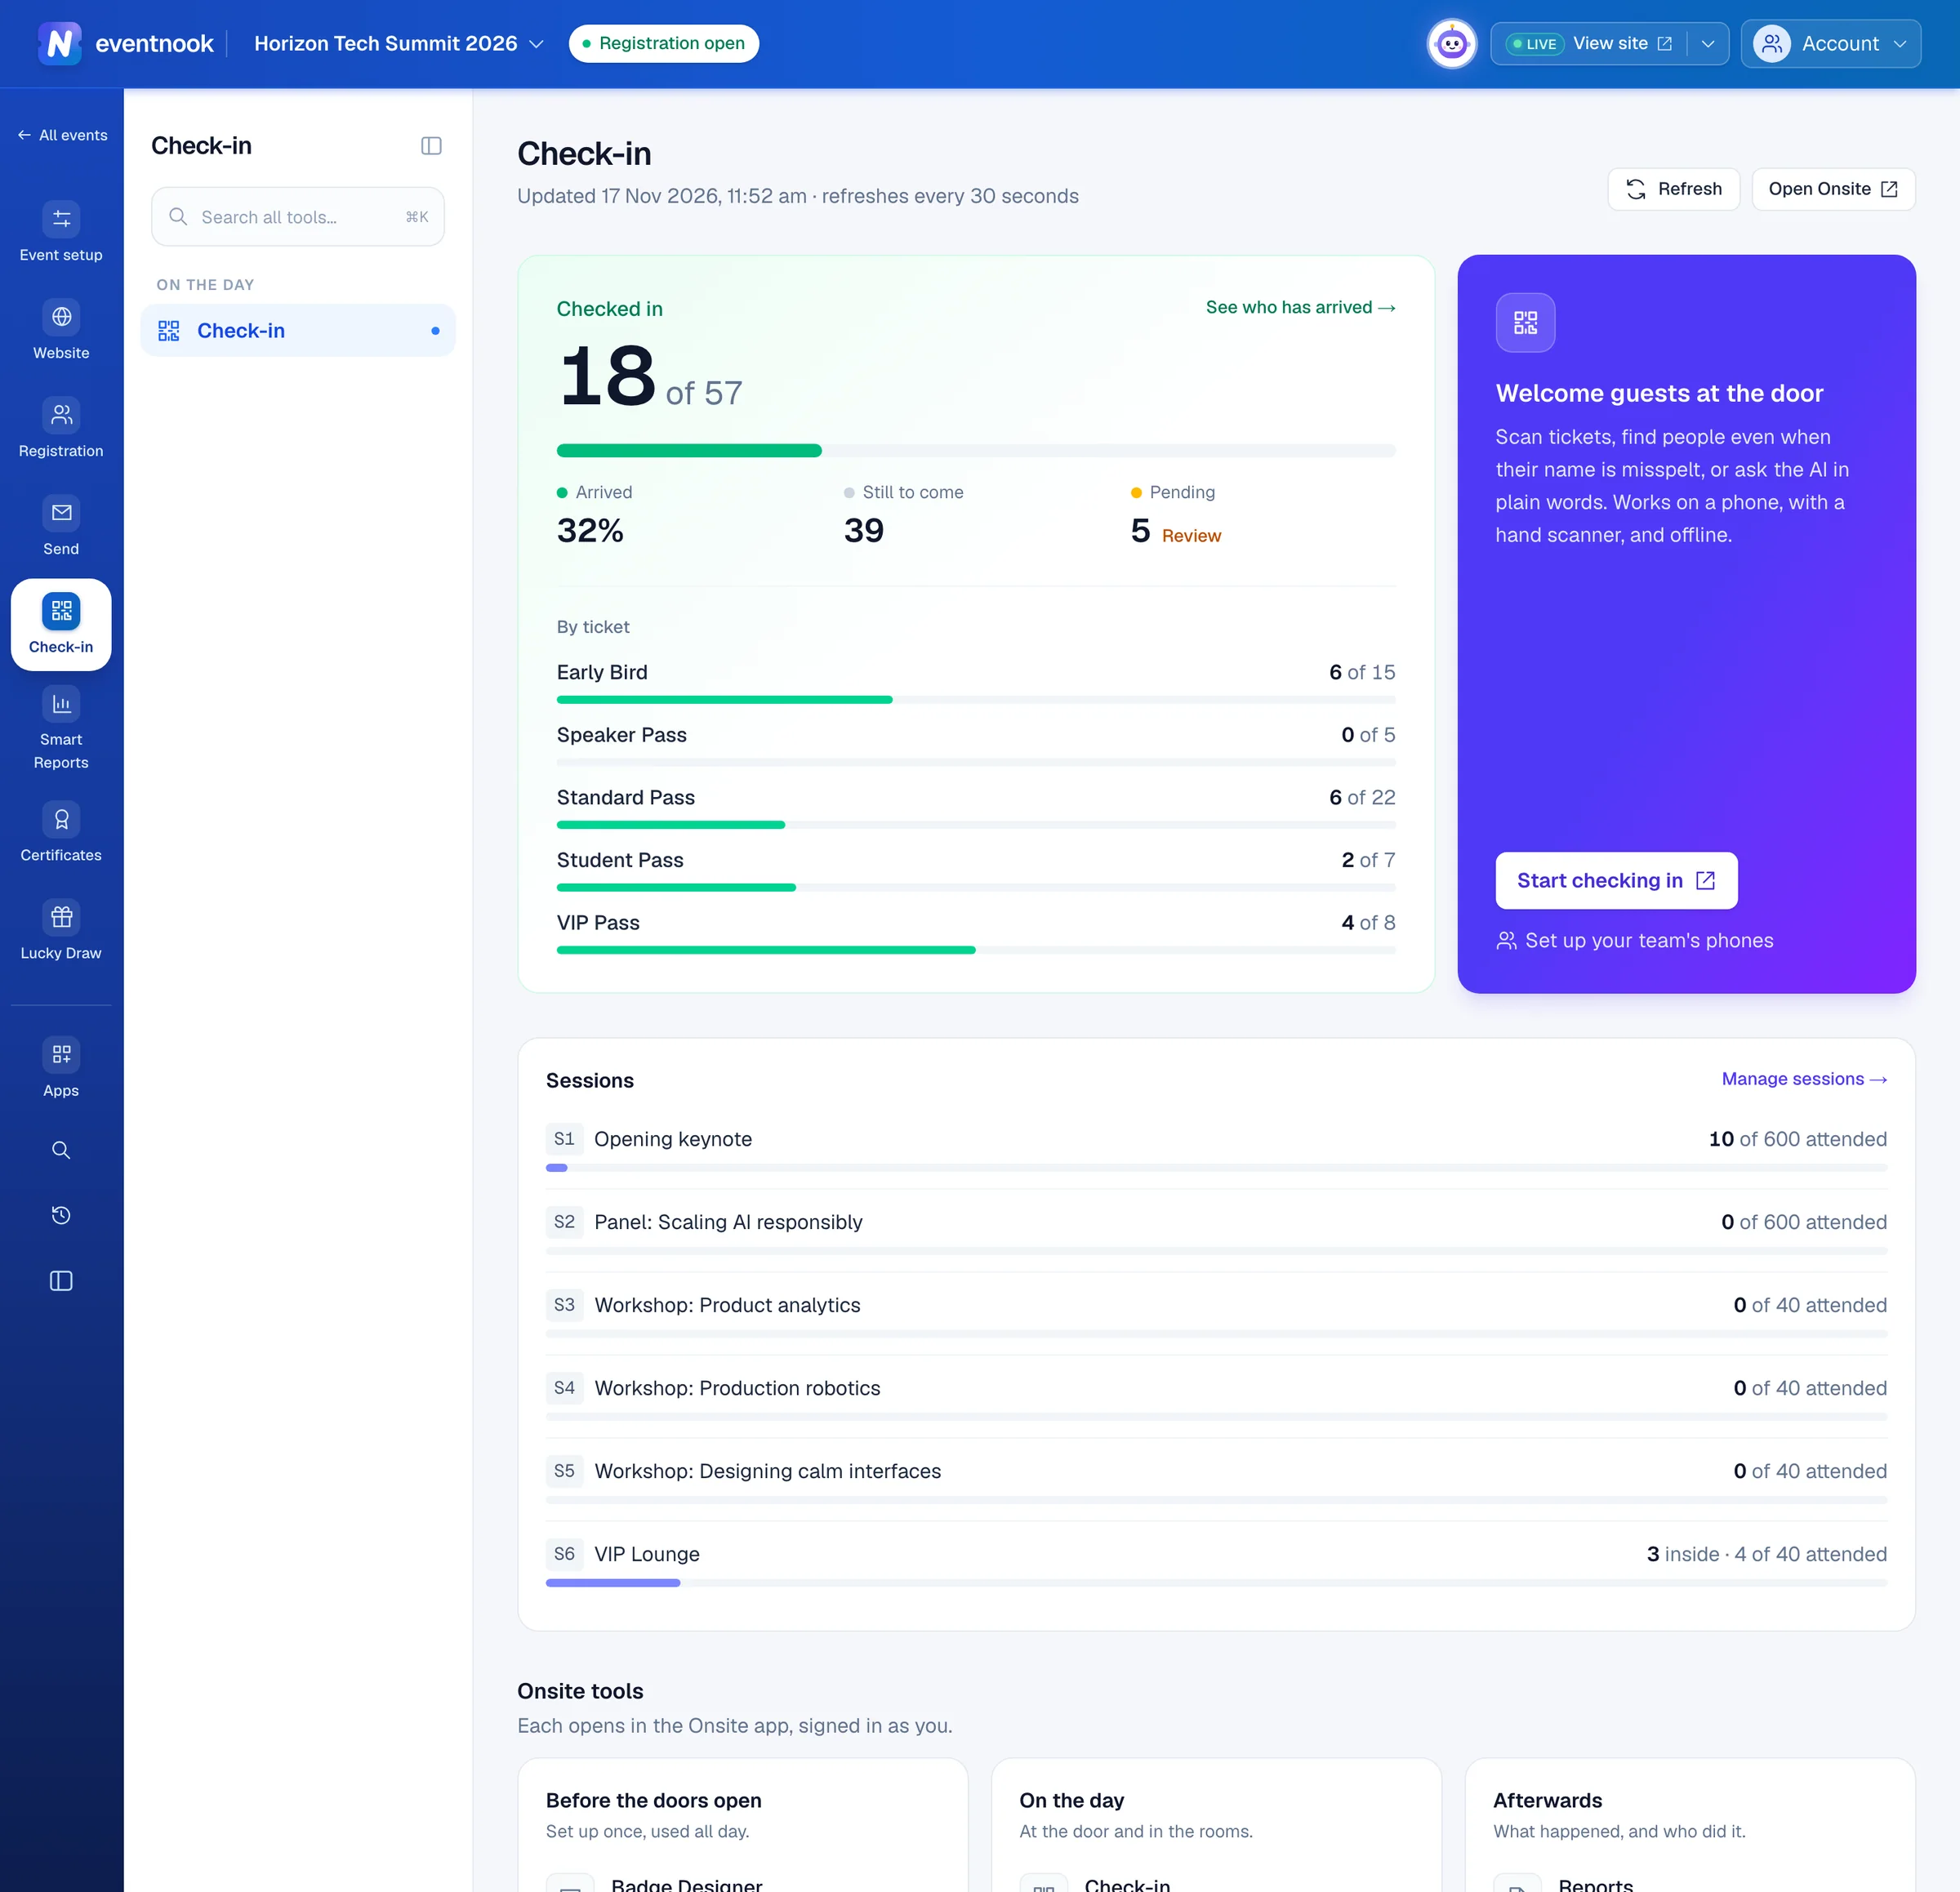
- 1Open the check-in screen in Onsite
- 2Open this event's Overview in Onsite
- 3Every Onsite tool, grouped by when you need it
The Check-in page in Event admin refreshes every 30 seconds while it is open. Times are in the event's time zone.
| Part | What it shows |
|---|---|
| Checked in | Arrivals out of the attendees who can be admitted, with Arrived, Still to come, Pending and the split By ticket. Click See who has arrived → for the attendee list, or Review beside Pending to approve orders. |
| Welcome guests at the door | Start checking in, and Set up your team's phones, which opens Staff Access. |
| Sessions | Each session's attendance against its places, when the event has sessions. Manage sessions → opens them in Onsite. |
| Onsite tools | Grouped as Before the doors open, On the day and Afterwards. |
| Add-on apps | The add-on apps for the event day and whether you have them. Choose apps in Onsite → opens Apps. See Add an app to your event. |
Sign in to Onsite on another device#
On a laptop or tablet at the venue, you can open Onsite without going through Event admin.
- Open Onsite in the browser and click Sign in.
- Type the Email and Password of your EventNook account and click Sign in.
- If you use two-step verification, type the 6-digit code and click Verify.
- On Choose your event, click the event.
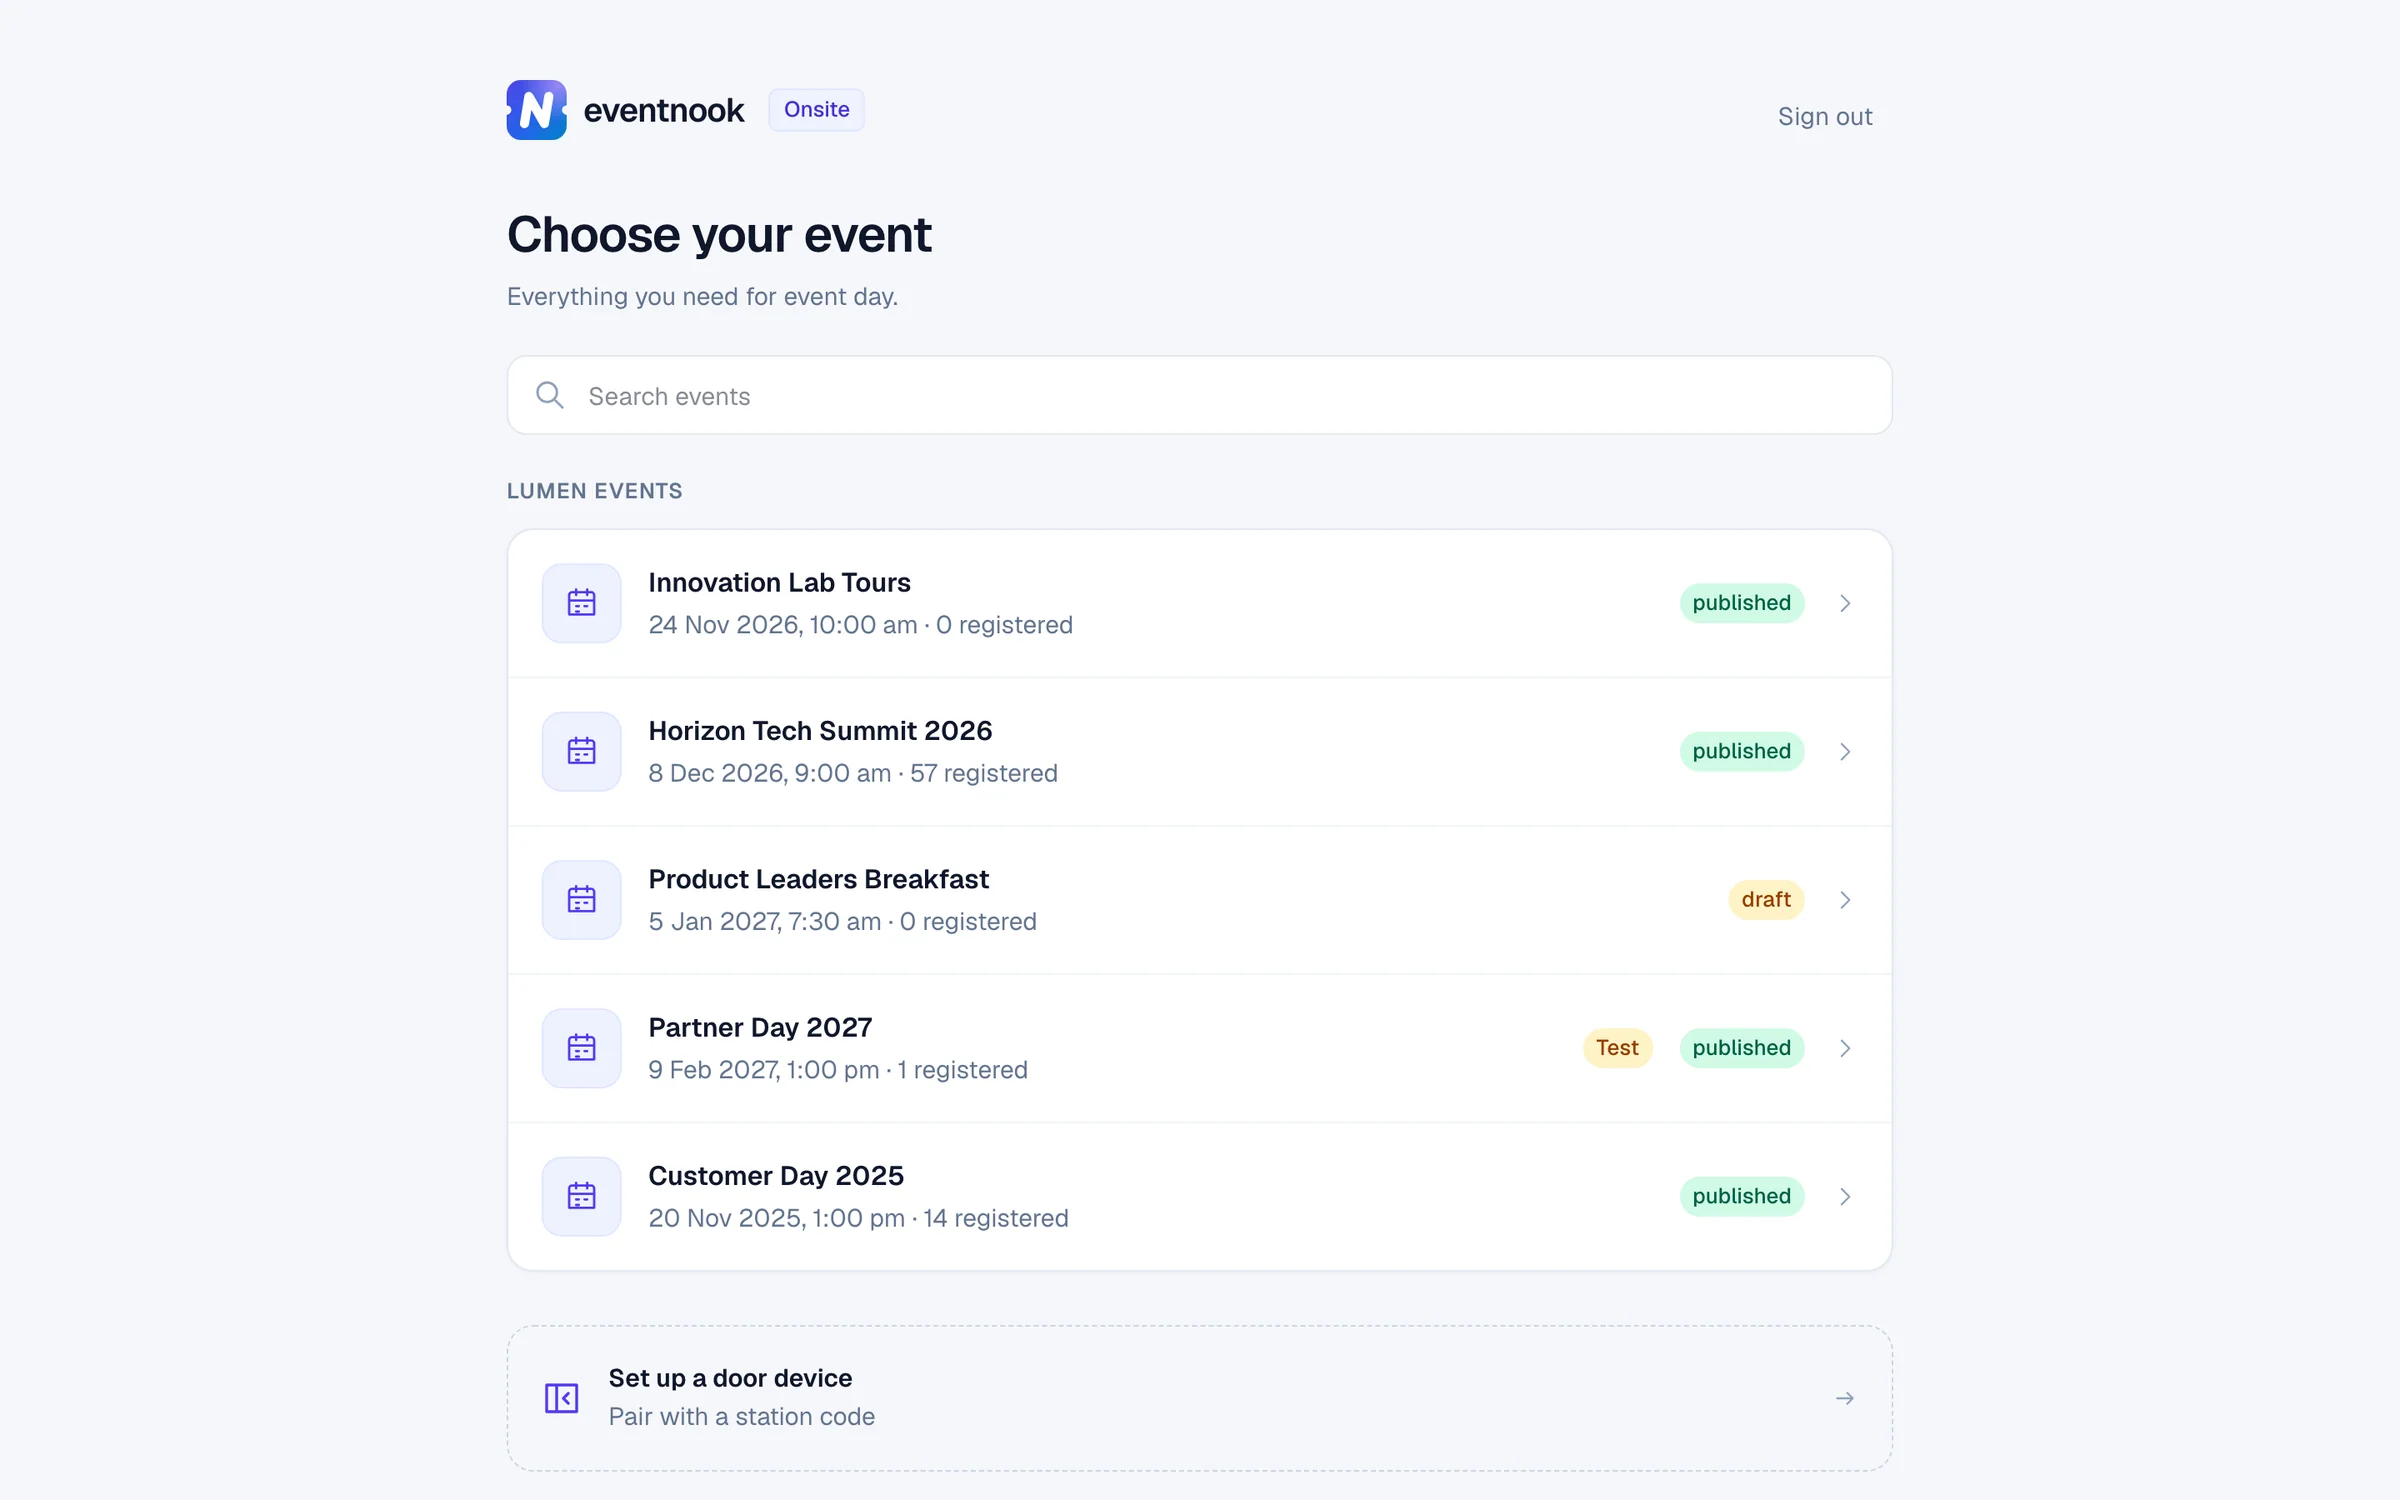
- 1Find an event by its name
- 2Turn this device into a door or kiosk with a code
Events are grouped by organisation. Today's and upcoming events come first, then the most recent past ones. Each shows its date, how many are registered and its status, with Test on an event in test mode. Type in Search events to find one by name.
Find your way around#
The top bar shows the event's name, Test event when the event is in test mode, and HeyNook on the right. HeyNook answers questions about the event and opens your team's chat. See HeyNook and Channels.
The menu on the left has a tile for each area. A tile opens the area's first page, and an area with several pages lists them beside the tiles.
| Area | Pages |
|---|---|
| Check-in | At a glance: Overview. At the door: Check-in, Walk-ins, Sessions. Devices & access: Kiosks, Staff Access, Printers. Rules & automation: Check-in Rules, Welcome Email, and Workflows when your organisation has it. |
| Badges | Badge Designer. |
| Add-on apps | Each add-on app the event has added gets its own tile, such as Seating, Knowledge, Wall or Lucky Draw. |
| Reports | Reports and Check-in & printing log. |
| Apps | The add-on apps: open the ones on this event, add others. |
At the foot of the menu, Events goes back to Choose your event, Admin opens this event in Event admin, and Sign out signs you out. You see only the pages your role at the event allows.
Arrange the menu#
- Move a tile: drag it to another place, or select it and press
Altwith↑or↓. Apps stays last. Onsite keeps your order for you. - Make the menu smaller: click the panel button below Apps. The menu shows small icons and opens to full size while you point at it. Click the button again to bring the full menu back.
- Hide the page list: click the panel button beside the area's title. Click it again in the narrow strip to bring the list back.
- Leave an add-on app off this device: open Apps and click Hide beside the app. Its tile goes from this device's menu only. Show brings it back.
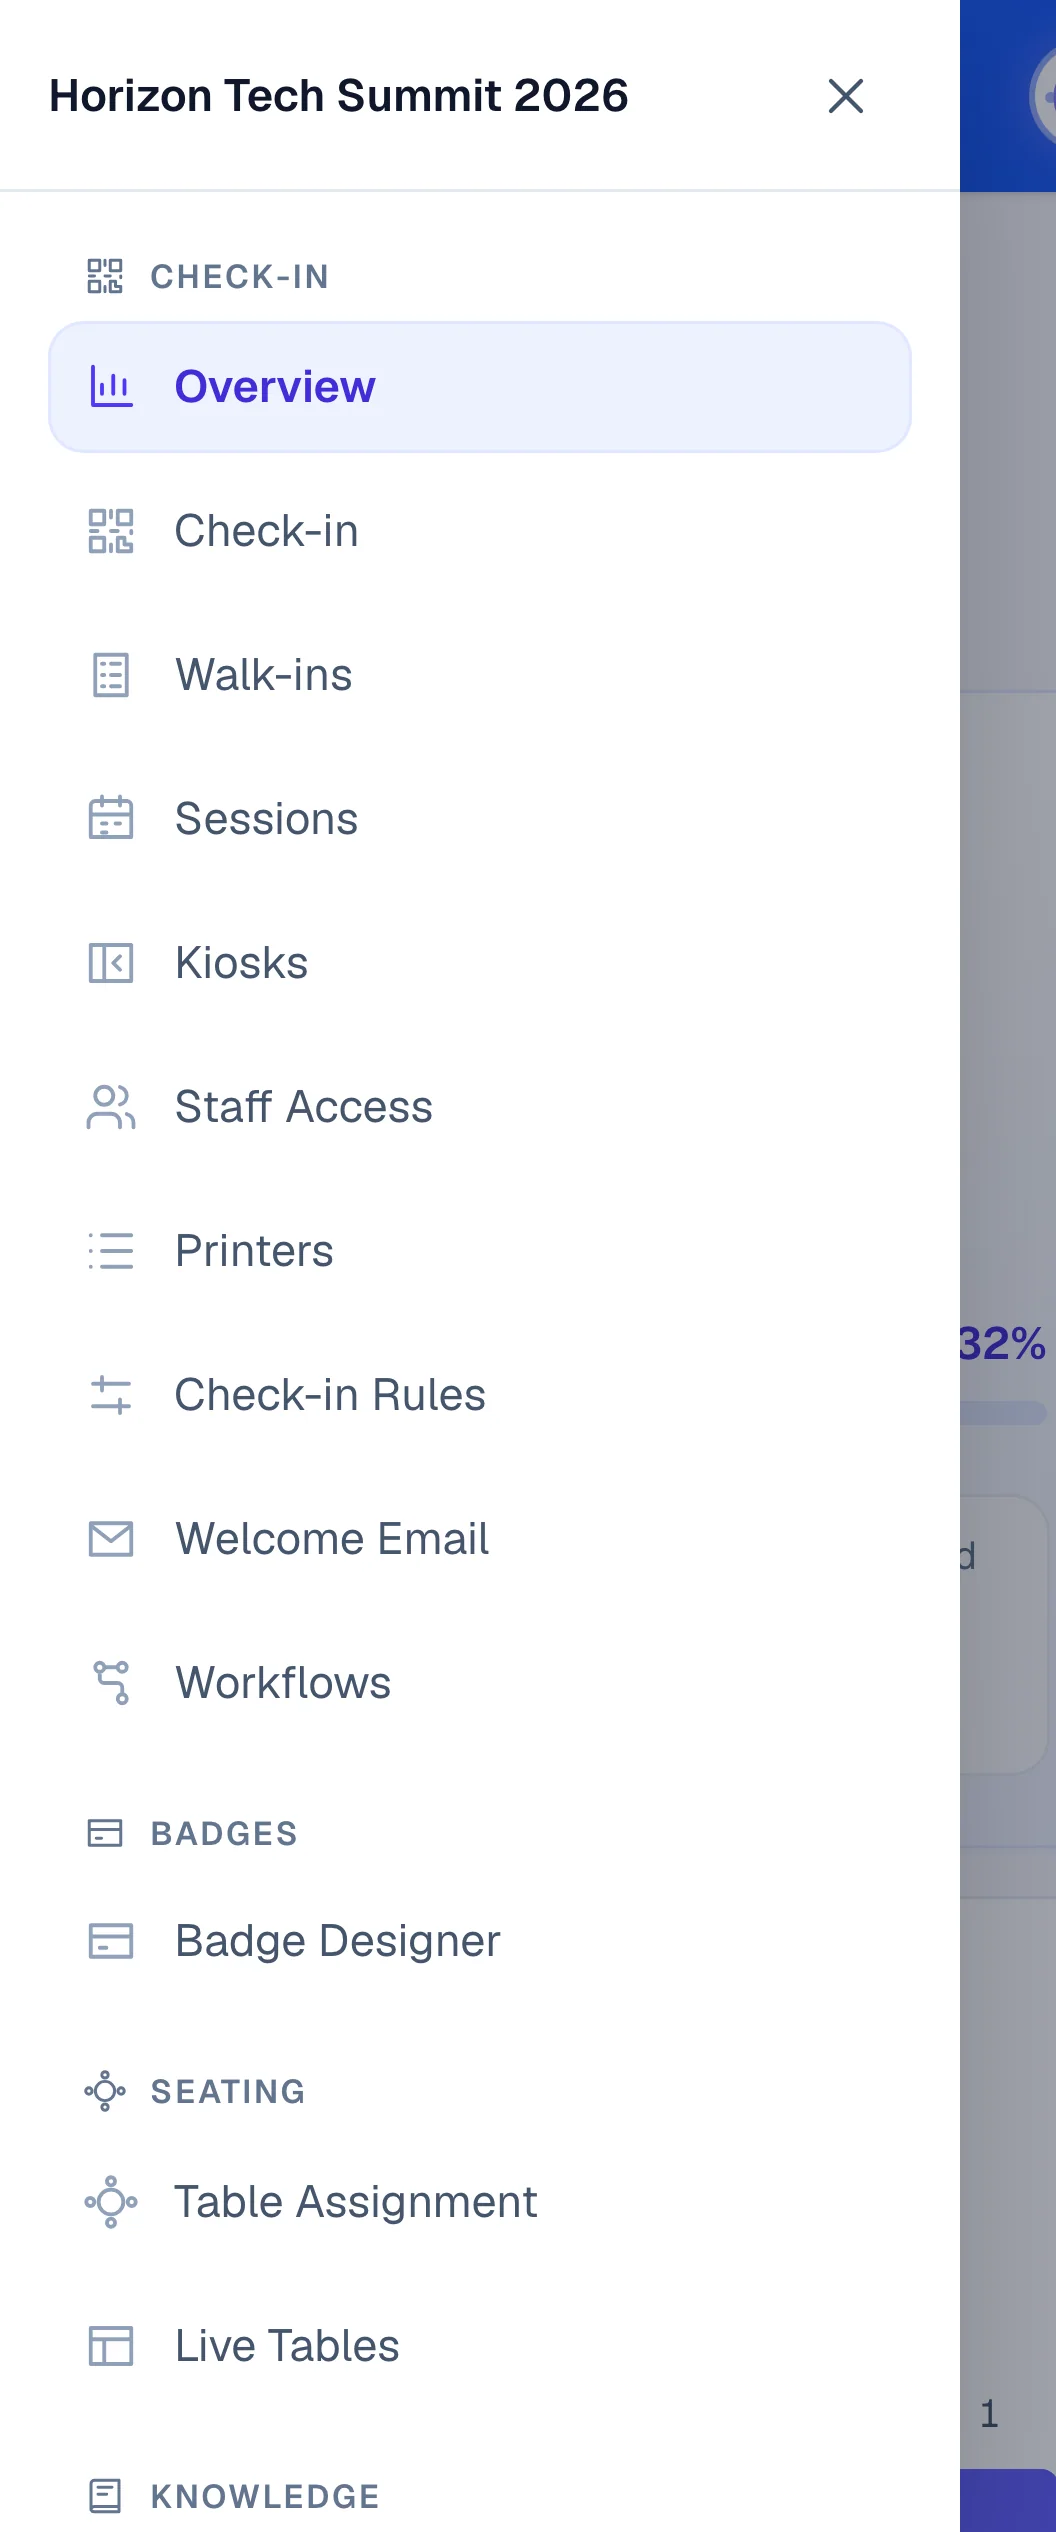
On a phone or a tablet held upright#
The menu is in a drawer. Tap Open menu at the top left. Every area is listed with its pages, then Switch event, Open admin portal and Sign out.
Read the Overview#
The Overview is the first page of the Check-in area: the event day at a glance. Its numbers refresh every few seconds while it is open.
Until your team arranges it, it shows:
- Checked in: the headline count against everyone expected, the Arrival progress bar, and Still to arrive, Pending approval and Cancelled. Open check-in goes to the check-in screen.
- Arrivals: check-ins every 15 minutes through the day.
- By ticket type: checked in out of expected for each ticket.
- Latest scans: the most recent scans across every station.
- Sessions: who has entered each session, when the event has sessions.
To add other figures, rearrange them or share the dashboard with your crew, see Follow arrivals and review the check-in log.
Sign out#
Click Sign out at the foot of the menu. Signing out erases the attendee lists downloaded to this browser, so a shared laptop keeps nobody's details. If this device has scans it hasn't sent yet, Onsite asks first. See When the connection drops.
If something looks wrong#
- "Check-in access is limited" on the Check-in page in Event admin. Your role at this event doesn't include Onsite. Ask the event's owner for access.
- "No events yet" on Choose your event. Create the event in Event admin first, then open it in Onsite.
- A page or an area is missing from the menu. Your role at the event doesn't include it, or the add-on app hasn't been added to the event. Open Apps to add it, or ask the event's owner.
- A tile you hid is back, or one is missing on another device. Hiding an app is kept on each device. Use Hide or Show in Apps on that device.
- You forgot your password. Onsite's sign-in has no reset link. Reset it from Event admin's sign-in page, then sign in to Onsite with the new password. See Password and two-step verification.
Who can do this#
Everyone with access to the event can open Onsite and see its pages. Checking people in and registering walk-ins needs the Owner, Admin, Event Admin or Event Editor role, or a Custom role that includes Onsite check-in; so does changing Onsite's set-up. Members and Event Analysts can look but not check in. Staff without an EventNook account join with a staff access code instead: see Let staff check in on their own devices.
Related guides
- Check in attendeesScan tickets or find guests by name on the Check-in screen, read the verdict, undo a mistake, and keep checking in when the venue Wi-Fi drops.
- Let staff check in on their own devicesGive your team and volunteers an access code so they can check people in on their own phones, tablets or laptops without an EventNook account, and stop any device at any time.
- Set up self check-in kiosksTurn a tablet or touch screen into a kiosk where attendees check themselves in and print their badge, then choose how it behaves and looks.
- Follow arrivals and review the check-in logArrange the live check-in dashboard, share it with your crew by link, and look back at every check-in, refusal and badge print in the check-in & printing log.
Still stuck? In EventNook, ask HeyNook. It knows the page you're on and your event, and can take you straight to the right setting.