Review registrations order by order
See each order with the people registered under it, work through the pending ones and approve several at once.
Where to find it: Event admin › Registration › Attendees & orders › Registrations
Registrations shows each order with the people registered under it: the order's details on the left, one row per attendee on the right. It opens on the Pending orders, so you can work through what is waiting for a decision and approve in place.
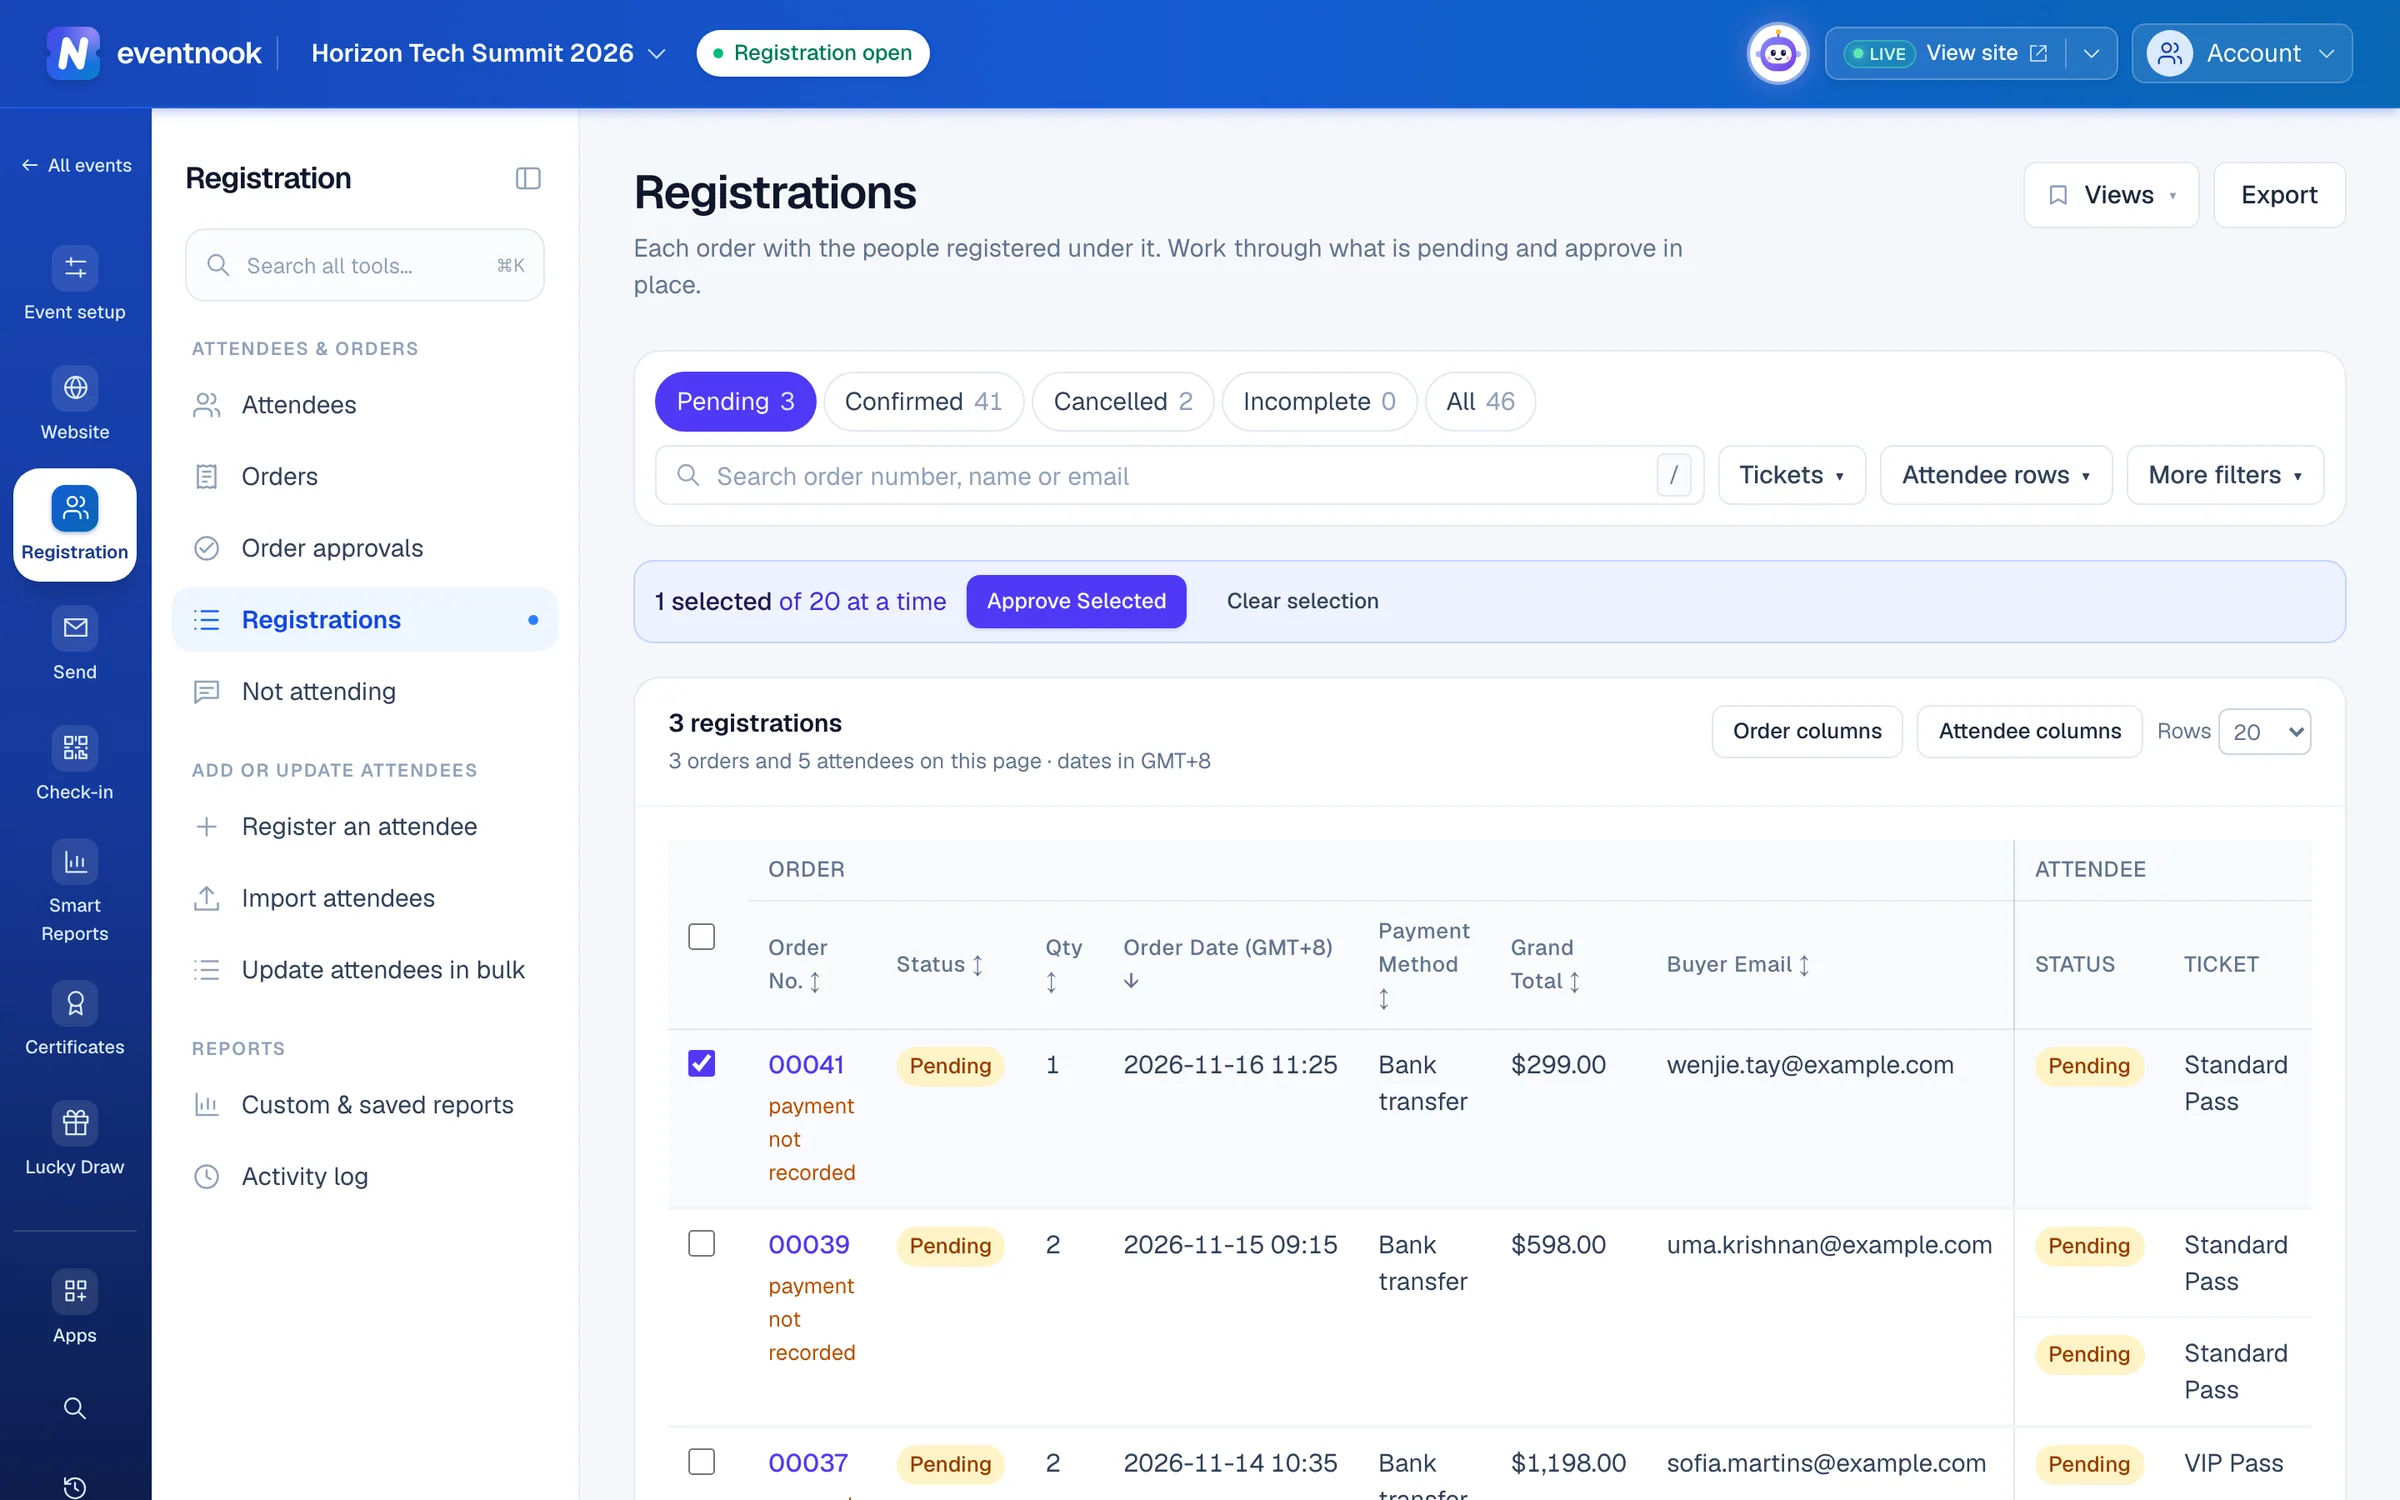
- 1Pending to begin with; Ctrl or ⌘ click to add a status
- 2Show only some attendees under each order
- 3Approve the ticked orders together
- 4Choose what shows for each person
Work through pending registrations#
- Open Registration › Attendees & orders › Registrations. It shows the Pending orders.
- Read each order and the people under it. Click an Order No. to open the order.
- Tick the orders to approve. You can tick up to 20 at a time; the box in the header ticks every order on the page, up to that number.
- Click Approve Selected.
- Optional: add an Internal note. It is stored on each order and never shown to buyers.
- Keep Send each buyer their confirmation email ticked, or untick it to approve quietly.
- Click Approve.
Approval result then lists each order as approved, skipped or failed, with the reason. Each order is checked again when it is approved, so one that can't go ahead is skipped without stopping the rest.
To reject an order, open it and click Cancel order, or use the approval queue, which has Reject on every row.
Show other registrations#
- Click a status to show it alone: Pending, Confirmed, Cancelled or Incomplete. Hold
Ctrlor⌘while clicking to add another. All shows every status. On a touch screen, a tap adds or removes one. - Type an order number, name or email in Search order number, name or email.
- Tickets keeps the orders that hold some tickets.
- Attendee rows shows only some attendees under each order, such as Cancelled ones, and leaves out orders that have none.
- More filters matches any order or attendee field, joined with And or Or.
The counts on the statuses follow your other filters. Clear filters goes back to the pending orders.
Choose columns#
Click Order columns or Attendee columns at the top right of the table to choose each side's columns and their order. Click a column heading on the order side to sort.
Use the Views menu in the header to keep a layout under a name, and Export to export the list as shown, with both sets of columns. Both work as on the orders list.
If something looks wrong#
- A box can't be ticked. Hover over it. The order may already be confirmed, or your role can't approve.
- "You can read this queue but not approve from it." Approving needs a role that can approve orders, such as Event Editor or Event Admin.
- An order shows "No attendee rows for this filter". Every attendee on it is filtered out by Attendee rows, or all were cancelled. The order still shows so it can be found.
- Some registrations were not approved. Open each one from Approval result to see what is blocking it, such as a full ticket.
Who can do this#
Everyone with access to the event's orders can see this report. Event Admin and Event Editor roles can approve from it.
Related guides
- Approve or reject pending ordersWork through the orders waiting for a decision and the payments that failed, approving or rejecting each one in place, from the keyboard or many at once.
- Find and export ordersFind any order by number, name or email, narrow the list by status and payment, keep the layouts you use as views, and export exactly what you see.
- Find attendees and change their detailsSearch and filter the attendee list, open anyone's details beside it, correct or cancel one attendee, find duplicates, count attendees in a pivot and export the list.
- Set when and how people registerOpen and close registration, cap the event, screen free registrations, set the checkout time limit, and decide what registrants and your staff may change afterwards.
Still stuck? In EventNook, ask HeyNook. It knows the page you're on and your event, and can take you straight to the right setting.