Design the attendee portal
Design Manage My Orders, the page where people who registered see and manage their registrations, and find the other screens attendees use after registering.
Where to find it: Event admin › Website › Registration pages › Attendee portal
The attendee portal is the screens people use after they register. Manage My Orders is where they sign in with their email and see their registrations: each one's status, tickets and QR codes, and what they can do with it. Each screen uses a ready-made design in your event's colours and fonts until you change it.
Open Website Builder › Attendee portal.
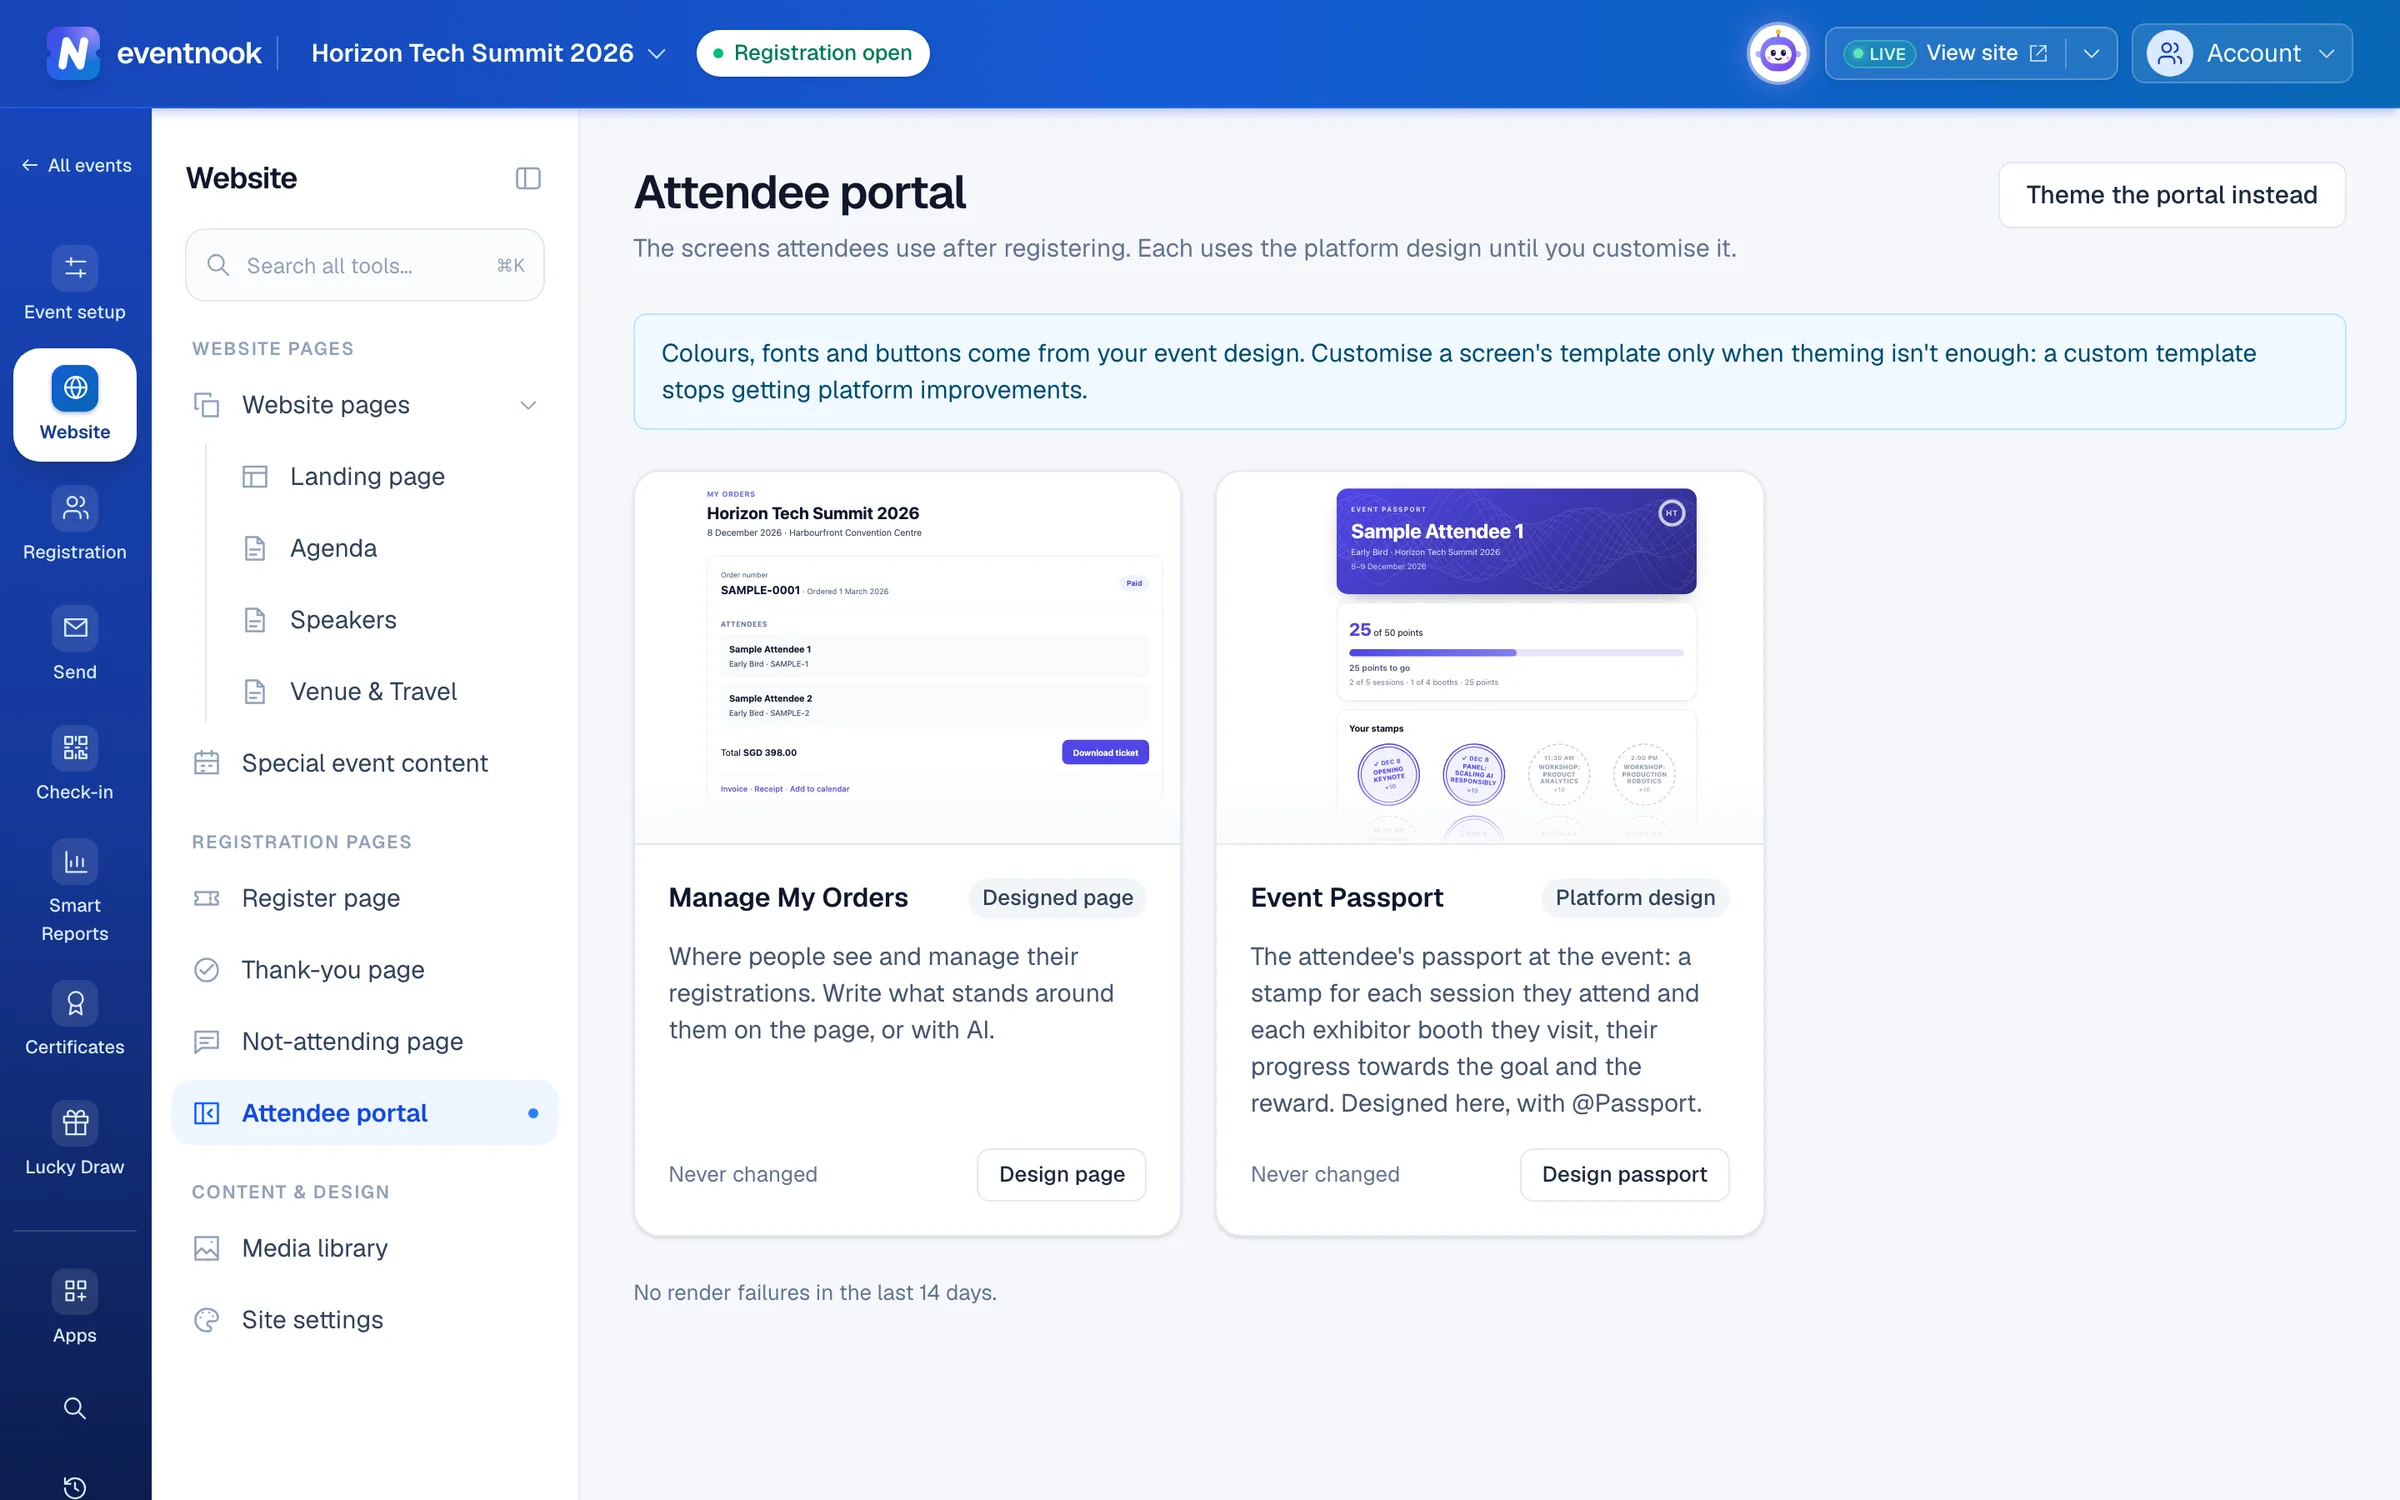
- 1Design Manage My Orders
- 2Colours and fonts for every screen
| Screen | What it is |
|---|---|
| Manage My Orders | Where people see and manage their registrations. Click Design page to write what stands around them. |
| Event Passport | The attendee's passport at the event, with a stamp for each session and booth they visit. It's an add-on app and shows here once the event has it: see Event Passport. |
Each card shows a live picture of the screen, when it last changed, and any recent problems drawing it. Usually you don't need to change a screen at all. To match your brand, click Theme the portal instead and set your colours and fonts in Layout & Design: see Set up the site's menu, design and settings.
Design Manage My Orders#
- On the Manage My Orders card, click Design page.
In the Content tab, choose a section under Your page, or click it on the page:
- Top bar: A link back, The event site's menu, or No bar. Who is signed in, with Sign out, shows either way.
- Above your registrations: your own words. It starts with the event's name, date and place.
- Their registrations: drawn for you, so they always show what's true.
- After your registrations: help for people, such as how to reach you or what to bring.
- Type on the page, pick one of the Ready-made designs, such as Help card with a button, or describe what you want under Design with AI.
- Click Save changes. The page is live at once.
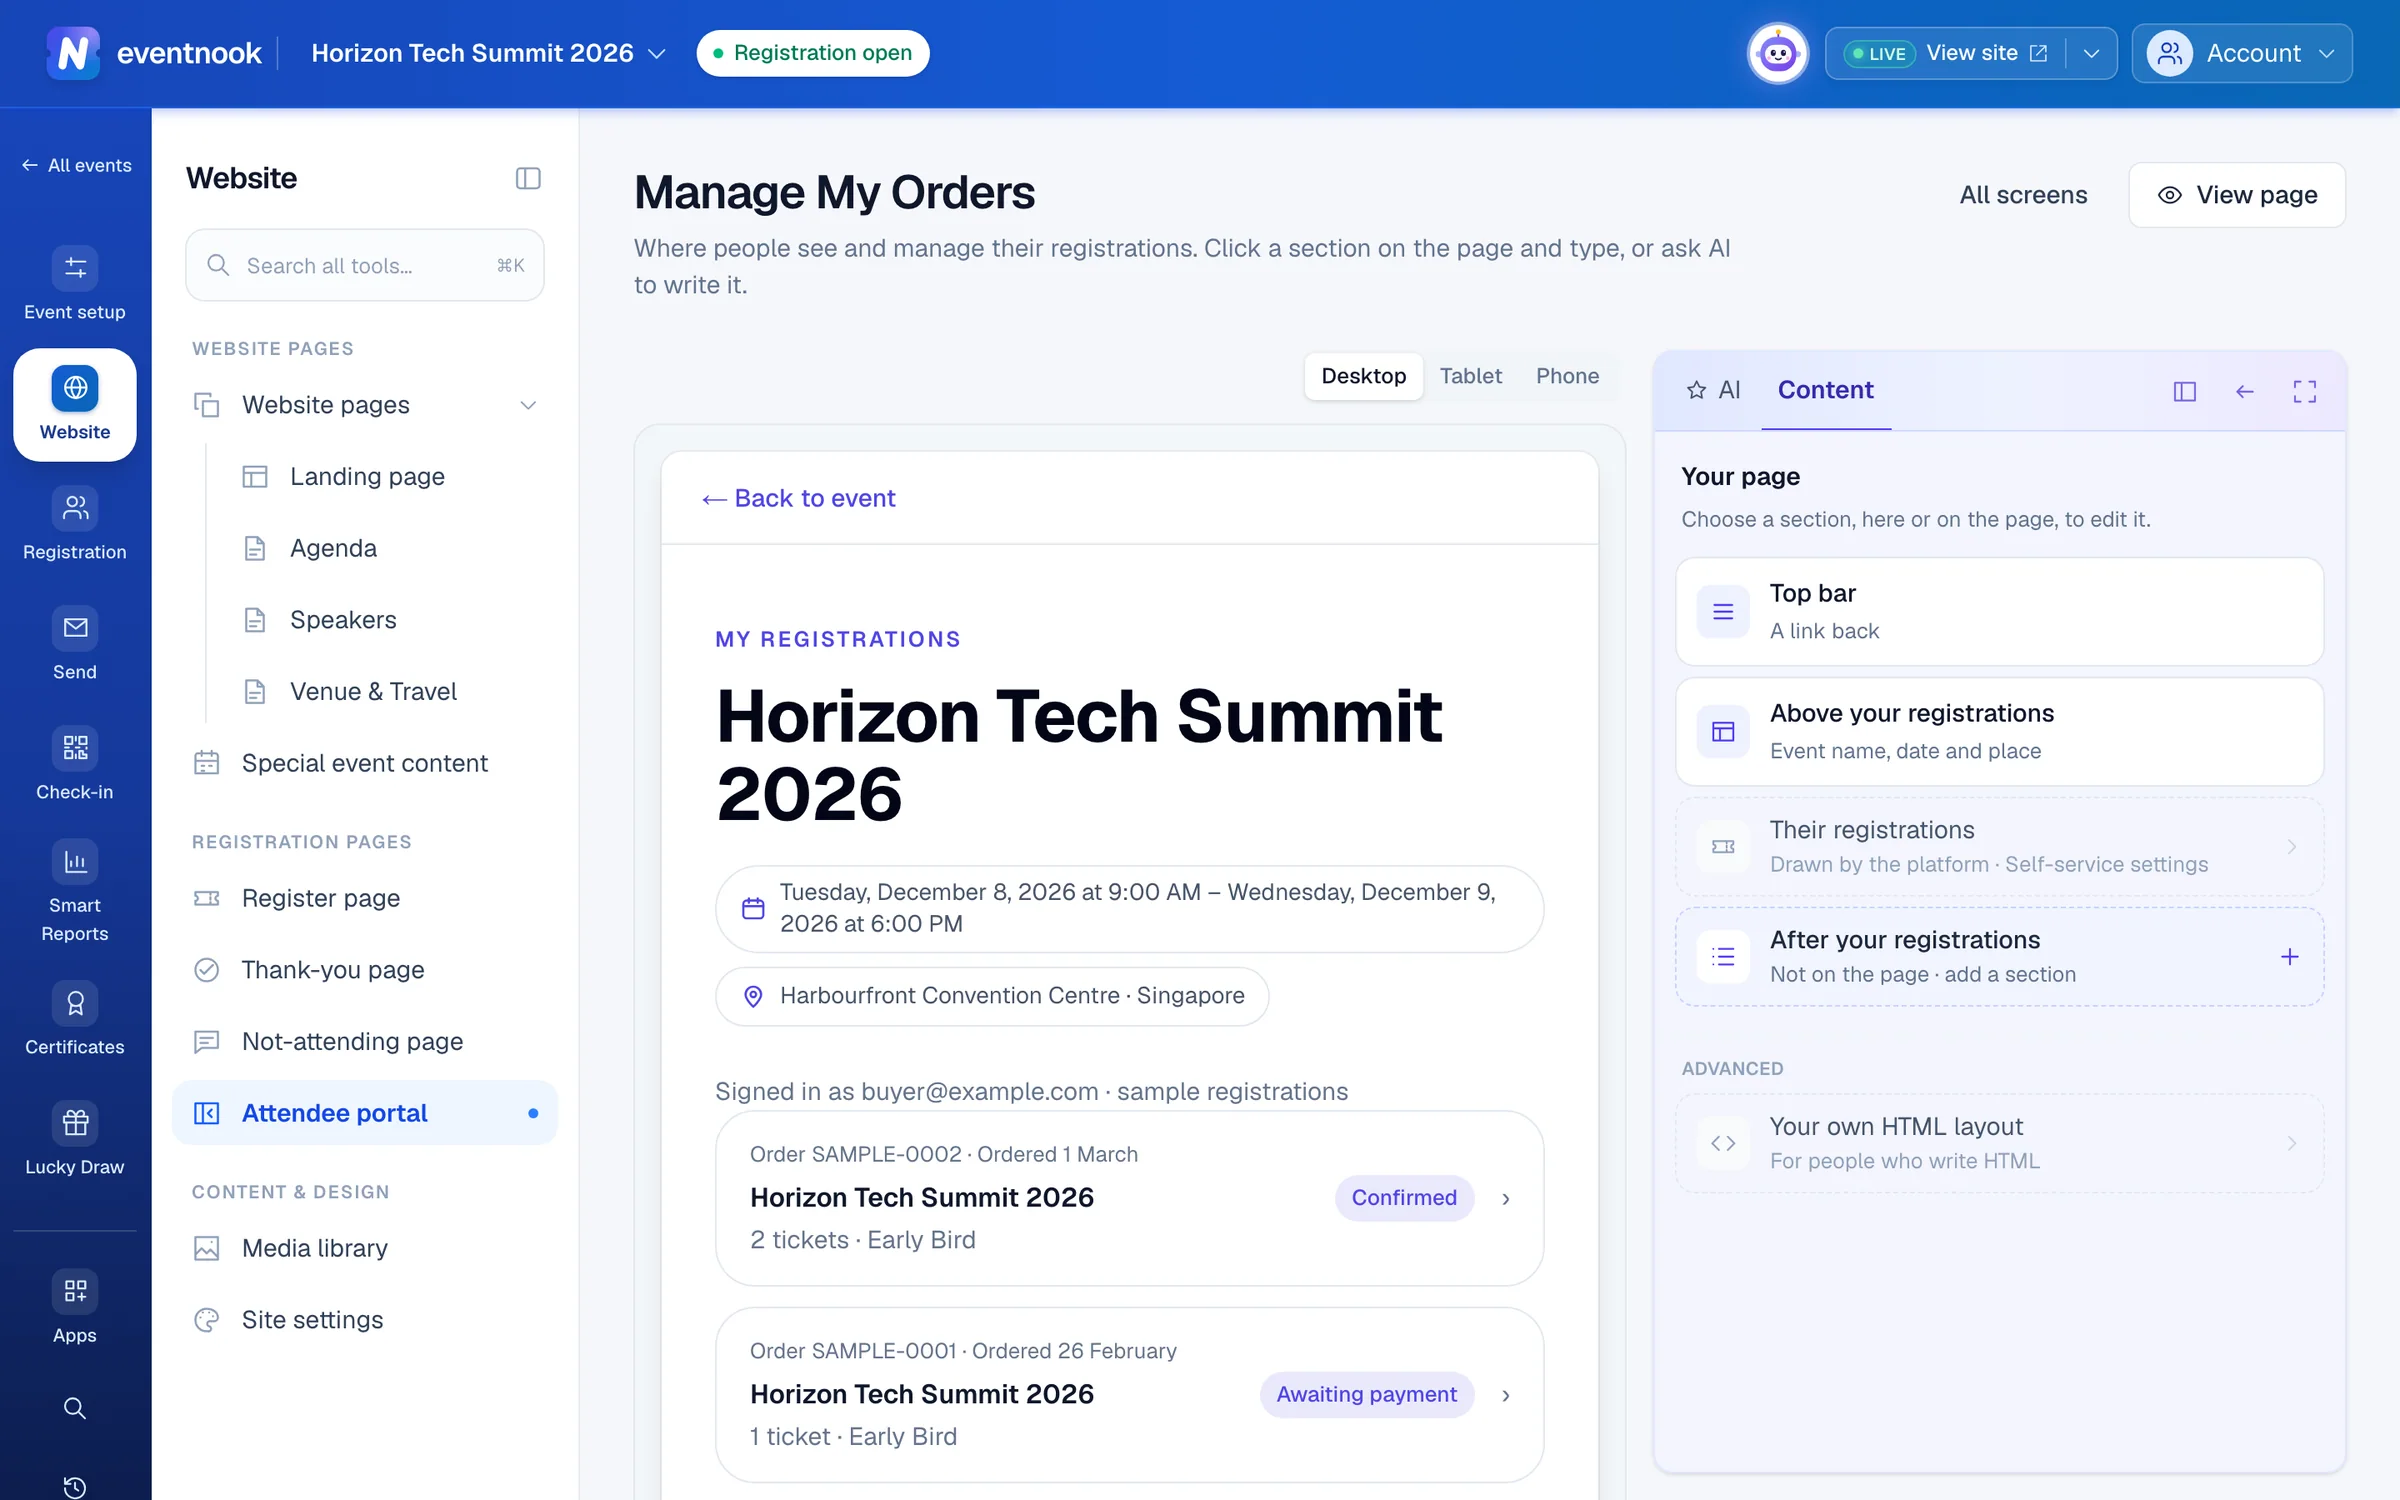
- 1The sections around their registrations
- 2Your own template, for people who write HTML
- 3Open the live page
The AI tab works as on the register page: say what people should read, and the page changes as it works. Ask for a link by name, such as "add a link to resend my confirmation", and the AI puts in your event's real address. See Design the register and thank-you pages.
Let people cancel or change their details#
What people can do with a registration, such as change their details, cancel or resend their confirmation, isn't set on this page. It's in Event settings, under self-service: see Event settings. Whether tickets show a QR code is set in QR code e-ticket.
Use your own HTML layout#
For people who write HTML. Under Advanced in Your page, choose Your own HTML layout, then Write your own HTML layout. Your template replaces this page and the list of registrations; each registration still opens its own page.
While your layout is in use, the builder says Buyers see your own HTML layout. Switch back to this page shows this page again, and keeps your layout so you can restore it later.
If something looks wrong#
- My changes don't show on Manage My Orders. Your own HTML layout is in use. Click Switch back to this page, or edit the layout instead.
- The link back won't save. Use a full address starting with
https://, or leave it empty for your event's home page. - A card says "Recent render failures". Your own layout couldn't be drawn for some visitors, and they saw the ready-made design instead. Open it and fix the template.
- Design with AI says it isn't available. AI may be off for your organisation, or its allowance used up. You can still type on the page.
Who can do this#
Everyone with access to the event can look at these screens. Editors and event admins can change them and use AI.
Related guides
- Set when and how people registerOpen and close registration, cap the event, screen free registrations, set the checkout time limit, and decide what registrants and your staff may change afterwards.
- Design the register and thank-you pagesWrite what stands around your tickets on the register page, and what people see right after they register, by typing on the page, picking a ready-made design or asking AI.
- Set up the site's menu, design and settingsChoose the colours, fonts and width every page starts from, set the menu bar, logo, footer and favicon, keep the site out of search, protect it with a code and add your own CSS.
- Manage your registrationSign in to My Order with a code sent to your email, see your registration and tickets, change your details and cancel if the organiser allows it.
- Design the Event PassportChoose the sessions and exhibitor booths that earn a stamp, set a goal and a reward, and design the passport attendees fill at the event.
Still stuck? In EventNook, ask HeyNook. It knows the page you're on and your event, and can take you straight to the right setting.