Set up the site's menu, design and settings
Choose the colours, fonts and width every page starts from, set the menu bar, logo, footer and favicon, keep the site out of search, protect it with a code and add your own CSS.
Where to find it: Event admin › Website › Content & design › Site settings
Two places set what every page of your event site shares. Layout & Design is the look: colours, fonts, width and shape. Site settings is the frame around each page: the menu bar and logo, the footer, the favicon, search, dates, security and your own CSS.
Choose the colours, fonts and width#
- Open the landing page editor. In the Settings tab, choose Layout & Design. Or click Colours & fonts in Your page.
- Change what you need. The live preview beside the controls shows your real page with the design you haven't saved yet.
- Click Save & publish. Every page, section and registration screen uses the new design straight away.
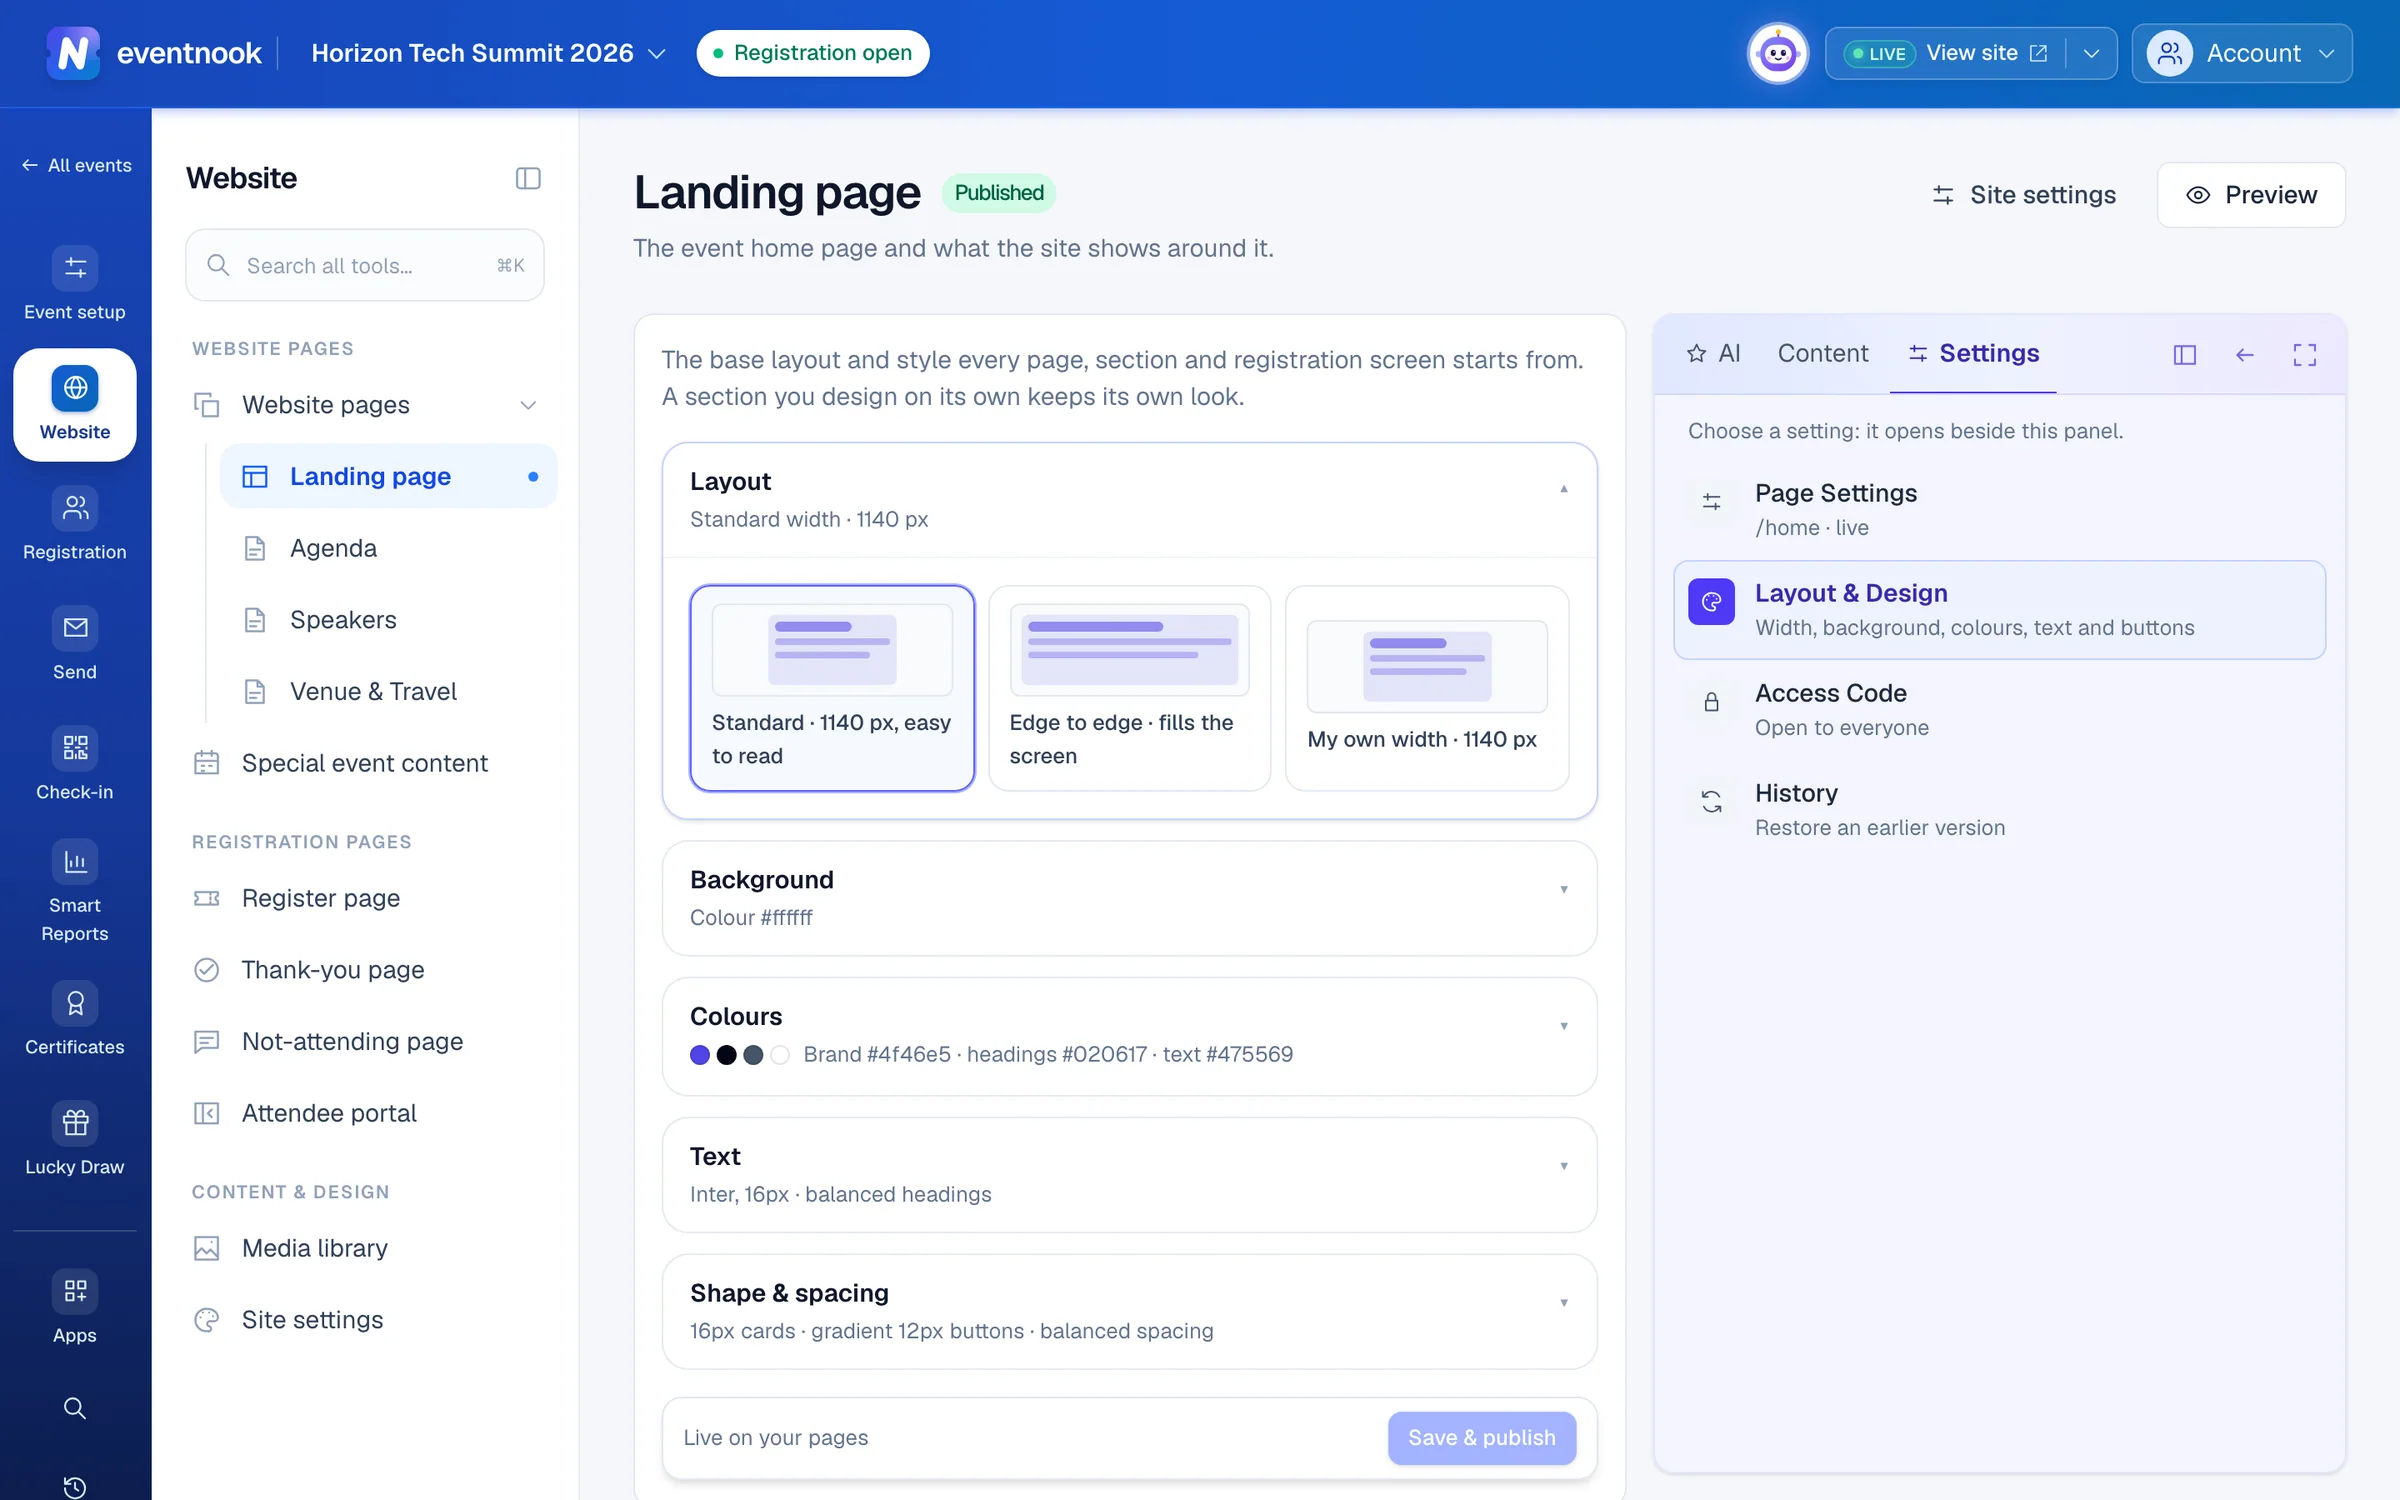
- 1Your brand colour and text colours
- 2Card and button corners, spacing
- 3Make the new design live
| Card | What you set |
|---|---|
| Layout | How wide the content sits: Standard · 1140 px, easy to read, Edge to edge · fills the screen, or My own width. |
| Background | What sits behind every page: a colour, a gradient, a glow or a picture from the media library. |
| Colours | Your Brand colour, the colour of text on it, and the rest. Can everyone read it? checks that text stands out from what it sits on, and offers a fix. |
| Text | The font, size and weight. Start typing a font's name to find it. |
| Shape & spacing | Card corners, the button style, Button corners and the room between things. |
Undo puts everything back the way it was before you started. A section you designed on its own, with Design it freely or with AI, keeps its own look.
Set the menu bar, logo and footer#
- Open Website Builder › Site settings. Pick a section from the menu on the left; each shows a short summary of its setting.
- Make your changes.
- Click Save changes. Site settings are live as soon as you save: there's nothing to publish.
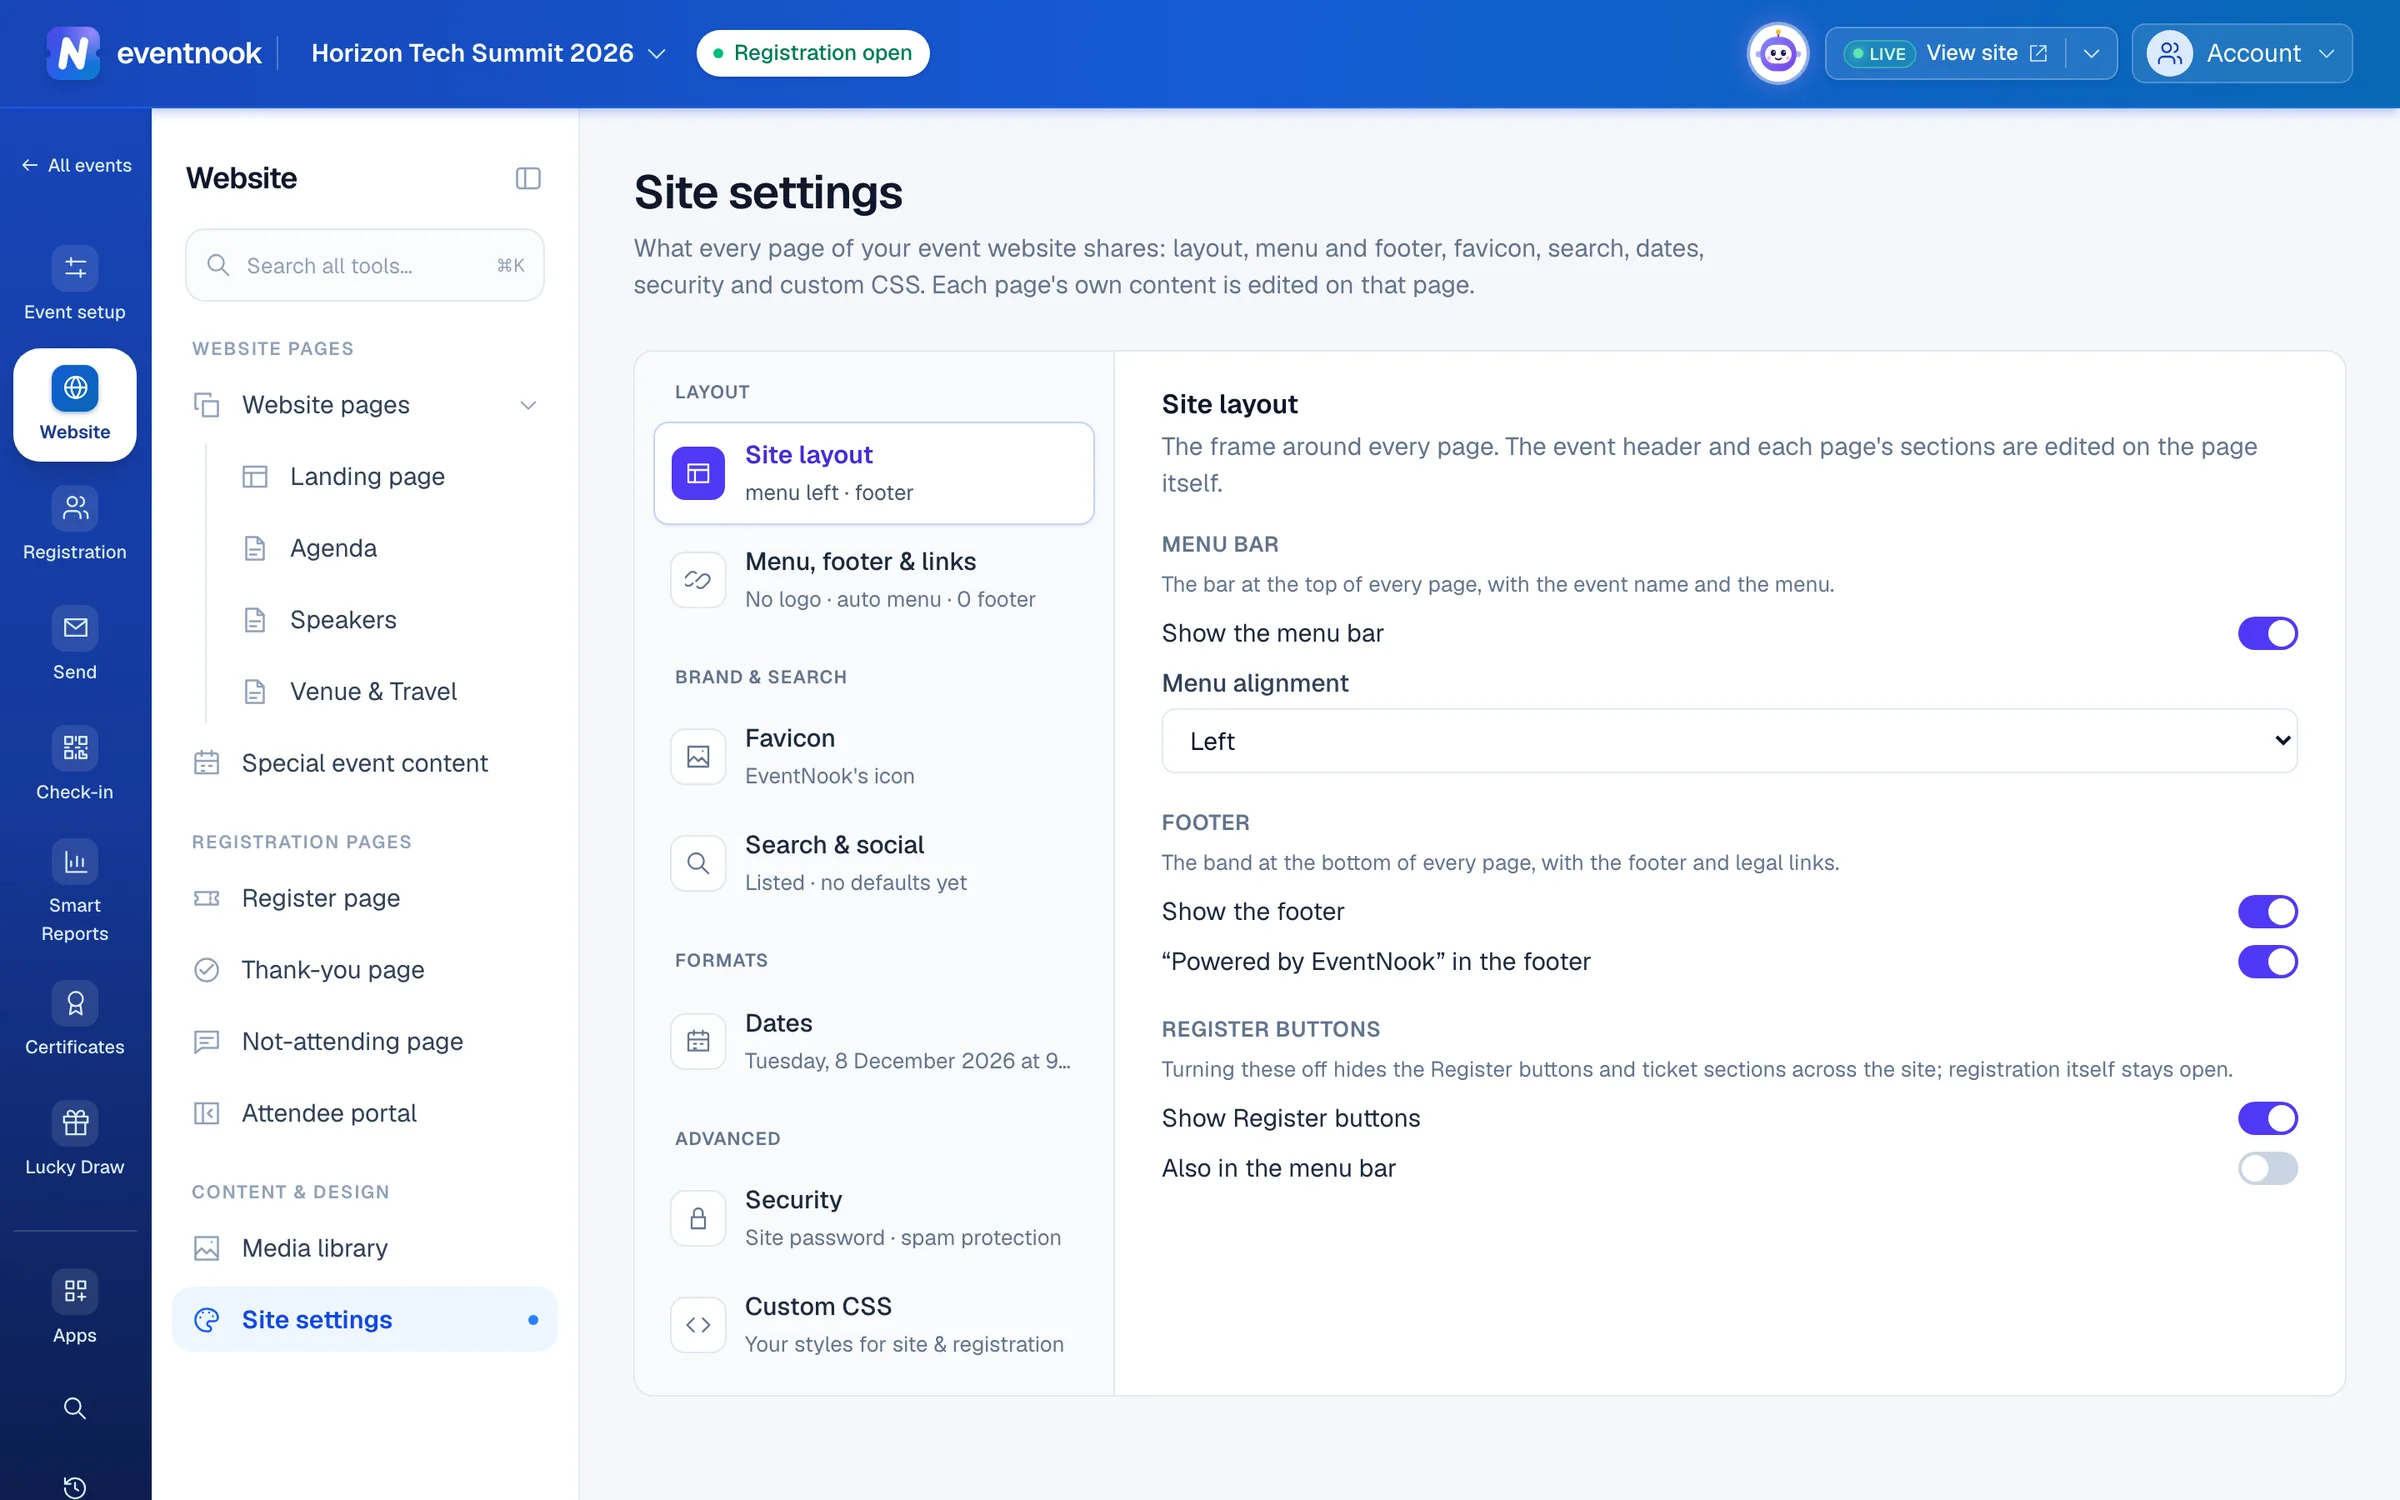
- 1Menu bar, footer and Register buttons
- 2Logo, menu items and footer links
- 3A code for the whole site, and spam protection
| Section | What it changes |
|---|---|
| Site layout | Show the menu bar and Menu alignment, Show the footer and “Powered by EventNook” in the footer, Show Register buttons (and Also in the menu bar). |
| Menu, footer & links | The Logo at the start of the menu bar, the menu items, and the footer, social and legal links. |
| Favicon | The small icon in the browser tab and bookmarks. |
| Search & social | Hiding the site from search engines, and the Description and Share image pages use when they don't set their own. |
| Dates | How the event date reads, in the event's time zone. Shown as gives the result. |
| Security | A code for the whole site, and refusing throwaway email addresses. |
| Custom CSS | Your own CSS for the event site and the registration pages. |
Put your logo or the event name in the menu bar#
In Menu, footer & links, under Logo, choose Text or Image. Text shows the Name you type, or the event's title when you leave it empty. Image shows a logo from the media library; a wide logo on a transparent background works best. The logo links to the home page. It only shows while the menu bar is on in Site layout.
Change the menu#
In Menu, footer & links, click Add menu item. Give it a Label and choose where it goes: a page, a web address or a section on a page. Use the arrows to order the items. With no items, the menu lists your published pages in page order. Add footer link, Add social link and Add legal link work the same way.
Keep the site out of search results#
In Search & social, turn on Hide the whole site from search engines and save. Every page then asks search engines not to list it. Search engines decide for themselves when to drop a page, so one already listed can take days or weeks to go.
Make the site private#
Event admins can protect the whole site with a code.
- In Site settings, open Security.
- Under Password for the whole site, type an Access code of 4 to 64 characters.
- Click Make the site private.
Every page, the registration pages and the event's widgets then ask for the code. Guests enter it once on each device. Keep a note of it: nobody can read it back. Change code asks everyone for the new code; Remove the code opens the site again. Links in emails to tickets, invoices, receipts and My Order keep working without it.
Refuse disposable email addresses is on to start with, so throwaway inboxes can't be used to register. An event admin can turn it off there and click Save spam protection.
Add your own CSS#
For people who write CSS. Try Layout & Design first.
- In Site settings, open Custom CSS.
- Choose Event website or Registration pages. Each has its own stylesheet, and one never affects the other.
- Write or paste your CSS and click Save stylesheet. It's live straight away.
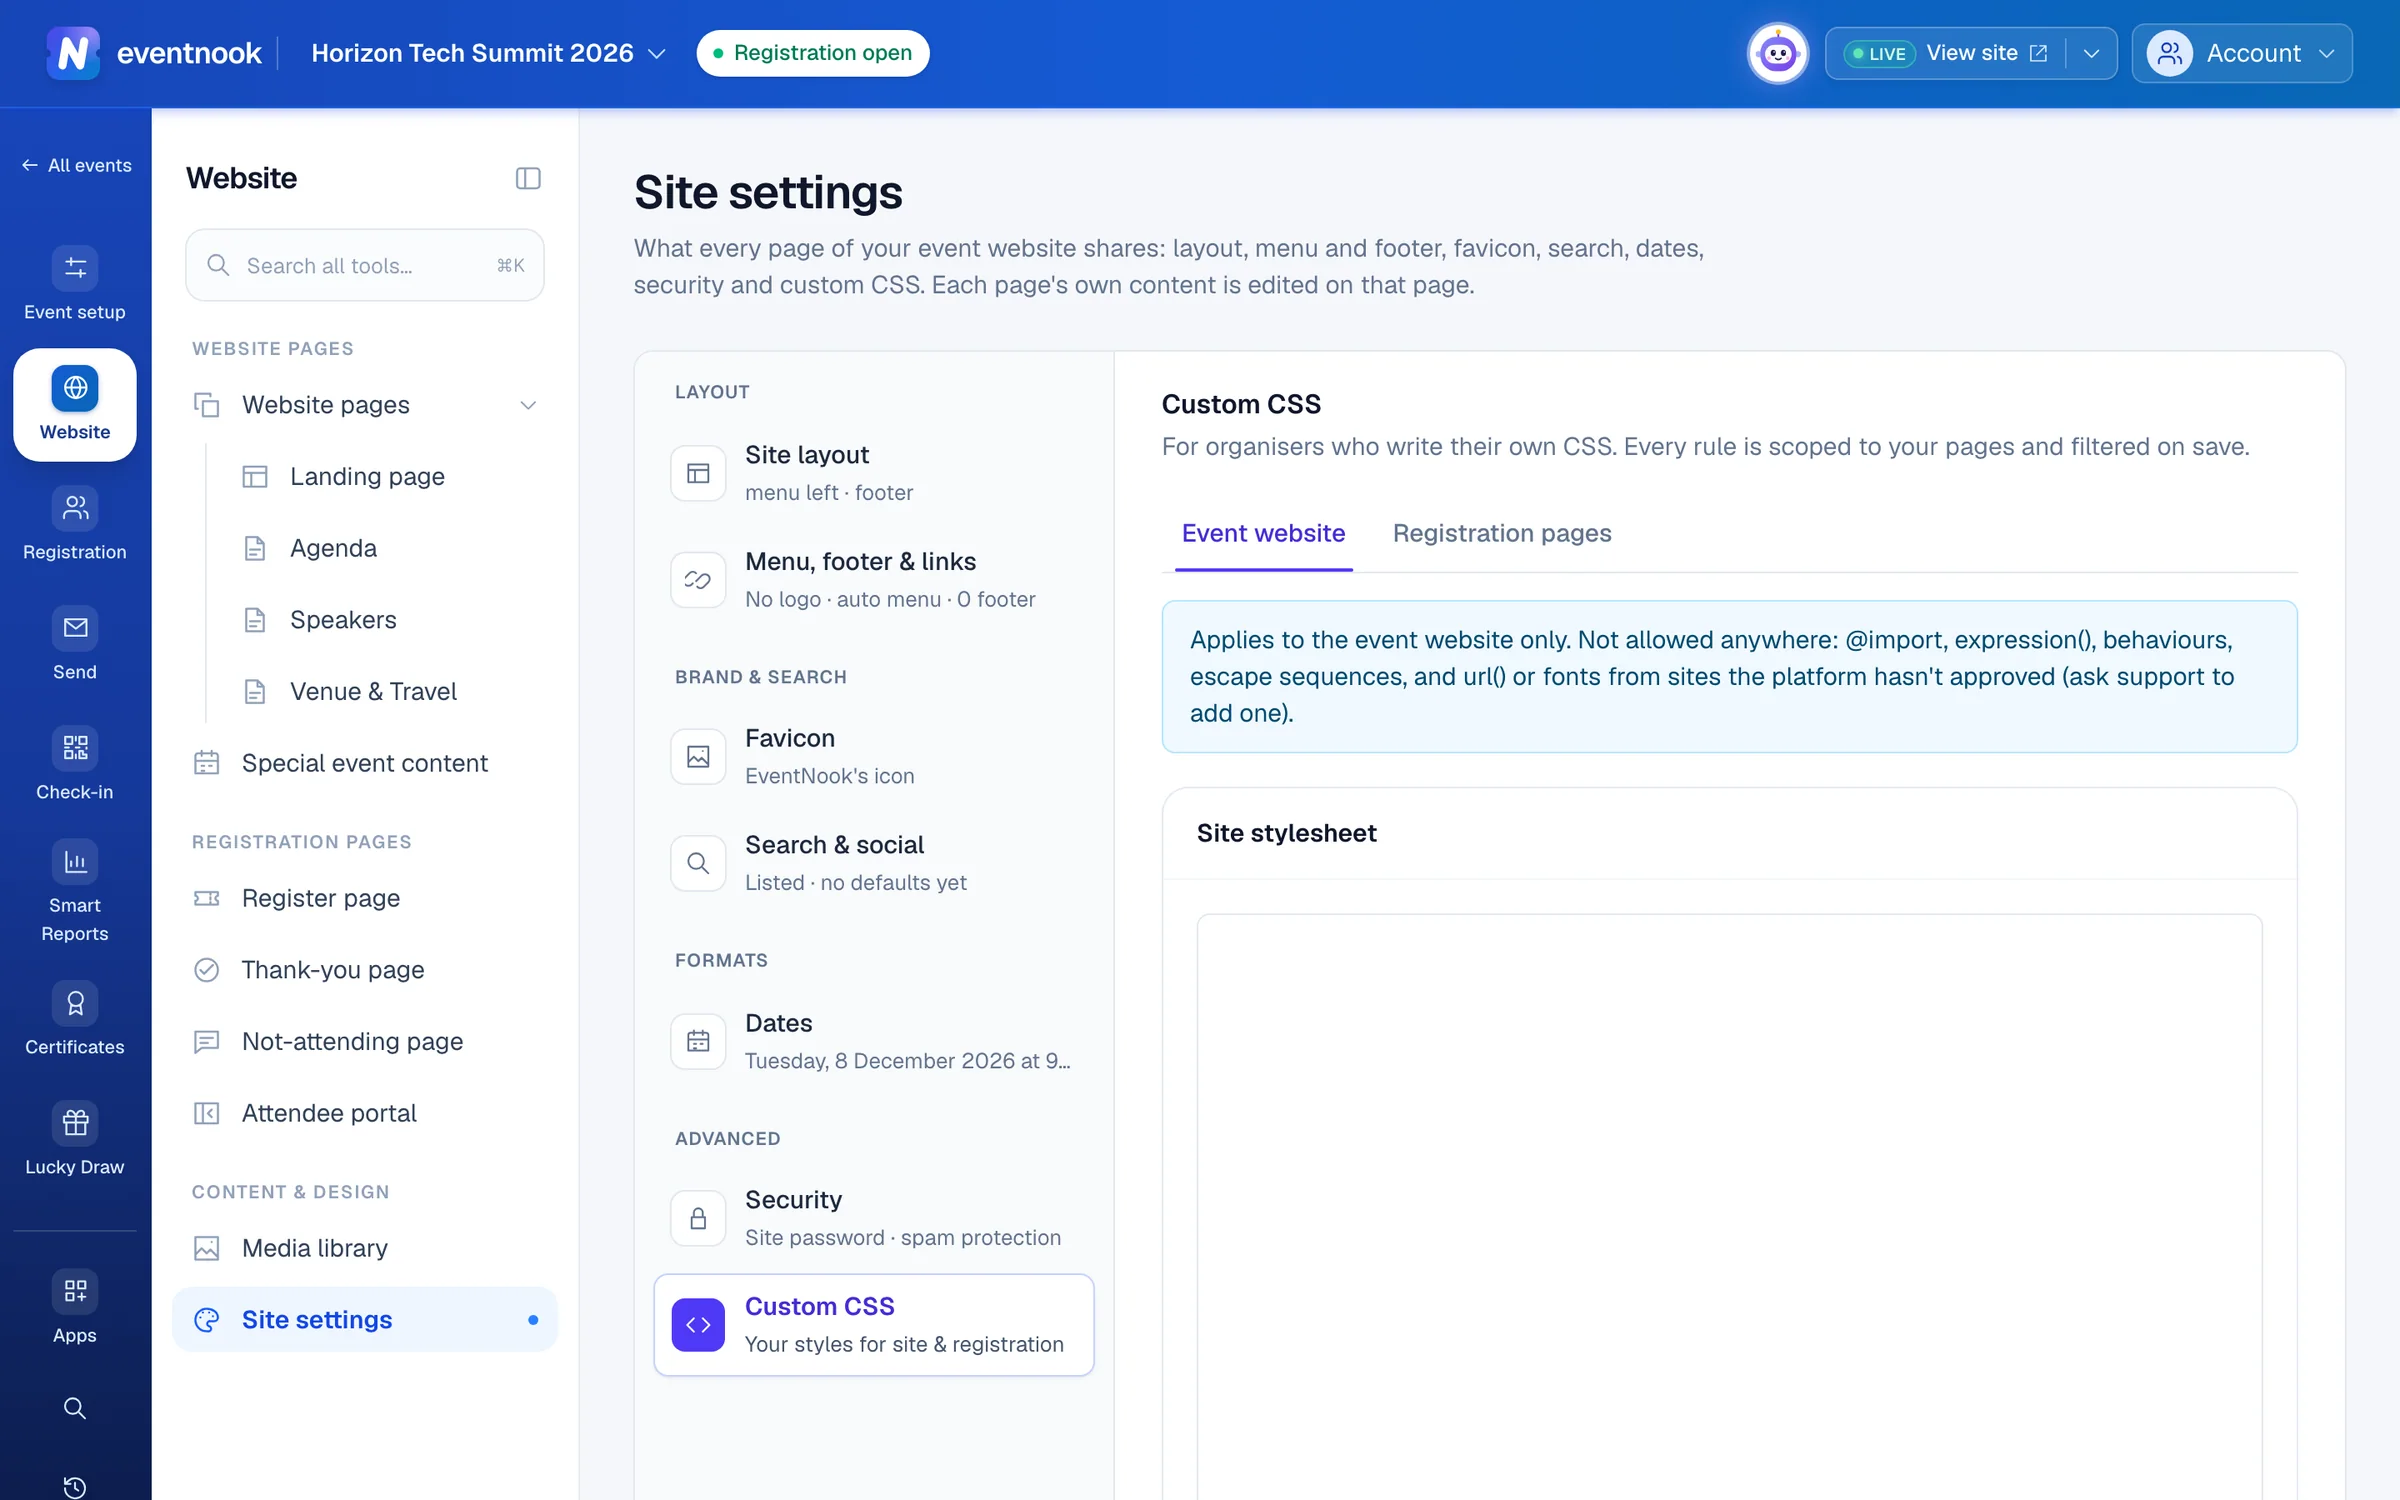
Check Removed when saving afterwards: it lists anything the filter took out, and why. @import, expression() and escape sequences are never allowed, and fixed positioning isn't allowed on the registration pages. Pictures and fonts load only from sites the platform has approved: to use your own, ask EventNook to add it.
If something looks wrong#
- The menu bar has no name or logo. Nothing is chosen under Logo. Choose Text or Image and save.
- A menu item doesn't show on the site. It points at an unpublished, deleted or protected page. The warning in Menu, footer & links says which.
- Guests say the site asks for a code. The site is private. Share the code, or remove it in Security.
- A guest's email is refused as a throwaway inbox. Ask them to use an address they keep, or turn off Refuse disposable email addresses.
- A section doesn't follow my colours. It was designed on its own. Change it in that section.
- My CSS font or picture doesn't load. Its site isn't approved. Ask EventNook to add it.
- Custom CSS can't be saved and mentions your plan. Custom CSS isn't in your plan. Ask EventNook.
- "Someone else saved in the meantime". Copy what you need, click Reload, and make your change again.
Who can do this#
Everyone with access to the event can see these settings. Editors and event admins can save them. Only event admins can change Security.
Related guides
- Build your event's landing pageDesign the home page of your event site by typing on the page or describing it to AI, add sections such as the agenda and speakers, and publish it.
- Add pages, event content and picturesAdd more pages to your event site, keep your agenda, speakers, sponsors, FAQ and documents in one place for every page, and manage the pictures the site uses.
- Share your event's links and embed the registration widgetChange the event's web address, copy its links and QR codes, put the registration widget on your own website, and make private, pre-filled and custom-domain links.
Still stuck? In EventNook, ask HeyNook. It knows the page you're on and your event, and can take you straight to the right setting.