Design the QR code e-ticket
Turn on e-tickets with QR codes, choose what the pass shows and where attendees get it, and check it in the live preview before you save.
Where to find it: Event admin › Event setup › Start here › QR code e-ticket
The e-ticket is the pass attendees show at the door: the event, the attendee, their ticket and a QR code your team scans at check-in. The same design is used on the web pass, in the emails that carry it and when it is printed.
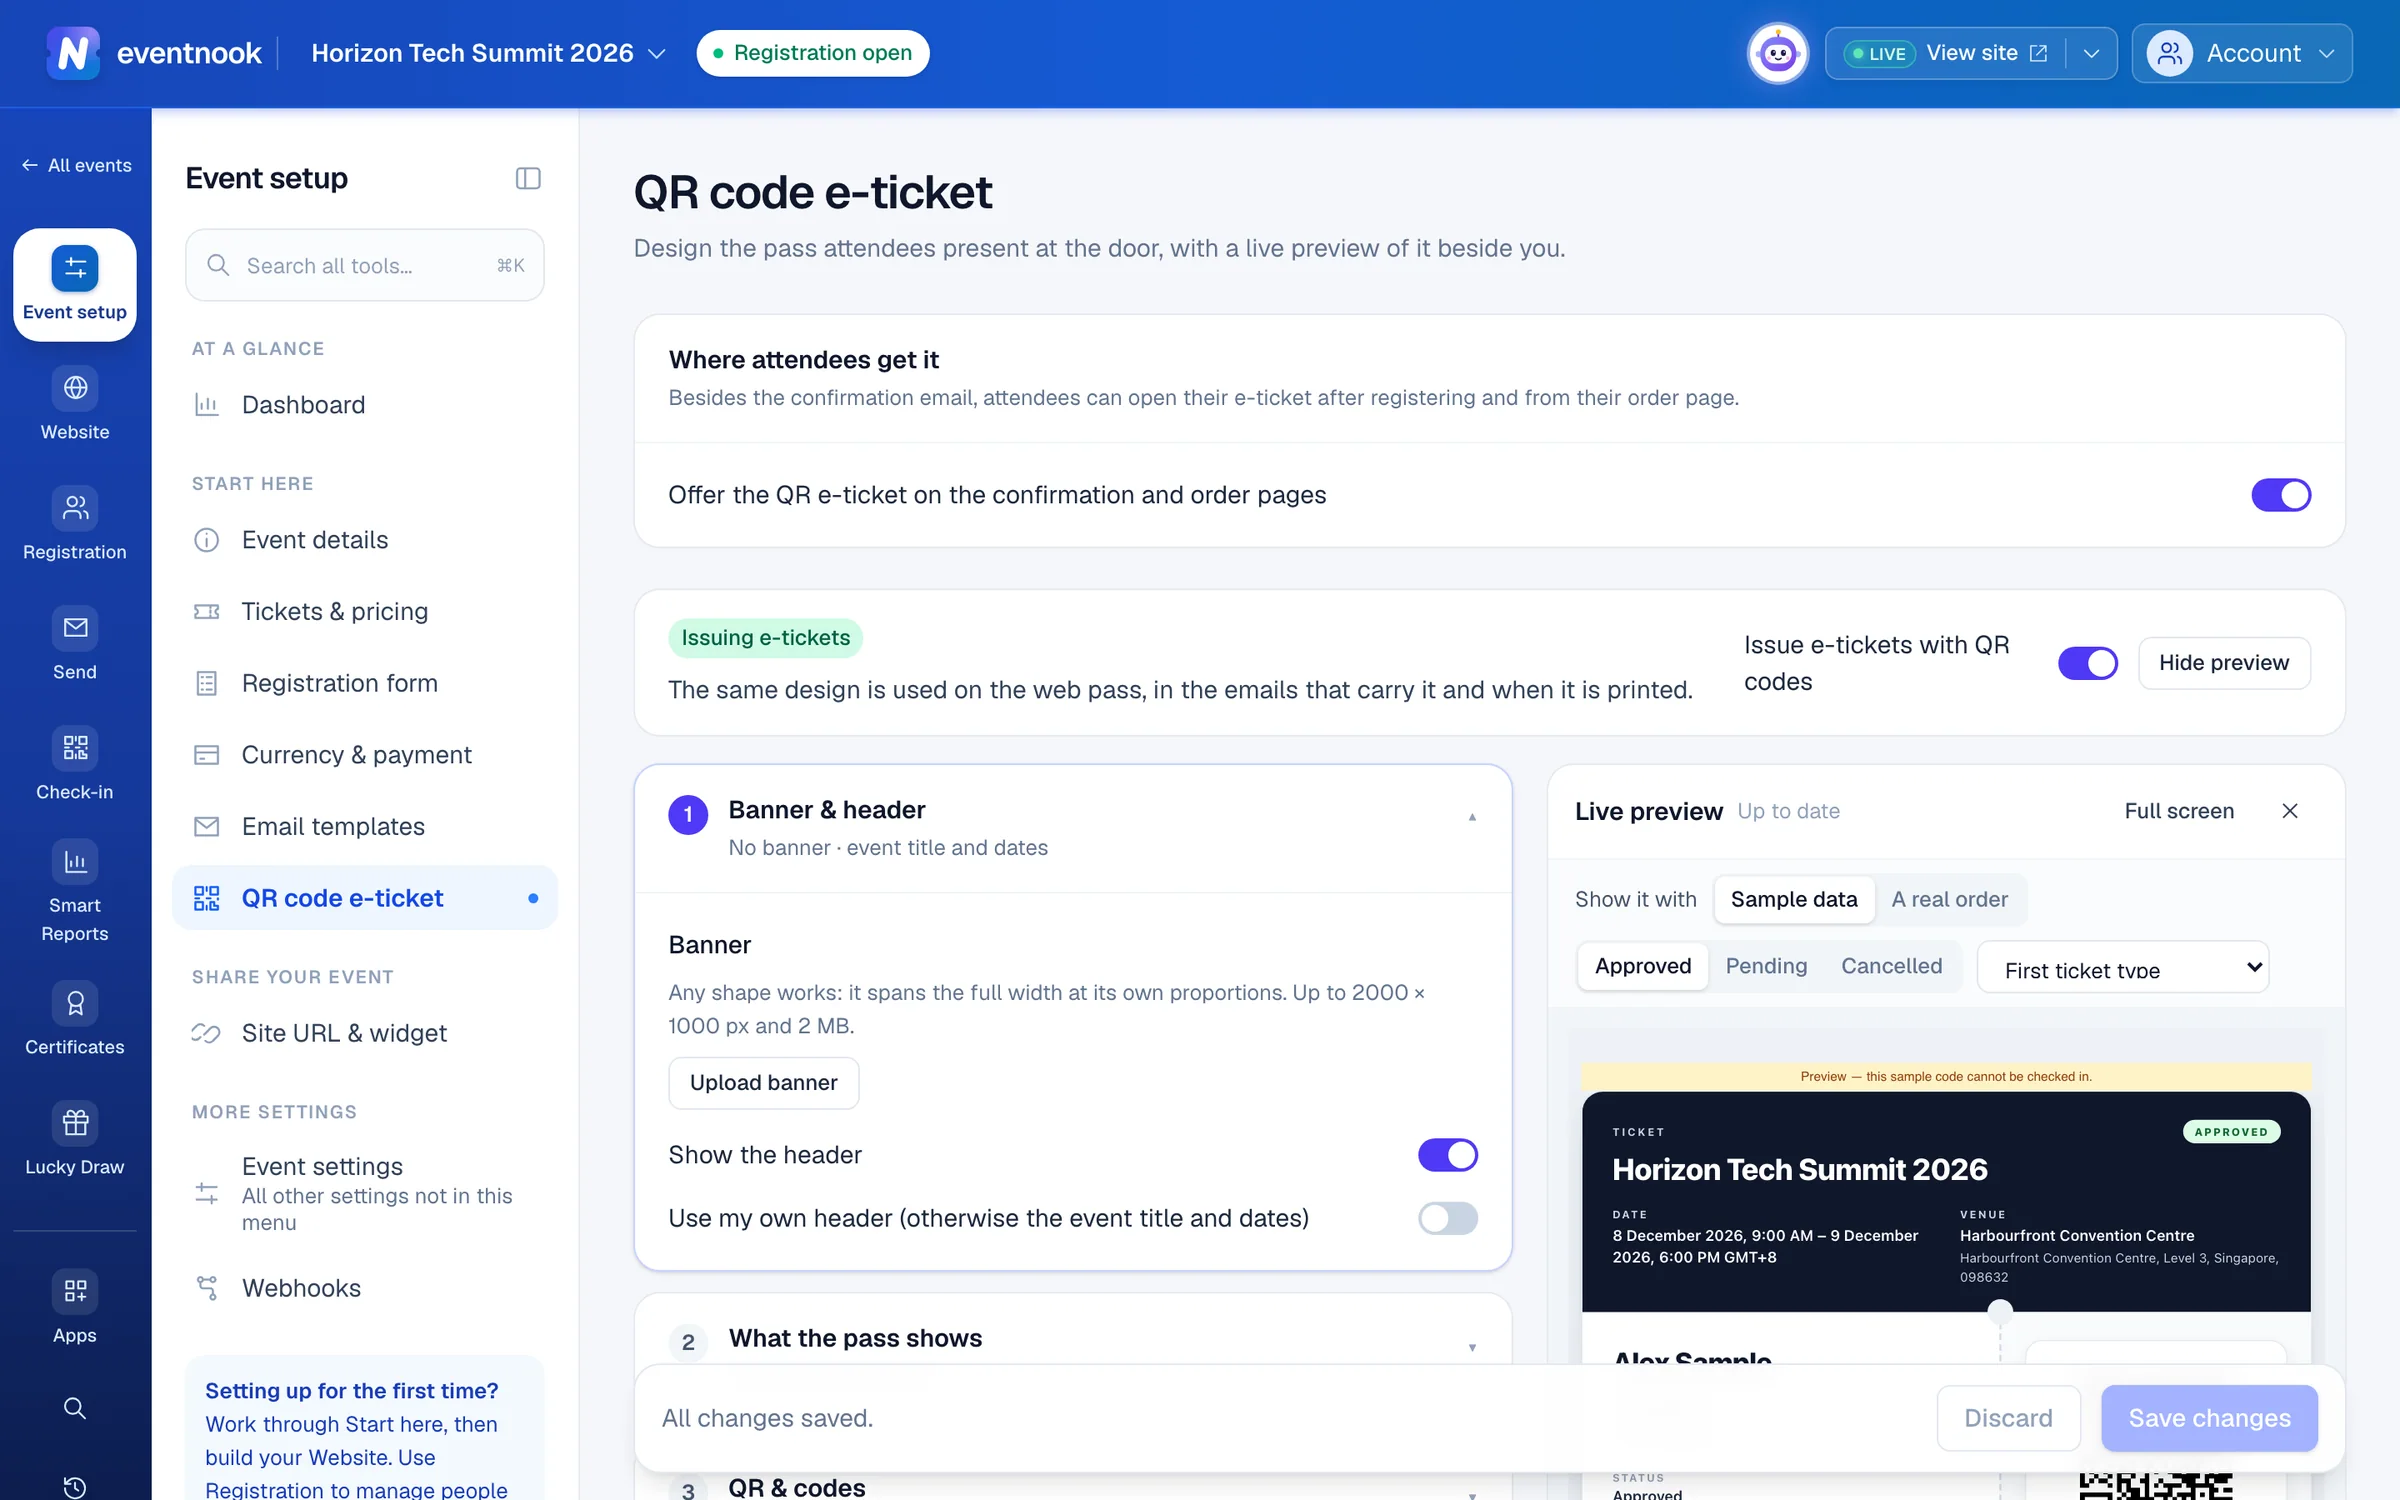
- 1Also offer it after registering and on the order page
- 2Turn e-tickets on for the event
- 3The pass with your unsaved changes
- 4Saves every part of the design together
Turn on e-tickets#
- Open QR code e-ticket.
- Turn on Issue e-tickets with QR codes. The badge changes to Issuing e-tickets.
- Click Save changes in the bar at the bottom.
Under Where attendees get it, Offer the QR e-ticket on the confirmation and order pages also lets attendees open their e-ticket after registering and from their order page, as well as from the confirmation email. That switch saves as soon as you turn it.
If the card says Not offered right now, it names why, such as e-tickets being switched off in the design.
Design the pass#
The parts of the design are on the left; the pass is on the right, in the Live preview. The preview redraws shortly after each change and shows what you haven't saved yet.
| Part | What you set |
|---|---|
| Banner & header | A banner image across the top, any shape up to 2000 × 1000 px and 2 MB, and the header: the event title and dates, your own header, or none. |
| What the pass shows | Which registration answers print on the pass, with the label for each and their order. |
| QR & codes | The check-in QR code, a manual entry code, a secondary QR code, and the invitation or discount code used. |
| Notes & terms | Notes such as what to bring or where to enter, and terms & conditions. Up to 4,000 characters each. |
| Custom template | Your own HTML layout in place of the standard pass. |
| Reference & signing key | The key that signs the check-in QR codes. |
When you're done, click Save changes. Discard throws away everything since the last save. The banner is the exception: it saves as soon as you upload it.
Print an answer on the pass#
- Open What the pass shows.
- Tick the answer, such as the attendee's company.
- Optional: change its label, and use ↑ and ↓ to move it.
- Optional: to print it on some tickets only, open its rule and choose Only selected tickets, then tick the tickets.
- Click Save changes.
A field marked no longer on the form was removed from the registration form. Untick it.
Choose the codes#
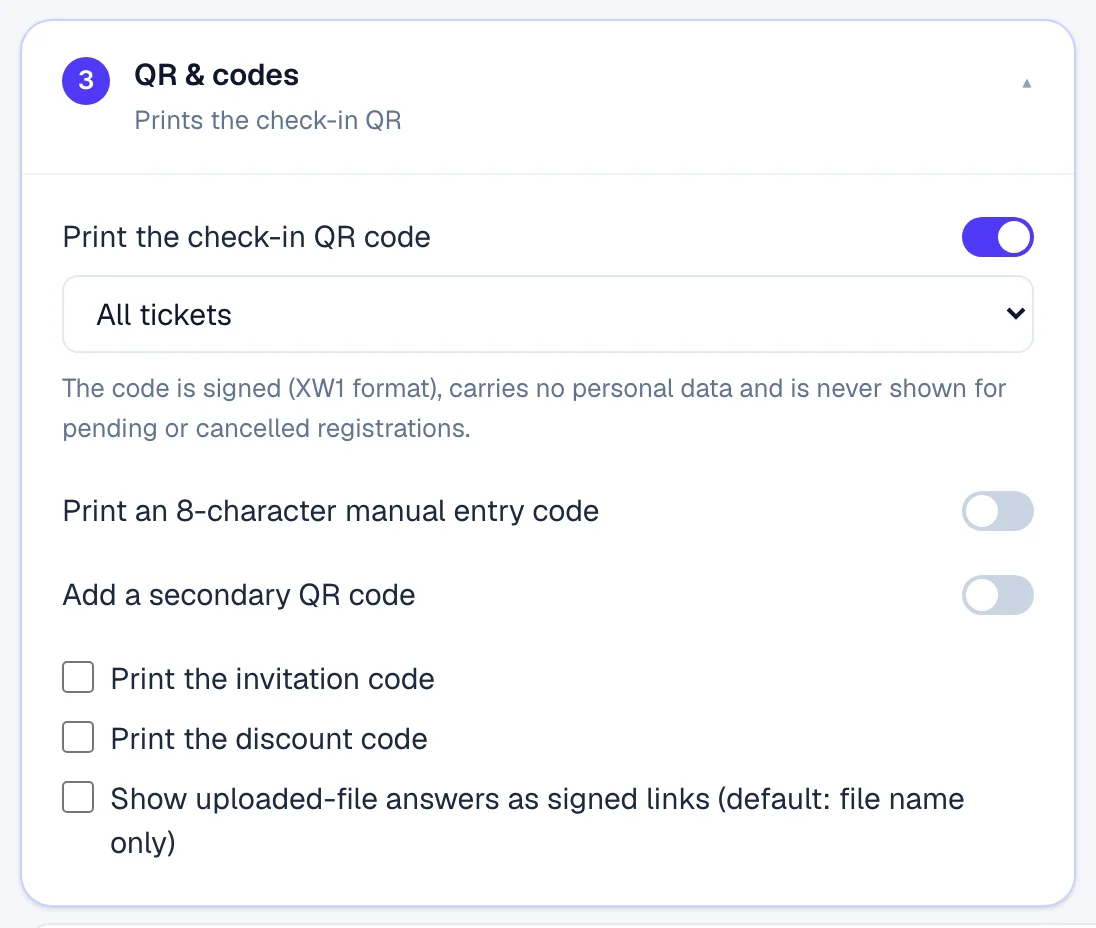
| Setting | What it does |
|---|---|
| Print the check-in QR code | The code scanned at check-in. It carries no personal data and never shows for pending or cancelled registrations. |
| Print an 8-character manual entry code | A short code your team can type when a QR code won't scan. |
| Add a secondary QR code | A second code for Networking / lead capture, a Session code or A link (https), with the Label printed under it. A link must be your event site or a verified domain. |
| Print the invitation code and Print the discount code | The code the buyer used, if any. |
Check the pass before you save#
In the Live preview, use Show it with to switch between Sample data and A real order:
- With Sample data, choose Approved, Pending or Cancelled to see what each attendee gets, and pick a ticket type.
- With A real order, find the order to see the pass its attendee receives.
Click Full screen for a closer look. Hide preview gives the settings the whole width; it stays hidden on this computer until you click Show preview.
The preview never sends anything or issues a code.
Stop a copied ticket#
If someone shares their QR code, reissue that attendee's ticket from their record. The old QR code and ticket link stop working straight away.
Rotate key, under Reference & signing key, doesn't do this. It signs new tickets with a new key, and tickets already sent keep working.
If something looks wrong#
- The preview hasn't changed. It redraws shortly after you stop typing; wait for Up to date beside Live preview. If an error shows instead, fix what it names.
- Save fails on a ticket rule. A field is set to Only selected tickets with no ticket ticked.
- "The design changed since you opened it." Someone else saved. Click Reload the latest version; your unsaved changes are lost, so make them again.
- The secondary QR link is refused. Use your event site's address or a verified domain.
- Attendees don't see the e-ticket after registering. Check that Issue e-tickets with QR codes is on and saved, and that Offer the QR e-ticket on the confirmation and order pages is on.
Who can do this#
Everyone with access to the event's settings can see the design and preview it. Event Admin and Event Editor can change and save it. Only an Event Admin, or the organisation's Owner or Admin, can rotate the signing key. Previewing a real order needs access to orders.
For attendees#
What attendees see, and how they open their pass, is in Your e-ticket and QR code.
Related guides
- Your e-ticket and QR codeFind your e-ticket in your email or in My Order, print or save it, and show its QR code at check-in.
- Change the emails your event sendsWrite the confirmation and other emails your event sends by itself, turn them on or off, choose who gets copies and check whether an email arrived.
- Change the wording people seeReword or translate the buttons, messages and labels of the event site, registration, emails and e-ticket, and set the date and time formats.
- Set when and how people registerOpen and close registration, cap the event, screen free registrations, set the checkout time limit, and decide what registrants and your staff may change afterwards.
Still stuck? In EventNook, ask HeyNook. It knows the page you're on and your event, and can take you straight to the right setting.