Email your attendees or buyers
Write one email to your attendees or the people who placed orders, choose exactly who gets it, and send it now or at a time you choose.
Where to find it: Event admin › Send › Email attendees
Use these pages for one-off emails, such as a reminder the day before or a change of room. Write the email once, choose who gets it, and send it now or schedule it. The confirmation and other emails your event sends by itself are set up elsewhere: see Change the emails your event sends.
There are two pages under Send:
| Page | Who gets the email |
|---|---|
| Email attendees | Each attendee, at their own address. Someone holding several tickets gets one email, unless you turn on One email per ticket. |
| Email order contacts | The person who placed each order. Each buyer address gets one email, however many orders it has. |
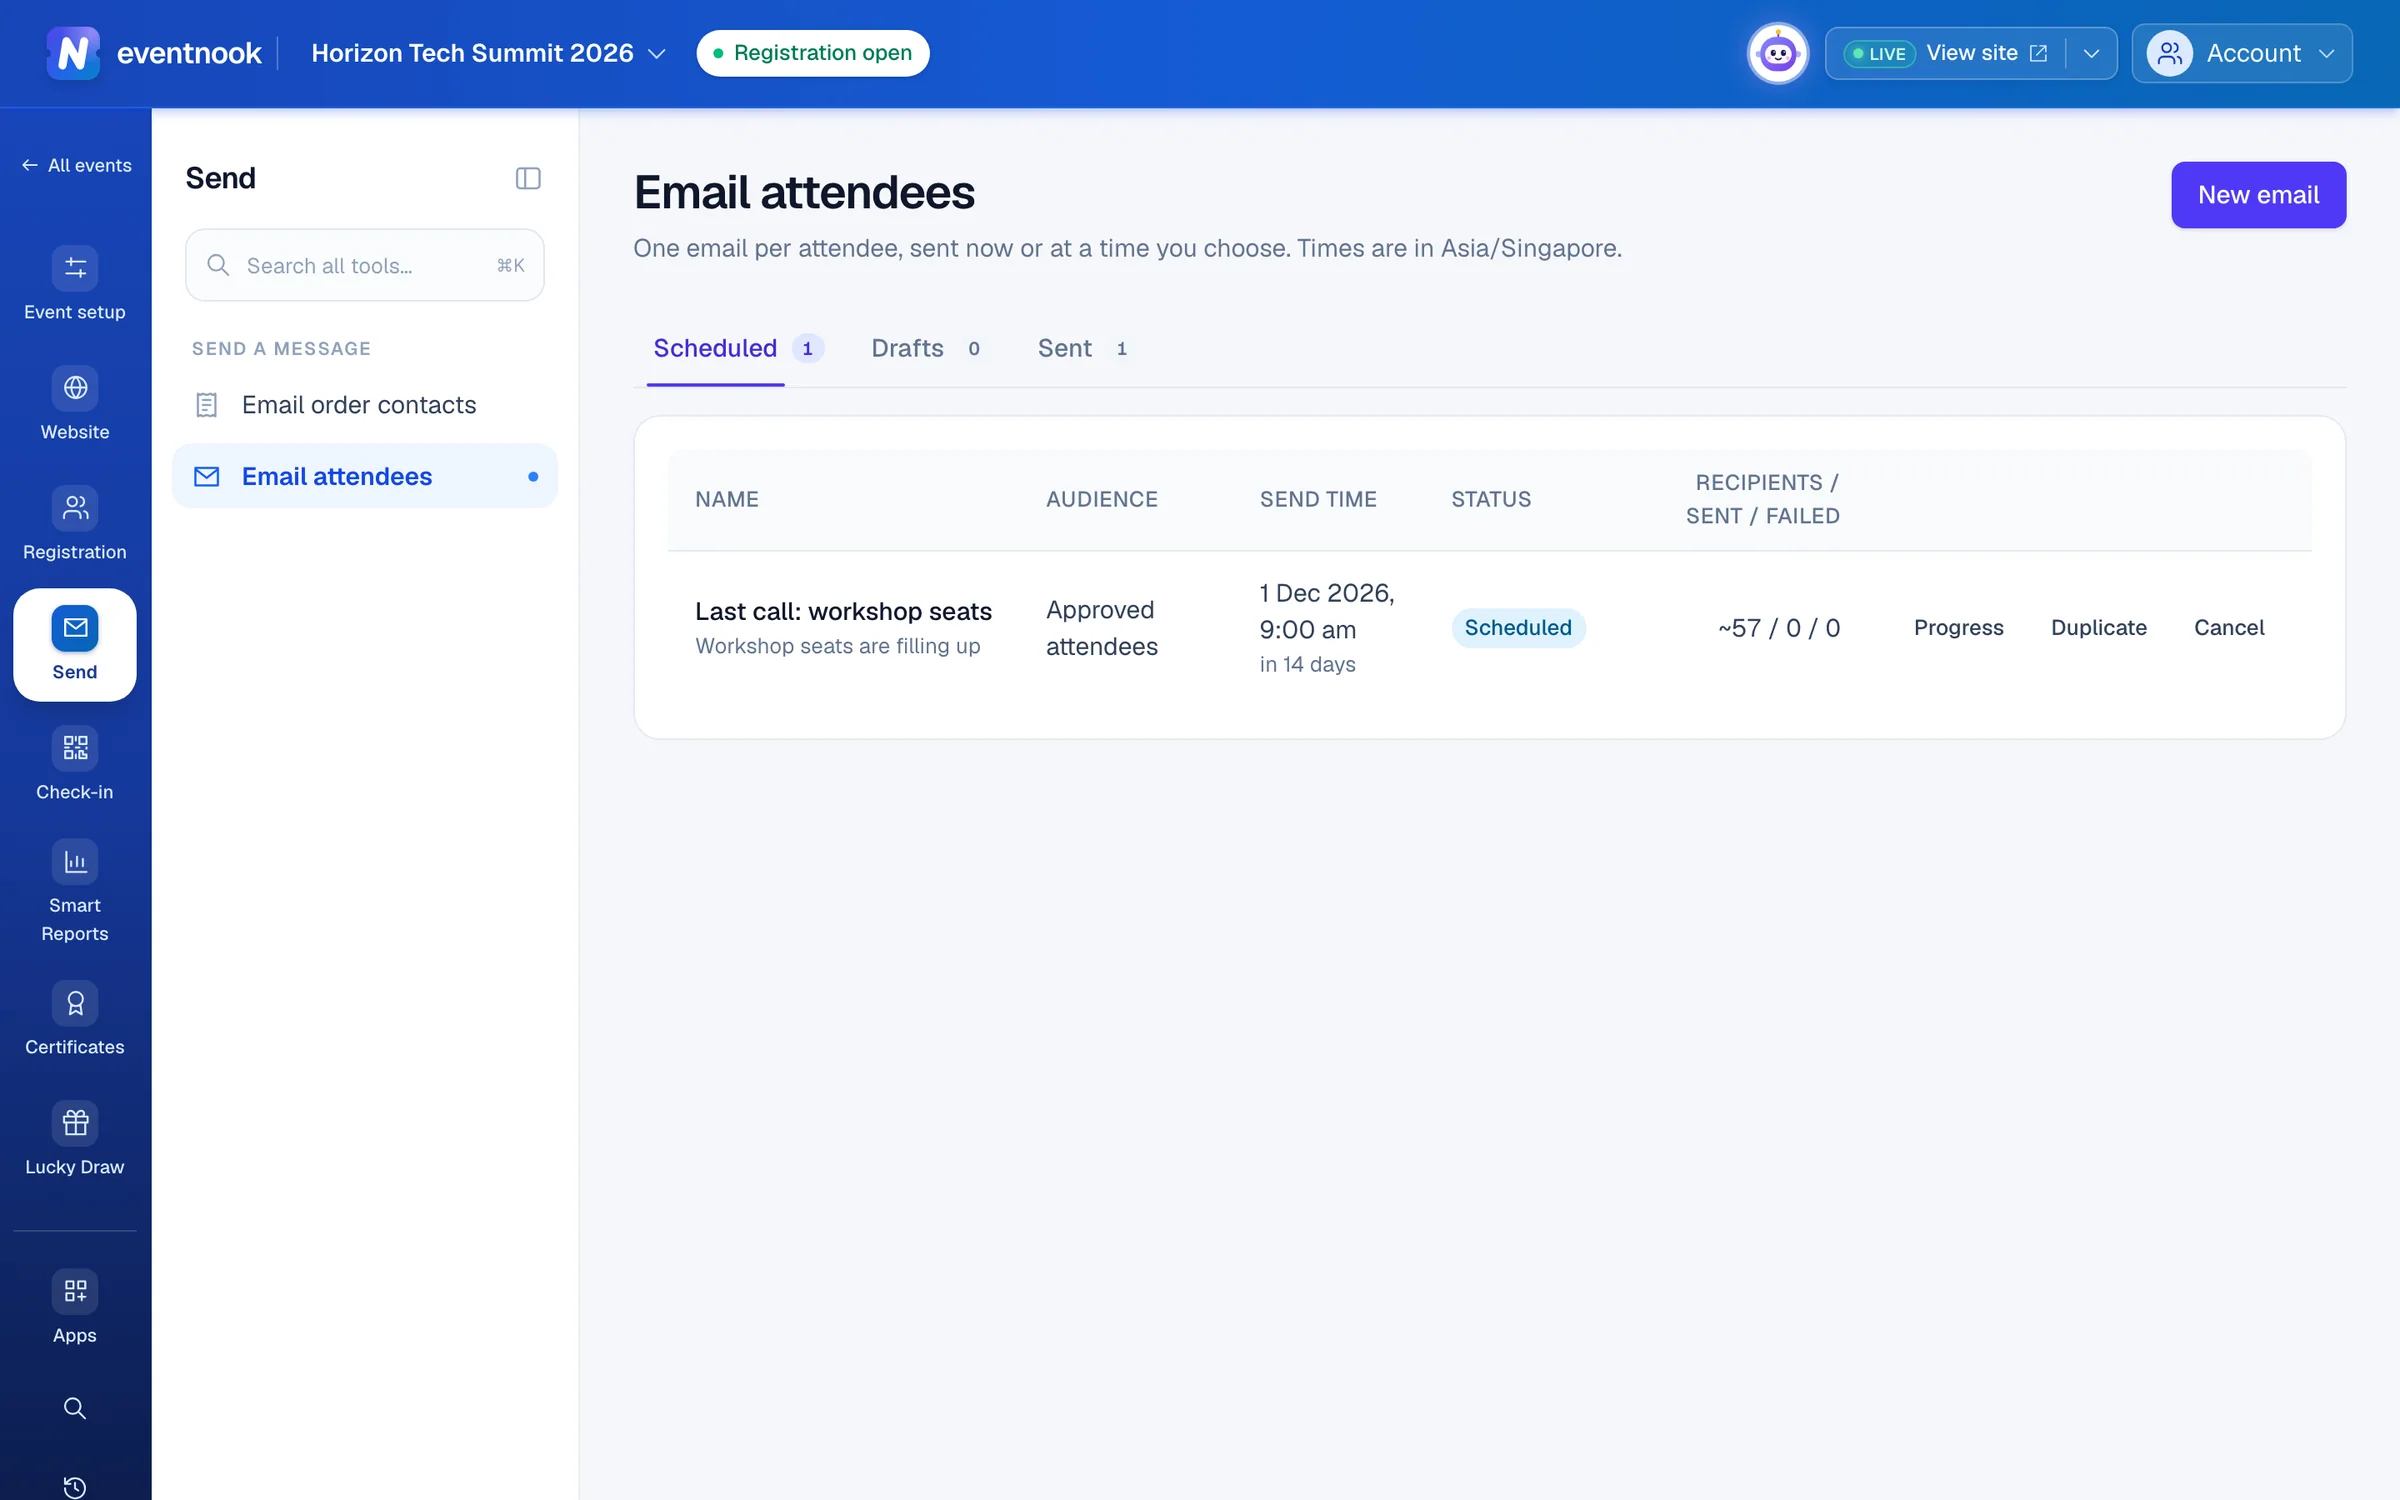
- 1Write a new email
- 2Emails waiting to go, your drafts, and what was sent
Write the email#
- Open Send › Email attendees or Send › Email order contacts and click New email.
- Optional: give the email a name at the top. Recipients don't see it.
- Type the Subject and your message on the email. Or ask the Copilot, for example "remind them the event is tomorrow and what to bring".
- Use Sections to move, remove or add blocks, and Settings for Who it's from, Look & feel and Attachments (up to 10 files, 10 MB in total).
- Click Preview to check it with sample details or A real order, and Send test to send it to yourself.
- Click Save changes.
The email starts from the design of your ticket email (for attendees) or confirmation email (for buyers), but changes here apply only to this email. Once the Copilot has written in an email, it shows AI-assisted, so your team can review it before it goes.
Choose who gets it and send it#
- Click Send….
- Under Who gets it, tick the statuses: Attendee status or Order status, such as Approved and Pending.
- For attendees, choose Check-in: Everyone, Checked in or Not checked in (no-shows).
- Optional: tick Ticket types to send to some tickets only. With none ticked, all ticket types get it.
- Check the count: it shows how many emails will actually go out.
- Under When to send, choose Send now, or Schedule and pick a Date and time at least 10 minutes ahead, in the event's time zone.
- Click Send now (or Schedule) and confirm.
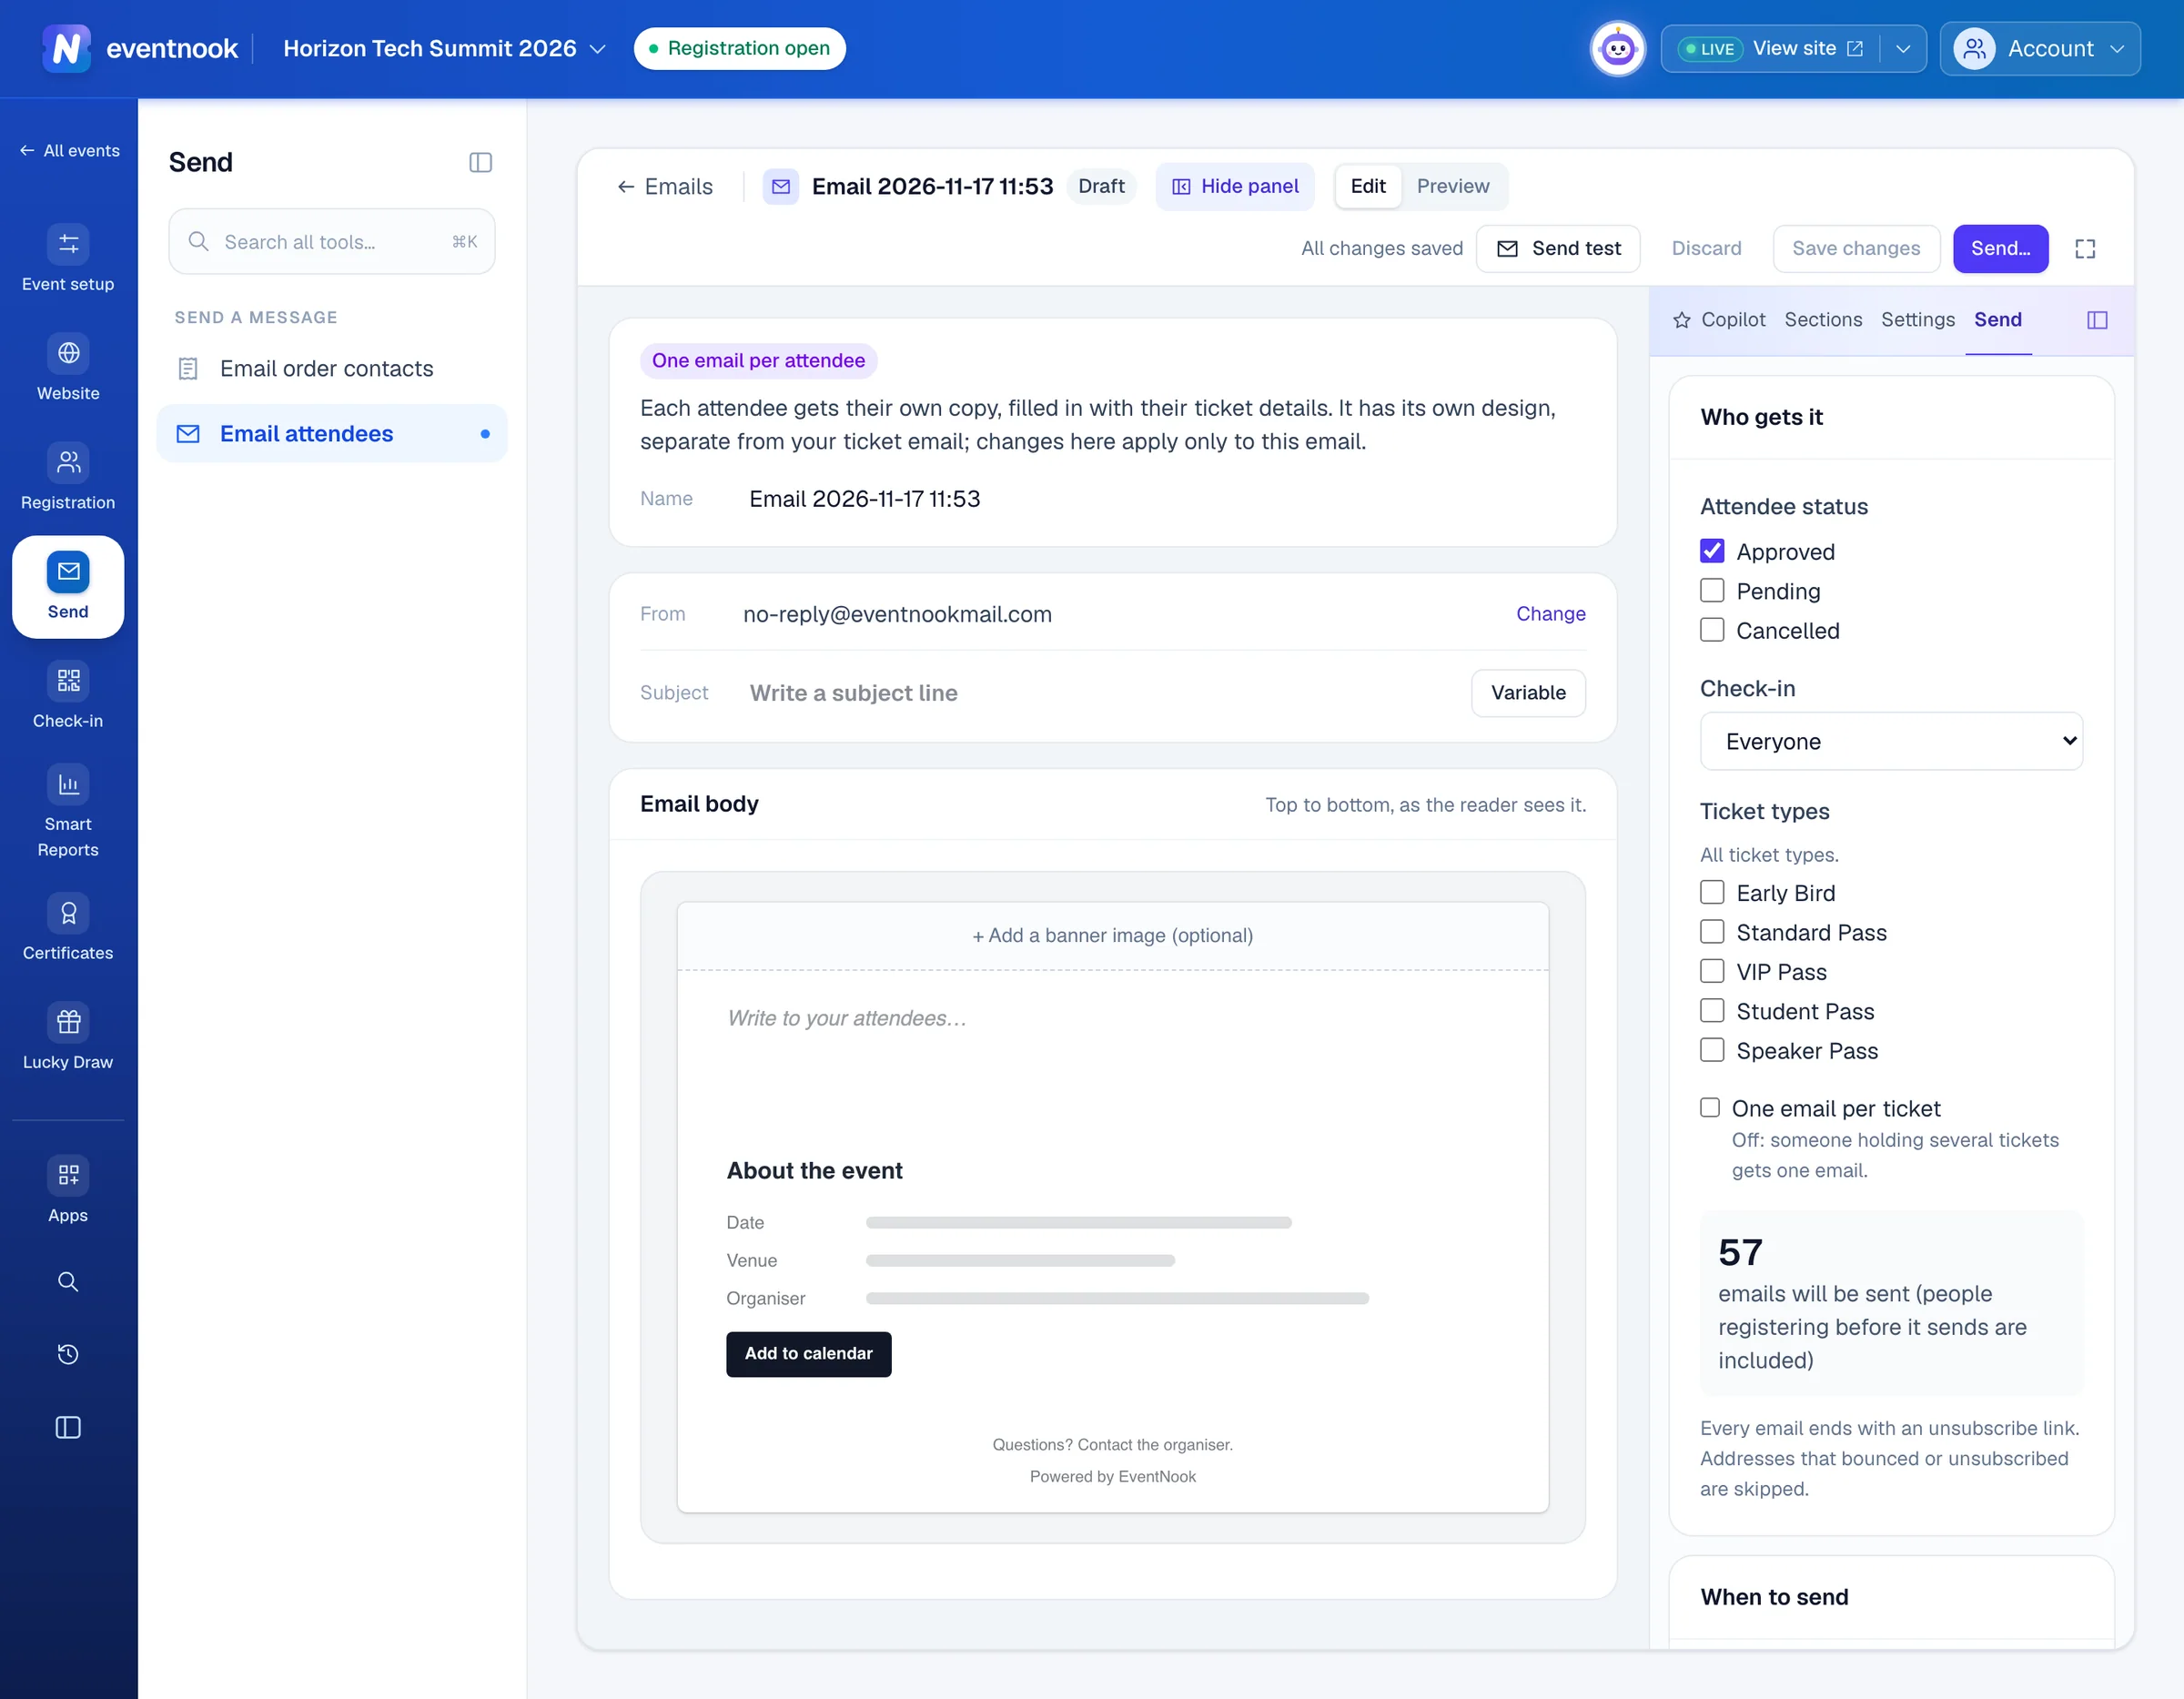
- 1Choose by status, check-in and ticket type
- 2Send now, or at a time you choose
For a scheduled email, people who register before it sends are included. For a large audience, Spread sending sends it over 1 to 24 hours instead of as fast as possible. Every email ends with an unsubscribe link.
Change or stop an email#
- A scheduled email can be edited, rescheduled or moved back to drafts with Unschedule until 15 minutes before it sends. After that it shows Locked, and you can only Cancel it from the list.
- An email that's sending can be stopped: click Progress on its row, then Stop sending. Emails already sent can't be recalled.
- Duplicate on a row copies an email, so you can send it again to other people.
When an email has gone, click Report on its row to see how many were sent, and why the rest weren't.
If something looks wrong#
- The count is lower than your registrations. People sharing an address get one email, and people with no address, an invalid one, or who bounced or unsubscribed are left out. The breakdown is under the count.
- "Nobody matches this audience." No one has the statuses, check-in or tickets you ticked. Change the choices under Who gets it.
- The email shows Delayed. Sending hasn't started yet. It goes as soon as it does. Nobody is ever sent the same email twice, even if sending is interrupted.
- The report says "Bounced or reported spam before". That address is on your suppression list. See Make sure your emails arrive.
Who can do this#
Everyone with access to the event's messages can see the emails and their reports. Writing, testing, scheduling and cancelling need permission to send messages, which editors and event admins have.
Related guides
- Change the emails your event sendsWrite the confirmation and other emails your event sends by itself, turn them on or off, choose who gets copies and check whether an email arrived.
- Make sure your emails arriveChoose who your event's emails come from, check your organisation's bounce and spam rates and sending domains, and find out why someone isn't getting your emails.
- Find attendees and change their detailsSearch and filter the attendee list, open anyone's details beside it, correct or cancel one attendee, find duplicates, count attendees in a pivot and export the list.
Still stuck? In EventNook, ask HeyNook. It knows the page you're on and your event, and can take you straight to the right setting.