Invite guests with invitation codes
Make tickets invitation-only, give each guest a code or a personal link, import a guest list and see who has registered.
Where to find it: Event admin › Event setup › More settings › Event settings › Invitation codes
Invitation codes unlock invitation-only tickets. A ticket that requires an invitation code isn't listed on the registration page until someone enters a valid code for it. Use them for speakers, VIP guests or a private event.
You give each guest their code or their personal link yourself, by email or any other way. EventNook keeps track of who has registered with each one.
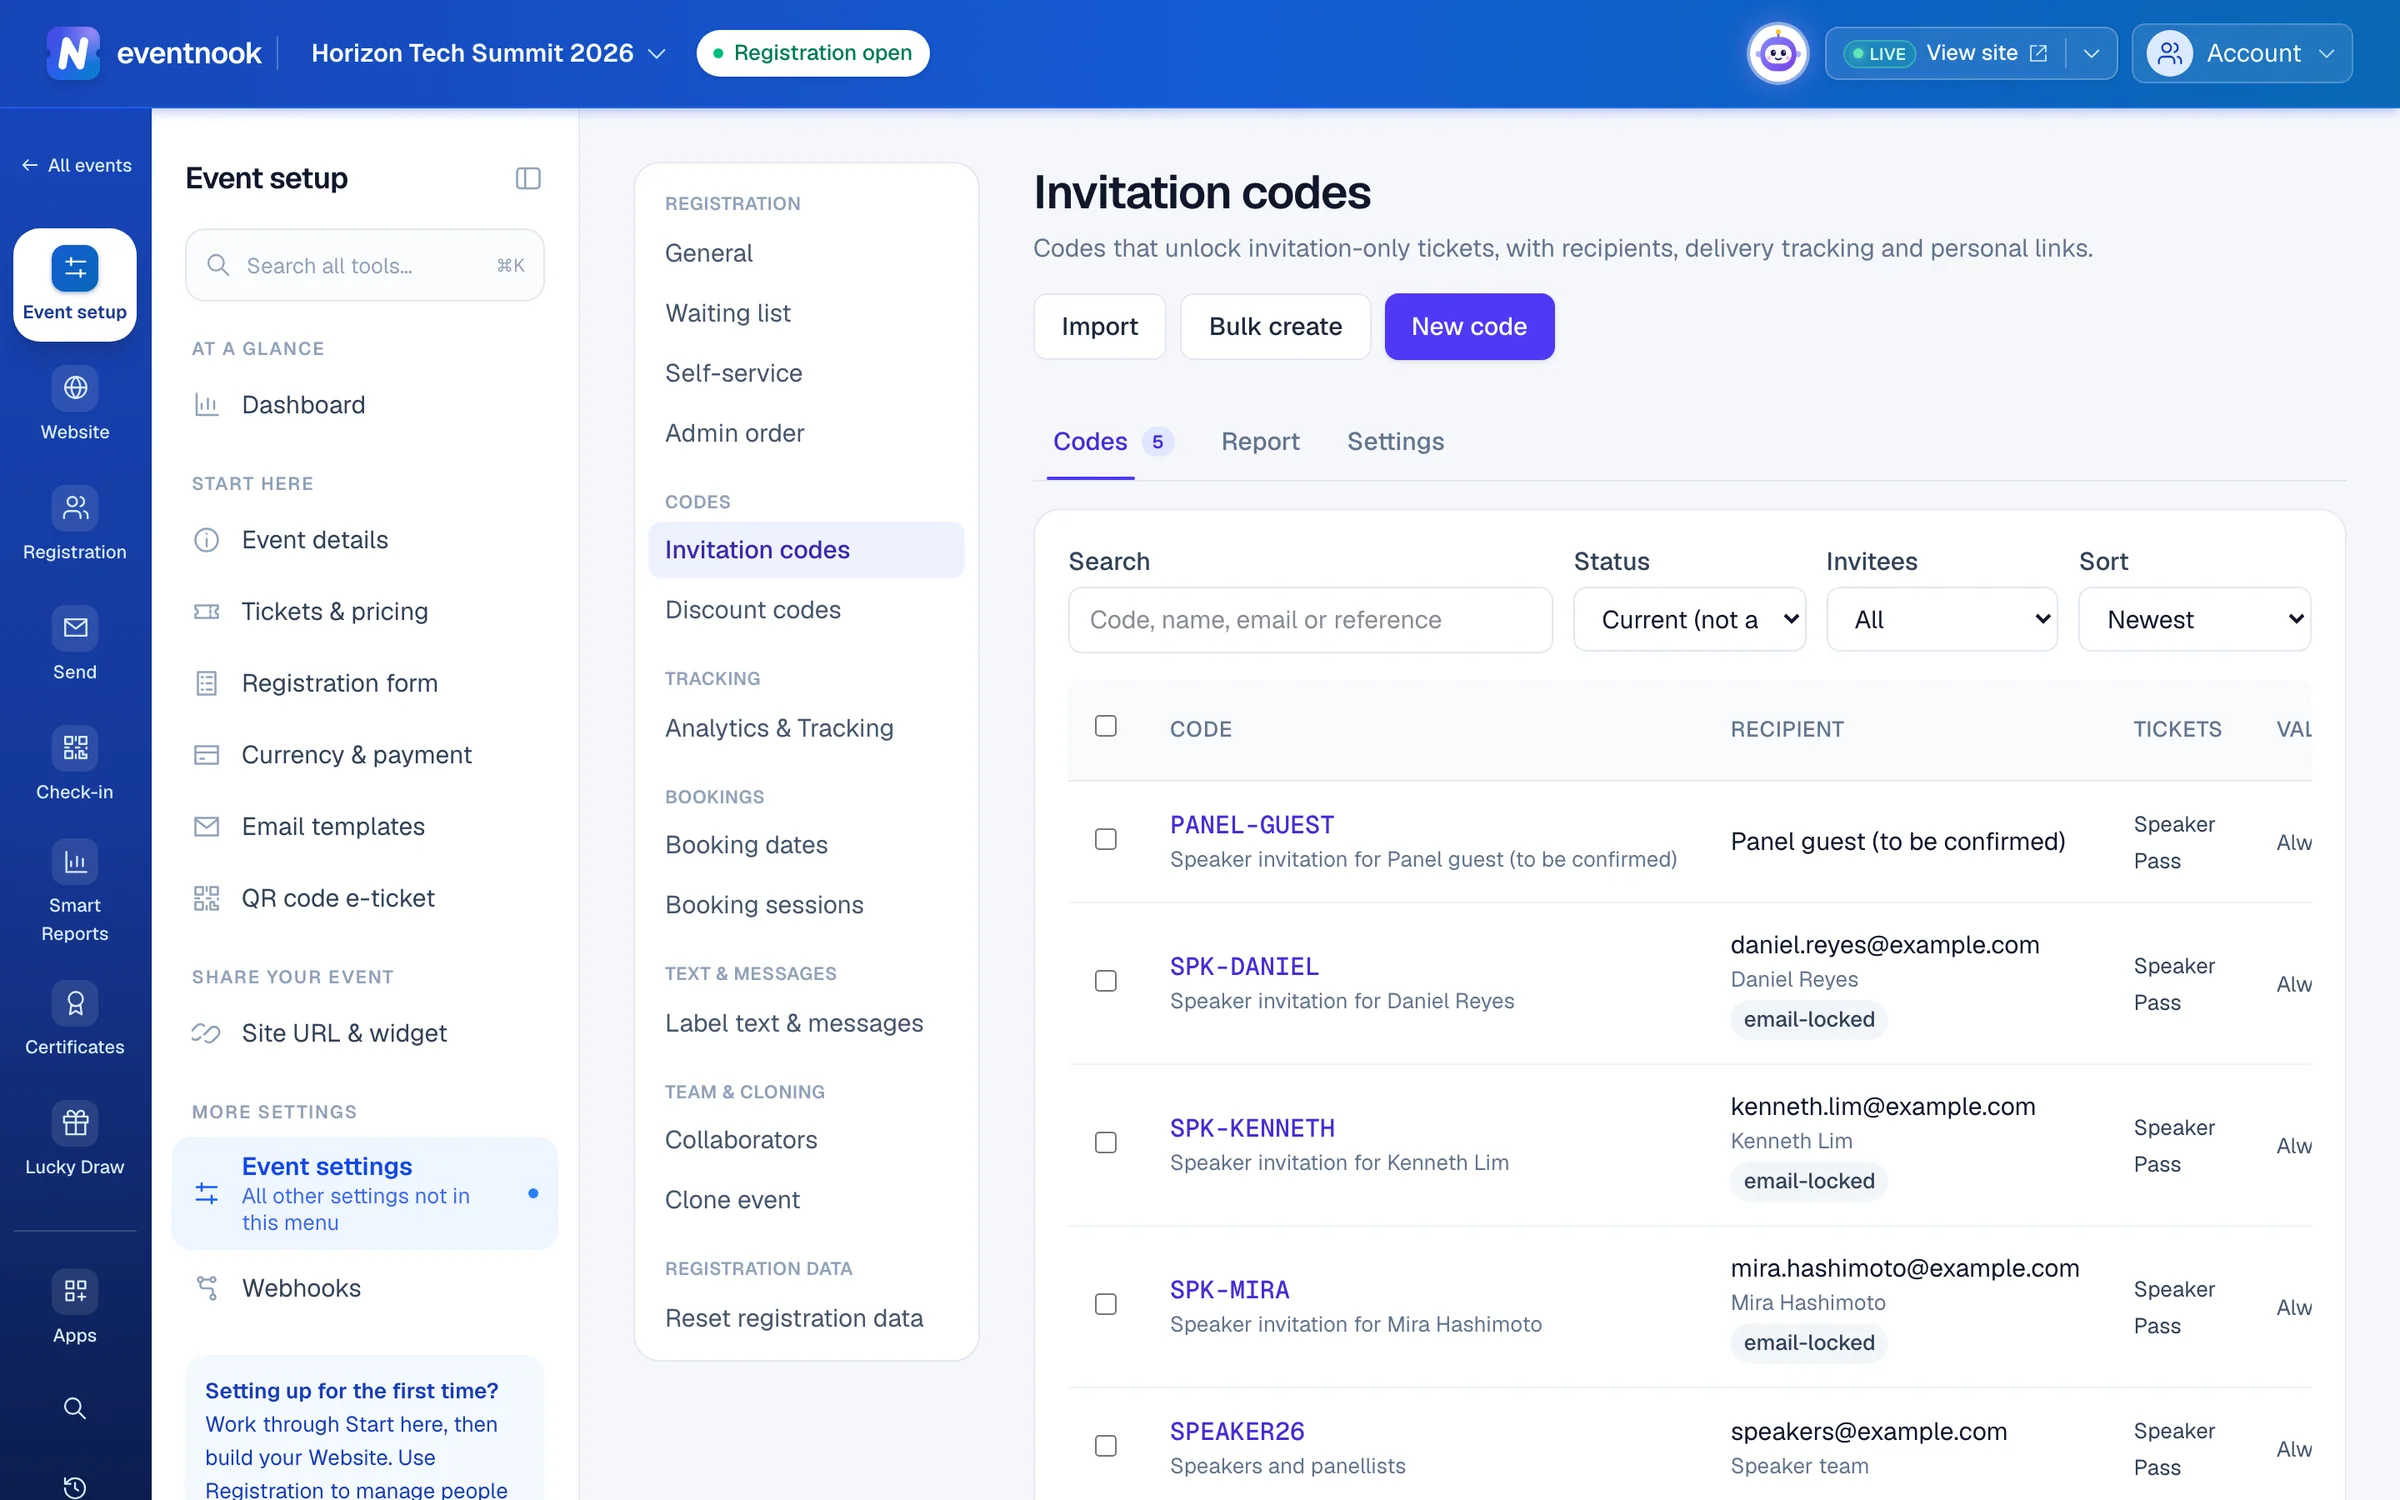
- 1A code for one guest, or one a group shares
- 2Create codes from a guest list
- 3Find guests who haven't registered yet
- 4Choose which tickets need a code
Make tickets invitation-only#
- Open Invitation codes and click the Settings tab.
- Under Requirement, choose Selected tickets require an invitation code.
- Under Invite-only tickets, tick each ticket that needs a code.
- Click Save requirement.
Other tickets stay open to everyone, and one order can have both. You can also tick Requires an invitation code in a ticket's Protect registration settings, on Tickets & pricing.
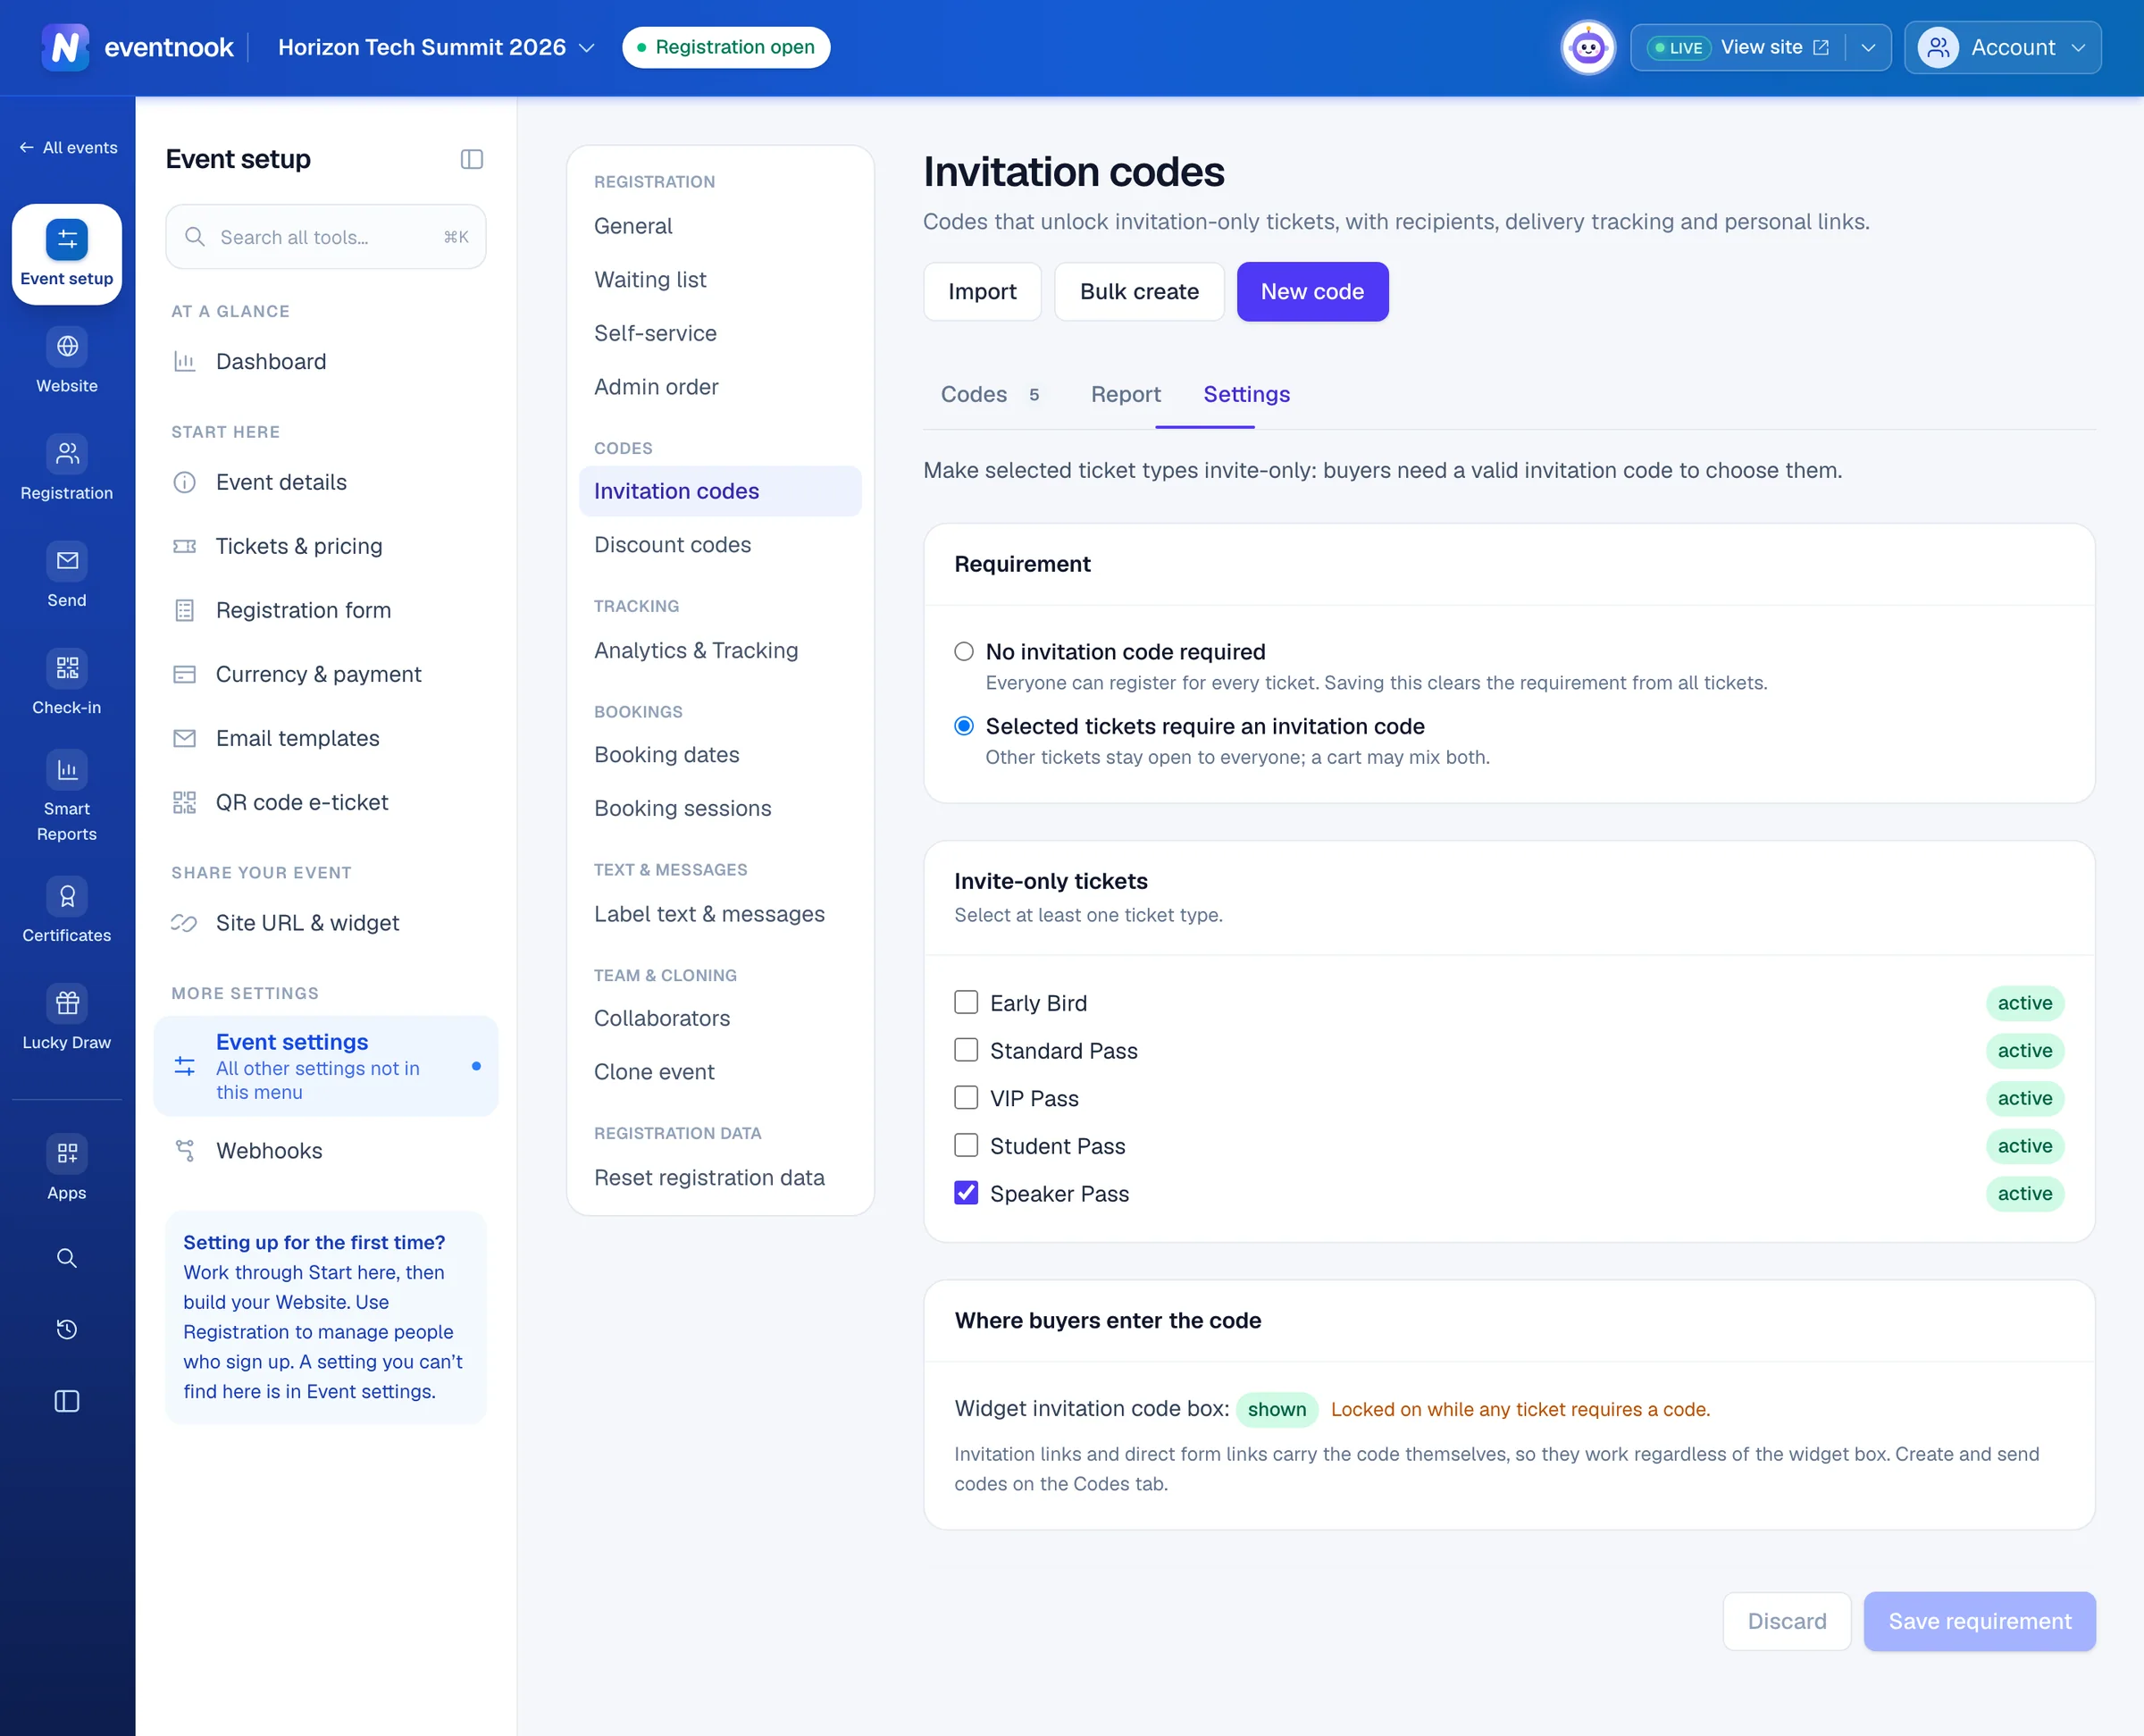
- 1Make some tickets invitation-only
- 2Whether the code box shows on the registration page
- 3Saves the requirement and the tickets it covers
Where buyers enter the code shows whether the invitation code box is on the registration page. It stays on while any ticket requires a code. Personal links carry the code themselves, so they work either way.
Choosing No invitation code required and saving takes the requirement off every ticket.
Create a code for one guest#
- Click New code.
- Type the Code: letters, numbers,
-and_, or an email address. Codes aren't case-sensitive. - Optional: under Recipient, type the guest's Email. If the code is an email address, it is used for you.
- Optional: tick Only this email address can use the code. The registration is then refused unless that address is the order contact's or an attendee's.
- Under Tickets this code unlocks, keep Unlocks all invitation-only tickets, or untick it and choose tickets.
- Set the Ticket capacity: how many tickets the code can unlock in total, across all orders. It starts at 1. Leave it empty for no limit.
- Optional: set when it Expires. Leave it empty for no end date.
- Click Create code. It works straight away, unless you turned Active off.
To give a company a block of places, make one code with a Ticket capacity the size of the block.
| More settings | What it does |
|---|---|
| Starts | The code works from this time. Empty means straight away. |
| Orders per buyer | How many orders one buyer can place with the code, matched on their email. Default: 1. Clear it for no limit. |
| Min quantity per ticket line and Max quantity per ticket line | How many of a ticket one order can take with the code. |
| Internal note | Only organisers see it. |
Send a guest their personal link#
- Click the code in the list. Its quick view opens beside the list.
- Click Copy link and paste the link into your message to the guest.
The link opens the registration page with the invitation applied, and fills in the guest's email address if the code has one. It doesn't show the code itself.
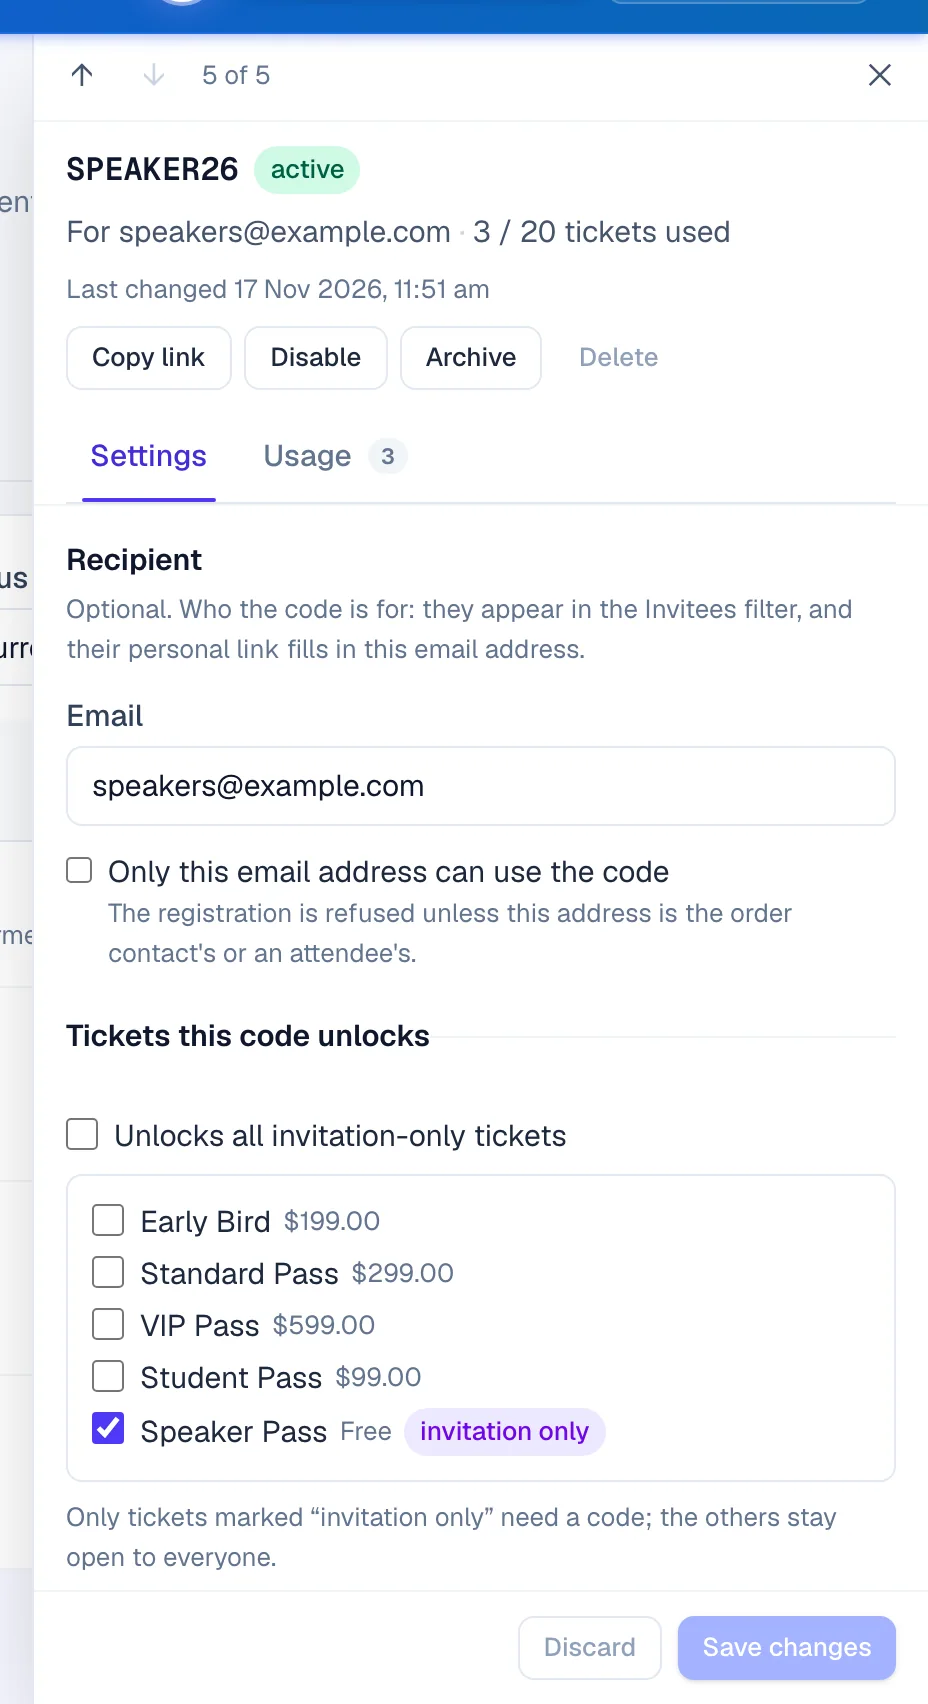
- 1The guest's personal registration link
- 2Who registered with this code
- 3Saves changes to this code
If a link was forwarded to the wrong person, open the code, click the Usage tab, then Open the full usage page, and click Revoke link. The old link stops working and a new one appears; the code itself keeps working.
Import a guest list#
- Click Import.
- Upload a CSV or Excel file under Upload CSV / XLSX, or paste the rows under Paste rows. The first row must name the columns, such as Name, Email, Code.
- Click Review columns. Check which column goes where; choose Ignore this column for the rest. EventNook remembers your choices for the next import.
- Click Import … rows. The button shows how many rows it found.
You can import up to 5,000 rows at a time. Rows that can't be imported are listed with the reason and skipped; click Download failures (CSV) to fix and import them again. A row with no code gets a code made for it.
| Column | What it sets |
|---|---|
| Code (generated when blank) | The guest's code. |
| Recipient name and Recipient email | Who the code is for. |
| Reference | Your own reference, such as a guest-list number. |
| Ticket capacity | How many tickets the code unlocks. |
| Expires at (date) or Expires in N days | When the code stops working. |
| Note | The internal note. |
To make many codes without a guest list, click Bulk create: paste your own codes or generate random ones, up to 500 at a time, all with the same settings. If your plan doesn't include bulk creation, the dialog says so; ask EventNook to add it.
See who has registered#
- In the list, set Invitees to Not registered yet or Registered.
- Tickets used shows tickets used against the ticket capacity, such as
3 / 10.(+2 held)after it means guests are checking out with the code right now. - Click a code and open Usage for each registration with its order number, and the tickets left.
- The Report tab totals every code and lists first and last use. Click Export CSV to download it.
Change, stop or remove codes#
- Change one: click it, change its settings in the quick view and click Save changes. The ↑ and ↓ at the top move to the next code. A code can't be renamed: archive it and create a new one.
- Change several: tick them, click Edit, tick each setting to change, and click Save to … codes. What you don't tick stays as it is on each code. A code the change doesn't fit is skipped and named.
- Give more time: tick the codes, click Extend expiry and type the Days to add. Codes with no end date aren't changed; expired codes are extended from today.
- Stop for now: click Disable, and Enable to turn it back on.
- Remove: click Archive. An archived code no longer works and leaves the list. To find it, set Status to archived. Restore brings it back disabled, so click Enable to use it again.
- Delete: only a code that was never used can be deleted. Tick it and click Delete. It can't be undone.
If a change affects registrations already made, such as a ticket capacity below what's used, the form lists what changes under This change affects existing redemptions. Click Confirm and save to go ahead. Existing orders keep what they were given.
| Status | What it means |
|---|---|
| active | Works now. |
| scheduled | Its start time hasn't come yet. |
| expired | Its end time has passed. |
| exhausted | Its ticket capacity is used up. |
| disabled | Turned off. |
| archived | Removed from the list; no longer works. |
If something looks wrong#
- A guest is told "This invitation is for a different email address". The code only works with the recipient's address. Ask them to register with the address you sent it to, or untick Only this email address can use the code.
- A guest is told the code doesn't have enough tickets left. Raise Ticket capacity, or ask them to choose fewer tickets. Places held in other guests' carts come back when those carts expire.
- A guest can't place a second order with the same code. Raise or clear Orders per buyer under More settings.
- "This invitation code does not unlock the selected tickets". Add the ticket under Tickets this code unlocks.
- The invitation-only ticket isn't on the registration page. That's expected: it appears once a valid code is entered.
- Delete is greyed out. The code has been used. Archive it instead.
- Import says "Map a code or recipient email column". Match a column to Code (generated when blank) or to Recipient email.
Who can do this#
Everyone with access to the event can see the codes. The Event Editor role or above can create, import, change, disable, archive and restore codes, and change the Settings tab. Deleting codes and ticking Include recipient emails on an export need the Event Admin role, or Owner or Admin of the organisation. Exporting needs permission to export data.
Related guides
- Create tickets and set pricesAdd the tickets people choose when they register, set their prices and limits, and stop selling one when you need to.
- Offer discount codesCreate codes that lower ticket prices, limit how often and when they work, and see how much discount each one gave.
- Set when and how people registerOpen and close registration, cap the event, screen free registrations, set the checkout time limit, and decide what registrants and your staff may change afterwards.
- Use an invitation or discount codeEnter a discount code to take money off your tickets, or an invitation code to see tickets that are kept for invited guests.
Still stuck? In EventNook, ask HeyNook. It knows the page you're on and your event, and can take you straight to the right setting.