Open an event and see where it stands
Open an event, read its status in the top bar, preview or view its site, find all its links, and open, close or deactivate registration.
Where to find it: Event admin › My Events
When you open an event, you land on its Dashboard. The top bar shows which event you're in and what state it is in, and holds the controls that change that state. They are the same on every page of the event.
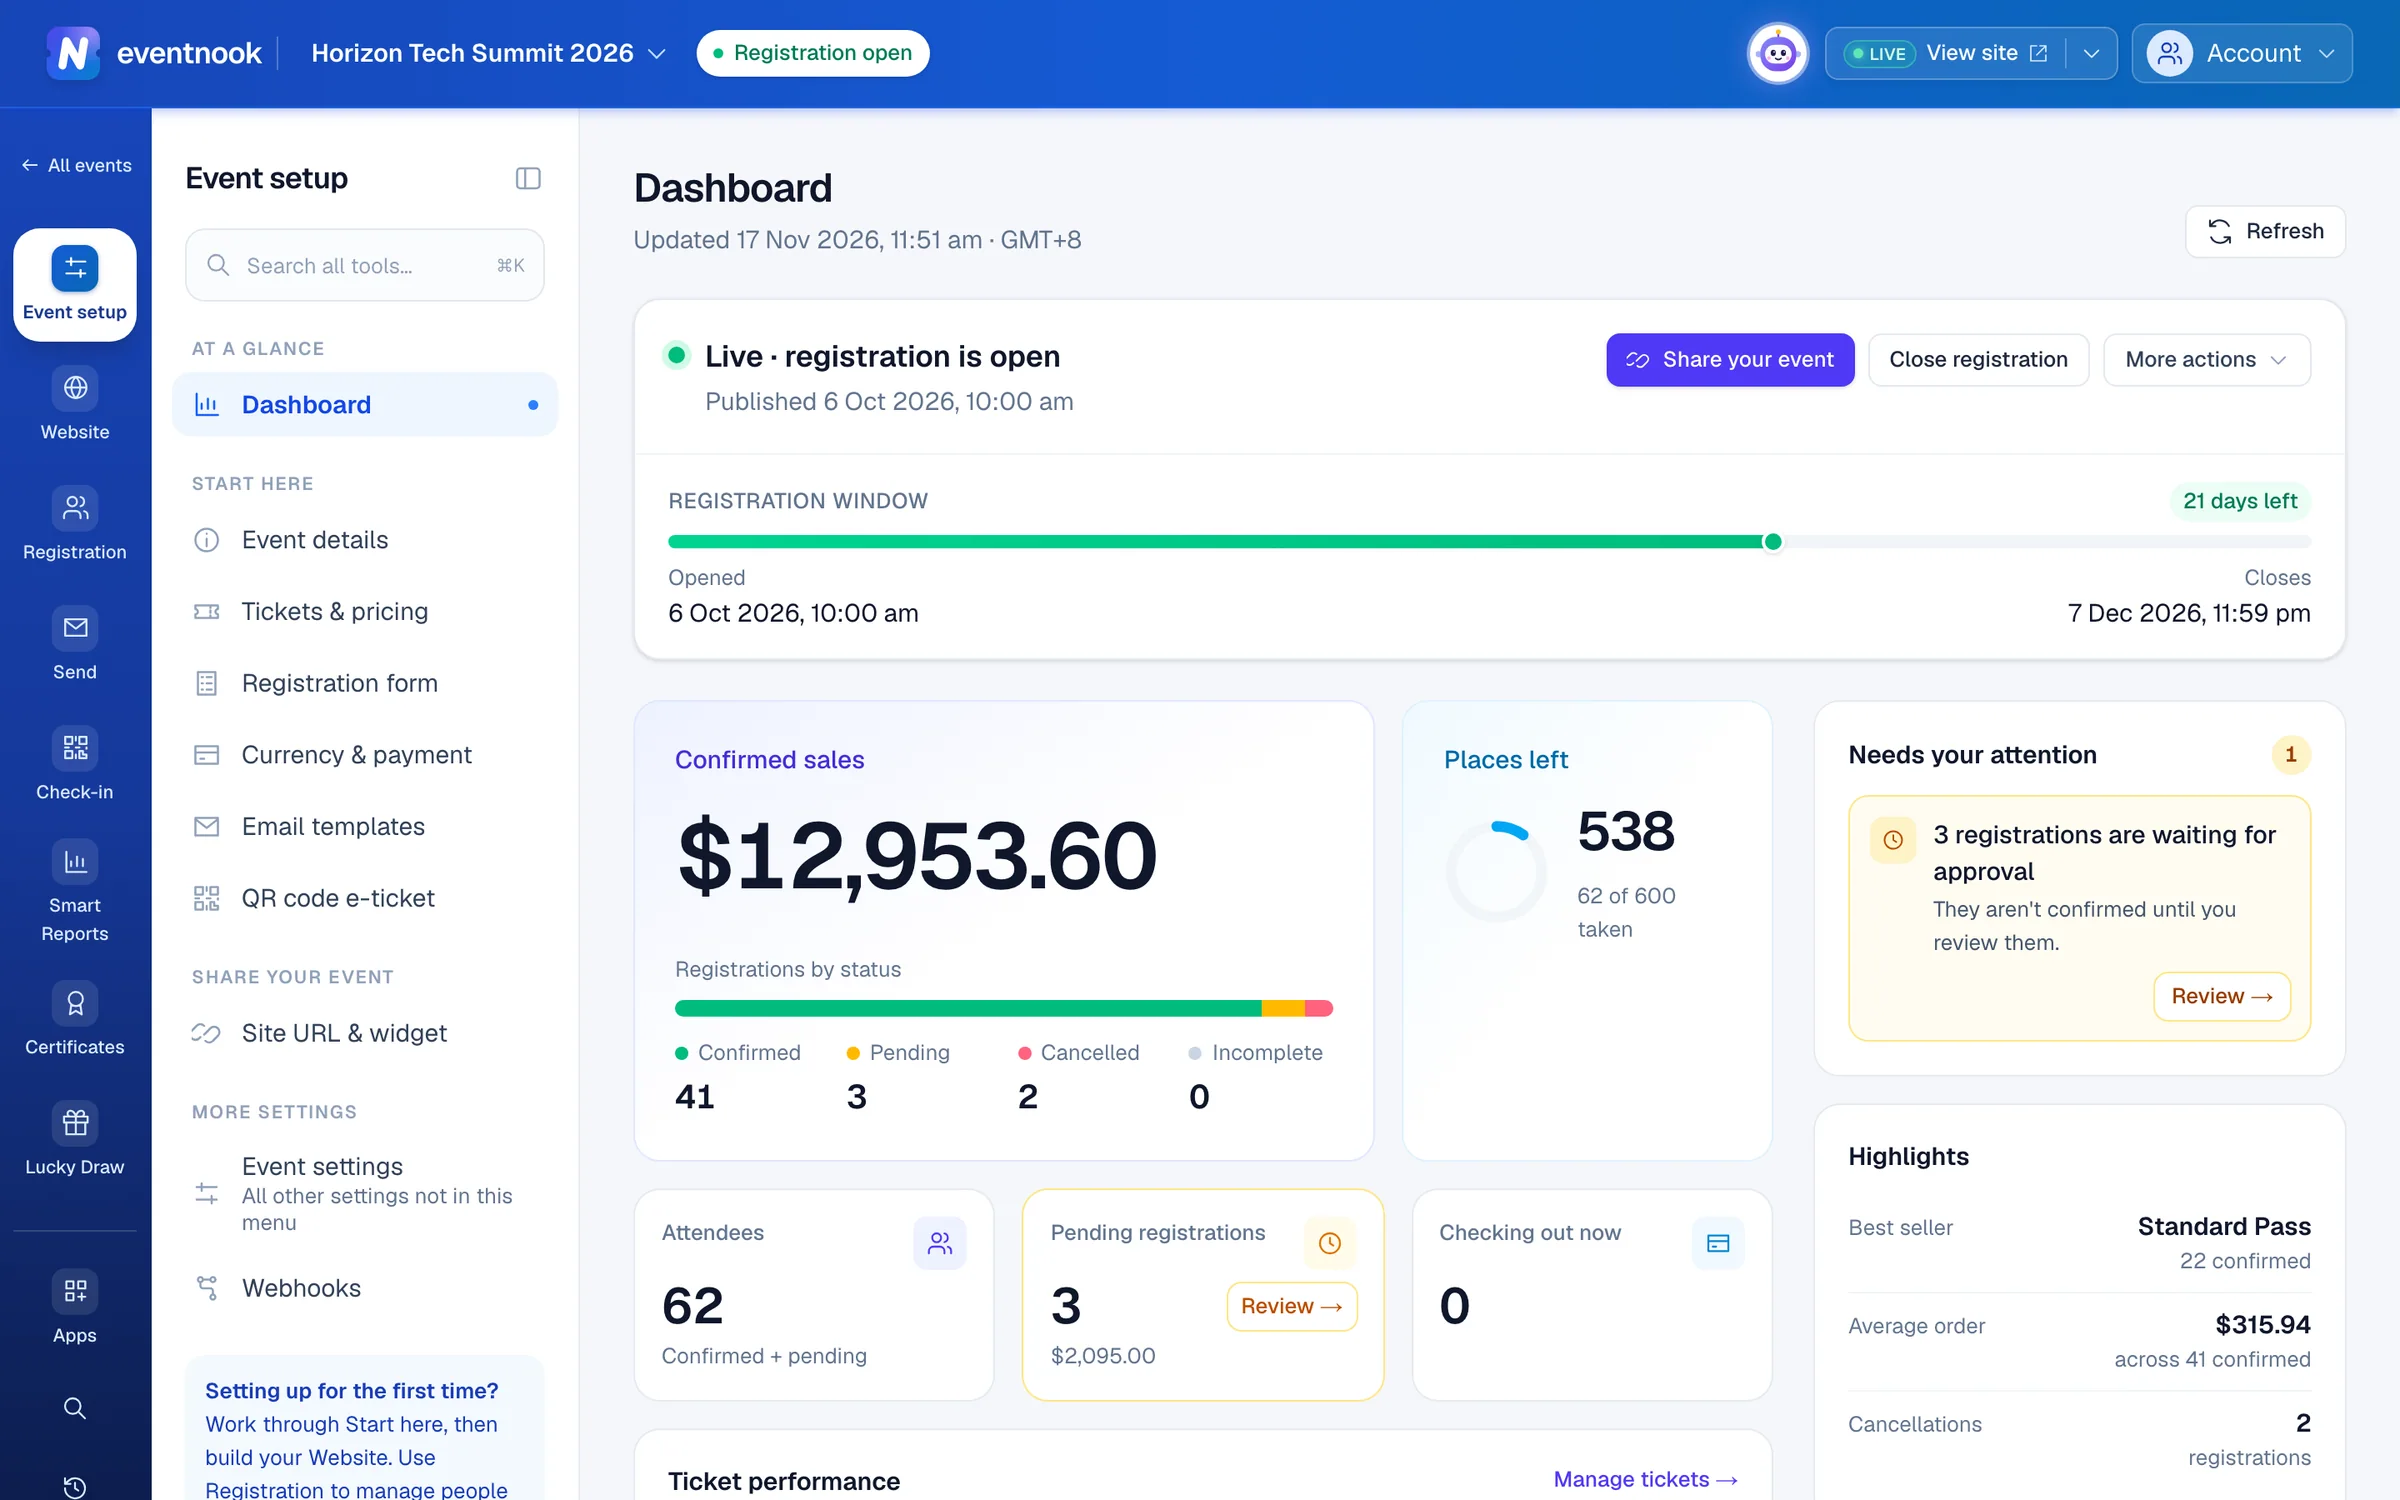
- 1Dates, time zone and address, and the way to your other events
- 2Whether people can register right now
- 3Open the public site in a new tab
- 4Every link to the event, and the actions that change its state
What the top bar shows#
| Part | What it tells you or does |
|---|---|
| Event name | Opens a panel with the start and end, the time zone and the event's address, with All events and Create event. |
| Status | On a published event, Registration open, Not open yet or Registration closed. Otherwise Draft or Deactivated. In the Archive while the event is in the Archive. |
| Test event · Go live | Shown on a test event. Go live takes real registrations from then on. See Take your event live. If your role can't publish, you see Test event only. |
| HeyNook | Its face, left of View site: ask HeyNook, or talk with your team in the event's channels. See HeyNook. |
| View site | Opens the public event site in a new tab. It shows Live while the event is published. |
| Preview | Replaces View site while the event isn't live. Opens your draft site in a new tab, through a private link that expires in 2 hours. |
| The arrow beside it | All event links, then under Event the actions your role allows. |
| Publish | The green button on a draft. On a deactivated event it says Make live again. |
What the dashboard shows first#
The dashboard opens with a card that says where the event stands, such as Draft — not public yet or Live · registration is open, with a bar for the registration window. The card has the same actions as the top bar: the next step as a button, the rest under More actions. A published event also has Share your event.
While the event is a draft, the Pre-launch checklist is below the card. Each step still to do has a button to the page that completes it, such as Set up tickets, and an optional step can be skipped with Skip for now. On a test event, a card offers to go live. Each goes once its step is done. The figures below them are explained in The event dashboard.
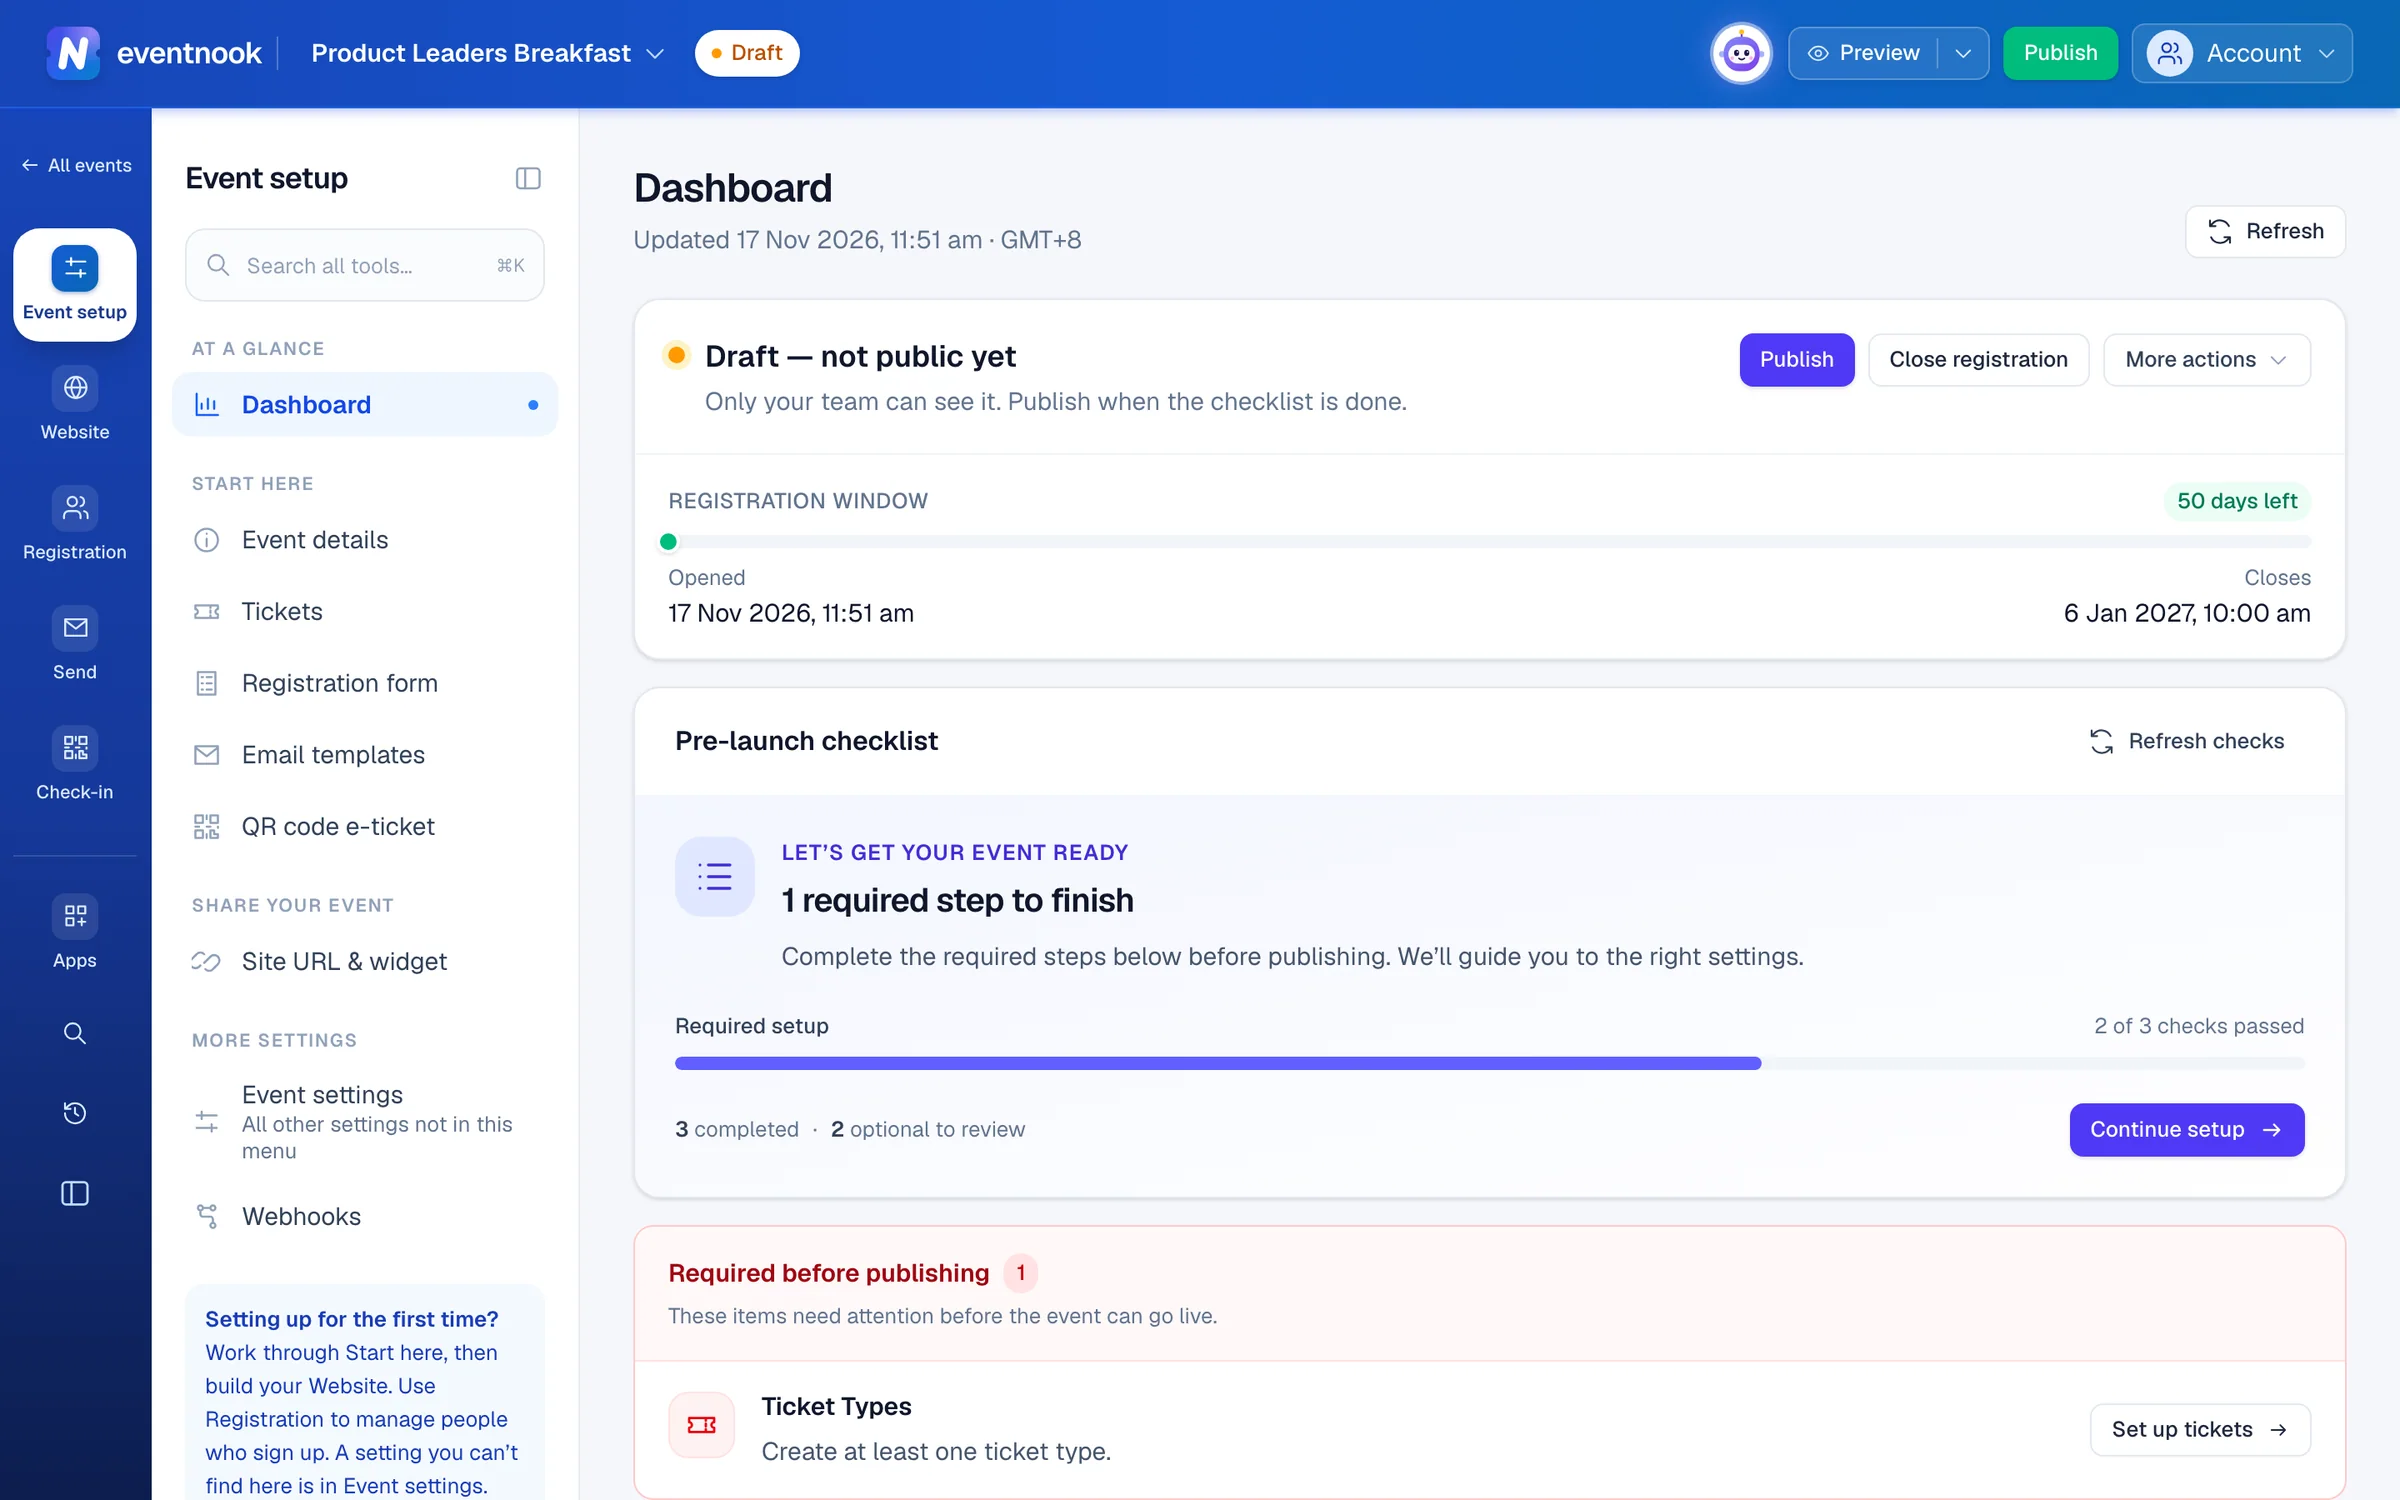
- 1Where the event stands, with the actions that change it
- 2What's left to set up before you publish
- 3See the draft site in a new tab
- 4Put the site online
To publish the event or take a test event live, see Take your event live.
Get all the event's links#
- Click the arrow beside View site (or Preview) and choose All event links.
- In Your event's links, click Copy link beside Event site, the link to share first. More links to share and For people who registered list the others, each with Copy.
To change the address or get the code for your own website, click Site URL & widget settings at the foot of the dialog. See Site URL, custom domain and widget.
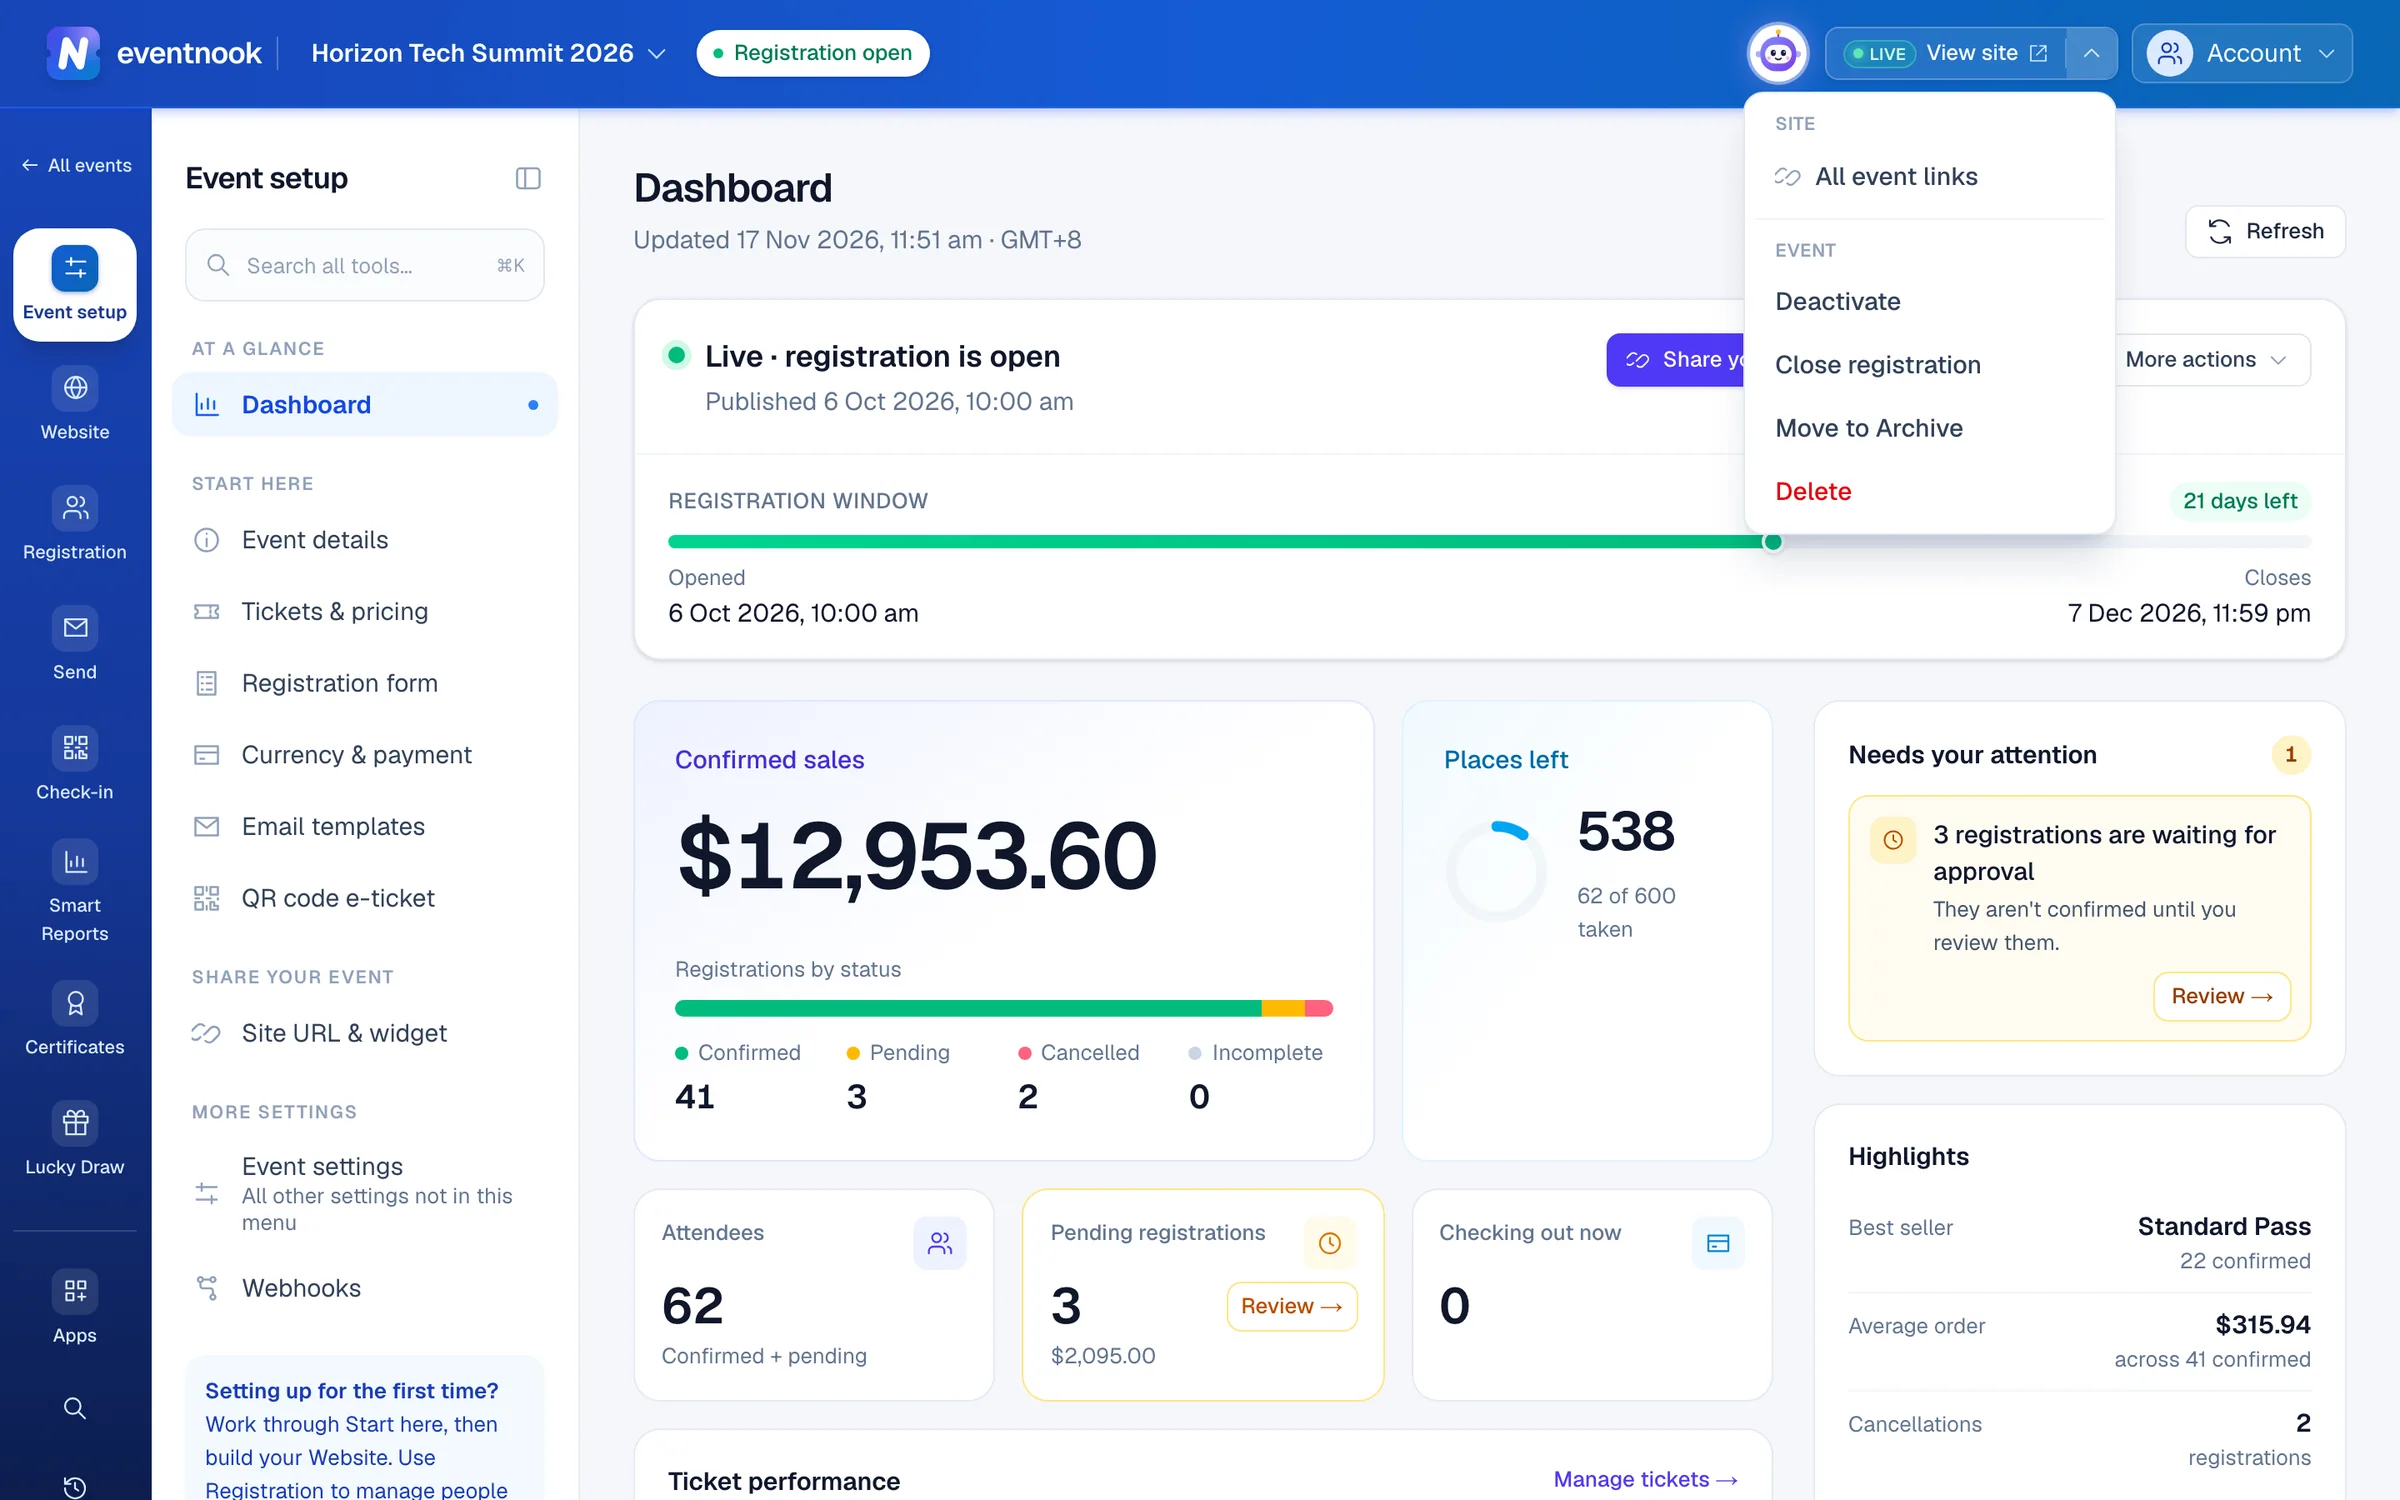
- 1Copy the site, registration and attendee links
- 2Stop new registrations; existing orders stay
- 3Take the site offline
- 4File the event away in the Archive
Close or open registration#
- Click the arrow beside View site and choose Close registration. On the dashboard, it is a button on the status card.
- Click Close registration in the dialog. New registrations stop at once. Existing orders are not affected.
To open it again, choose Open registration. Optional: set Close registration at, in the event's time zone; leave it empty to keep the current close time. If registration closed on its end date, you must choose a new close time in the future.
Take the site offline#
- Click the arrow beside View site and choose Deactivate.
- Optional: type a reason in Reason (optional, kept in the audit log).
- Click Deactivate.
Visitors see an unavailable page. Existing orders stay valid, and self-service, e-tickets and check-in keep working. Orders are not cancelled, nothing is refunded, capacity is not released and scheduled emails still send.
To bring the site back, click Make live again in the top bar. It walks you through publishing again.
Archive or delete the event#
Move to Archive, Restore from Archive and Delete are in the same menu. See Archive, reset or delete an event.
Find your way around the event#
The event menu on the left follows the work: Event setup, Website, Registration, Send, Check-in and Apps. A setting that isn't in the menu is in Event setup › Event settings. To jump to any tool, press ⌘ K or Ctrl K. See Find your way around.
If something looks wrong#
- "Event not found". You don't have access to this event. Ask its organiser to add you.
- "Nothing to change — already in that state." Someone else made the same change a moment ago. The top bar now shows the current state.
- Open registration asks for a close time. Registration closed on its end date. Choose a new close time in the future.
- "The preview could not be opened. Try again." The private link couldn't be made. Click Preview again.
- There is no Publish, Deactivate or registration option. Your role can't publish this event.
Who can do this#
Everyone with access to the event sees the top bar and the dashboard. Publish, Make live again, Deactivate, Open registration and Close registration need the Owner, Admin or Event Admin role. Event Editors can also move the event to the Archive and restore it. Only an organisation's Owner and Admins can delete it.
Related guides
- Find your way around Event adminGet around Event admin with the top bar, the events list, the event menu and the tool finder, and know where HeyNook and your account settings are.
- Publish your event and go liveFinish the pre-launch checklist, publish the event so people can see it and register, and take a test event live when you're ready for real registrations.
- Read the event dashboardSee confirmed sales or registrations, places left, pending approvals and how each ticket is selling, and what needs your attention next.
- Archive, reset or delete an eventMove an event you've finished with to the Archive, clear the registrations made while testing, or delete an event you no longer need.
- Share your event's links and embed the registration widgetChange the event's web address, copy its links and QR codes, put the registration widget on your own website, and make private, pre-filled and custom-domain links.
Still stuck? In EventNook, ask HeyNook. It knows the page you're on and your event, and can take you straight to the right setting.