Build your event's landing page
Design the home page of your event site by typing on the page or describing it to AI, add sections such as the agenda and speakers, and publish it.
Where to find it: Event admin › Website › Website pages › Landing page
The landing page is the home page of your event site: the first thing people see when they open your event's link. You build it with your page in view. Type on the page itself, or describe what you want and let AI design it. You don't need to know HTML.
Open it from Setting › Essential Setup › Event pages, or Website Builder › Landing page.
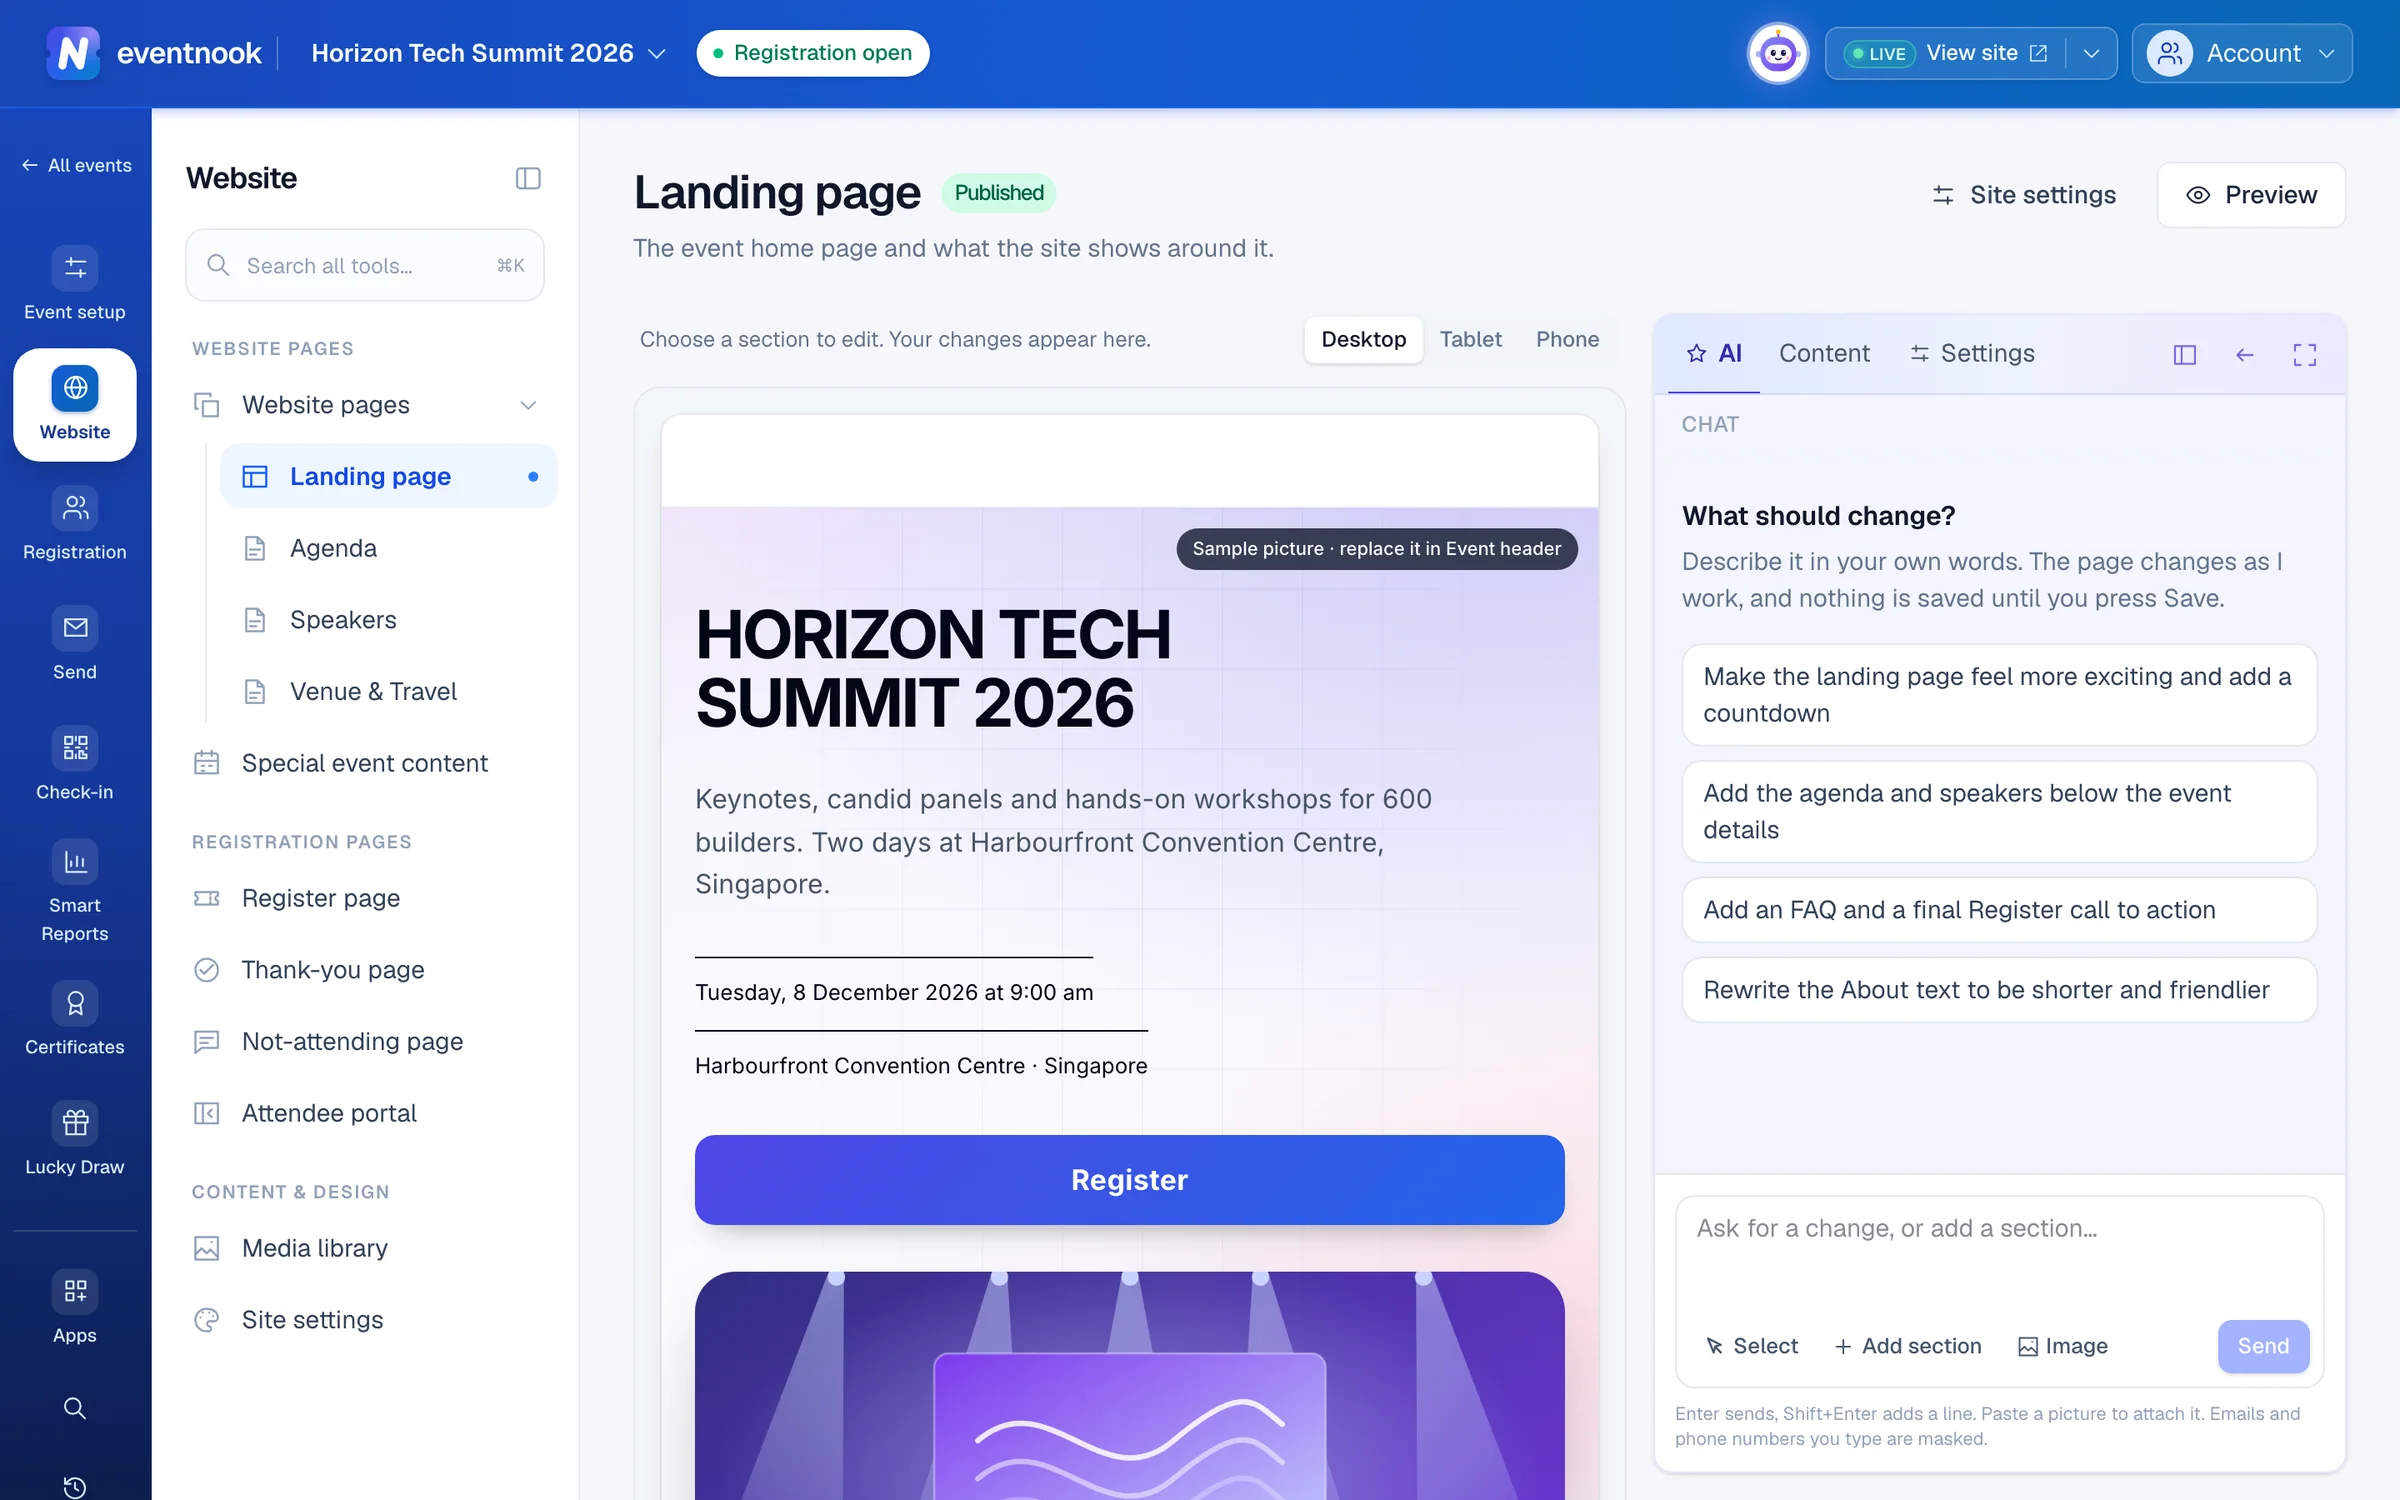
- 1Describe the page and AI designs it
- 2Your sections, in page order
- 3Publishing, search listing, design and history
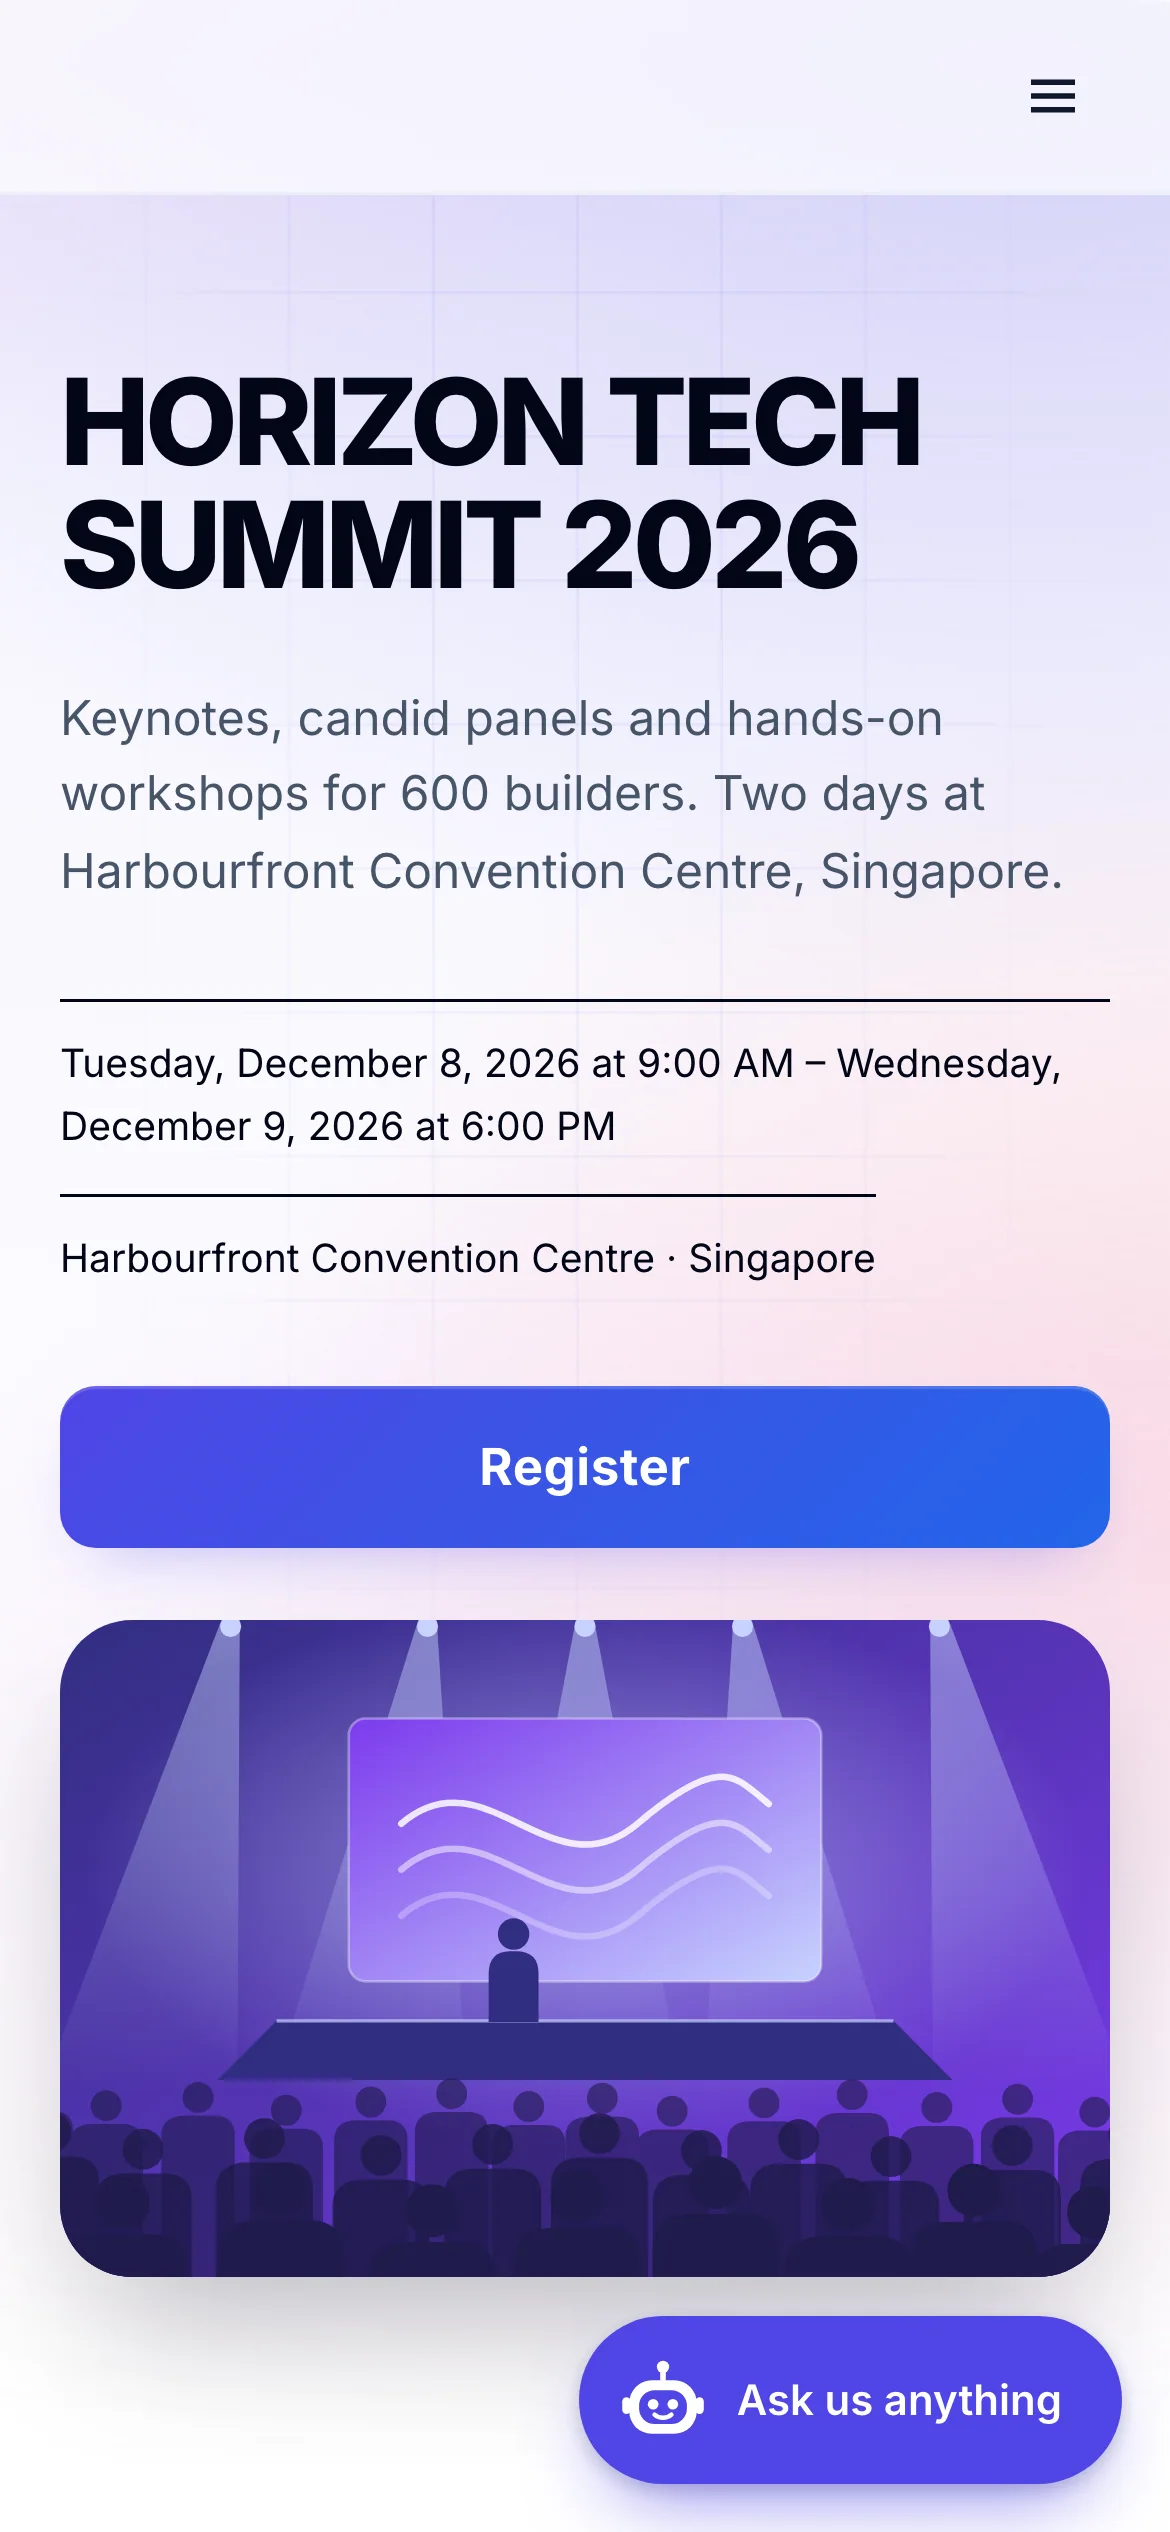
- 4See the saved page as visitors will
The panel beside the page has three tabs:
| Tab | What it's for |
|---|---|
| AI | Design with AI: say what you want and the page changes as it works. Editors start here. |
| Content | Your page: your sections in page order, and the form of the section you're editing. |
| Settings | Page Settings (publishing and how the page shows in search), Layout & Design (colours, fonts and width for the whole site), Access Code and History. |
Use the buttons at the top of the panel to move it to the other side, widen it, or open the Full-screen editor. On a small screen, Edit and Page switch between the panel and the page.
Save, preview and publish#
Changes to the page are a draft until you publish them.
- Click Save changes in the bar at the bottom.
- Click Preview to see the saved draft as visitors will. Try it on a phone as well as a computer.
- Click Publish when the page is ready. Visitors see it straight away.
The page's badge says Published or Draft changes. Discard puts back everything you haven't saved.
Set up the event header#
The event header is the top of the page, with the event's title, date and place.
- In Content, click Find your event’s first impression, or choose Event header.
- Pick a theme: Spotlight, Summit, Keynote, Editorial, Festival, Gala or Minimal. The page shows the choice at once.
- Edit the introduction, image and buttons in the form below. Under the image, choose Show full image, Fill image area or Hide image.
- Save, then publish.
Show across the site turns the event title, date and location on or off for every page. Use original layout goes back to the basic layouts.
For full control, click Design it freely. The header becomes your own design, starting from the theme you have, and still shows the event's real title, date and venue. Click any part of it on the page to Edit text, Ask AI about it or Show in code. Use a ready-made layout goes back.
Design the Register button#
Click a button in the header to open Hero buttons. Change the Button text and keep Opens set to Registration. Under When clicked, keep Open registration in a pop-up so visitors register without leaving the page, or choose Go to the registration page.
Pick a Ready-made look (Theme, Bold, Pill, Outline, Gradient, Glow, Sharp or Ghost), then fine-tune its fill, text, shape, icon and effects. Start again from the theme undoes it all.
Add and arrange sections#
- In Content, click + Add section. To put one between two sections, point at the line between them on the page and click + Add a section here.
- Choose a section and start editing it in the panel. ← All sections goes back to the list.
- Save, then publish.
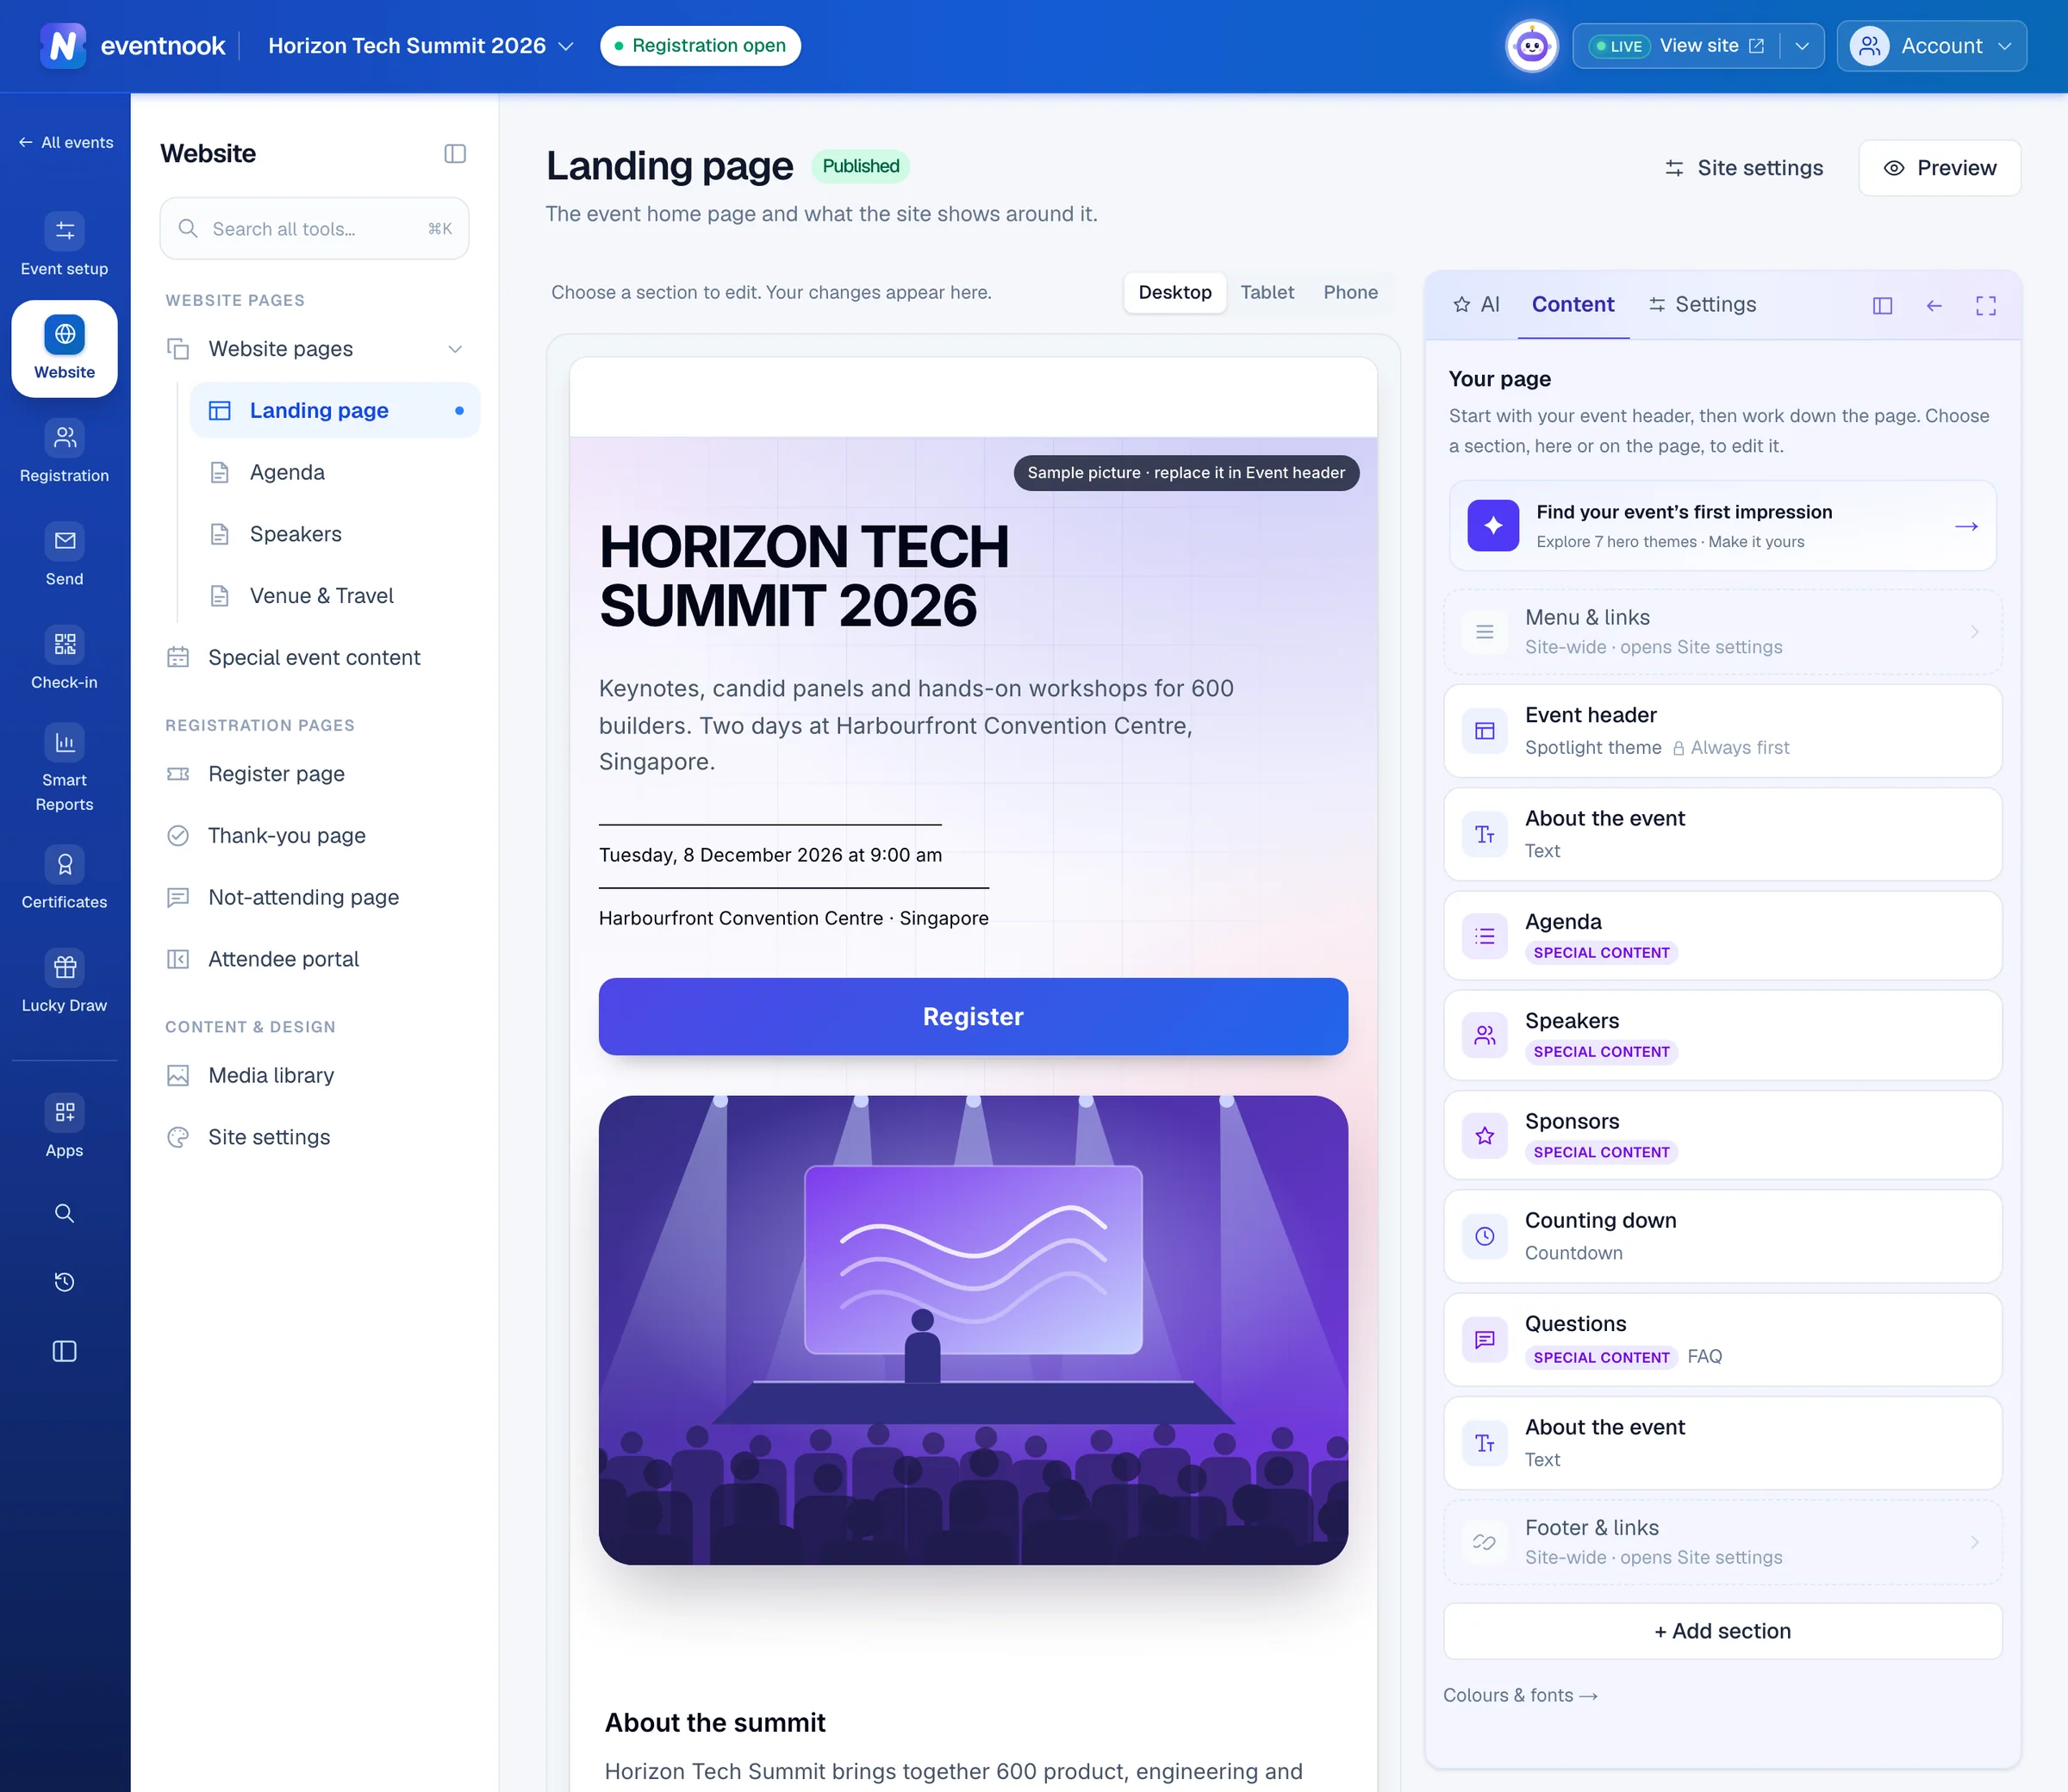
- 1Choose the look of the event header
- 2Add the agenda, speakers, photos and more
- 3The design every page starts from
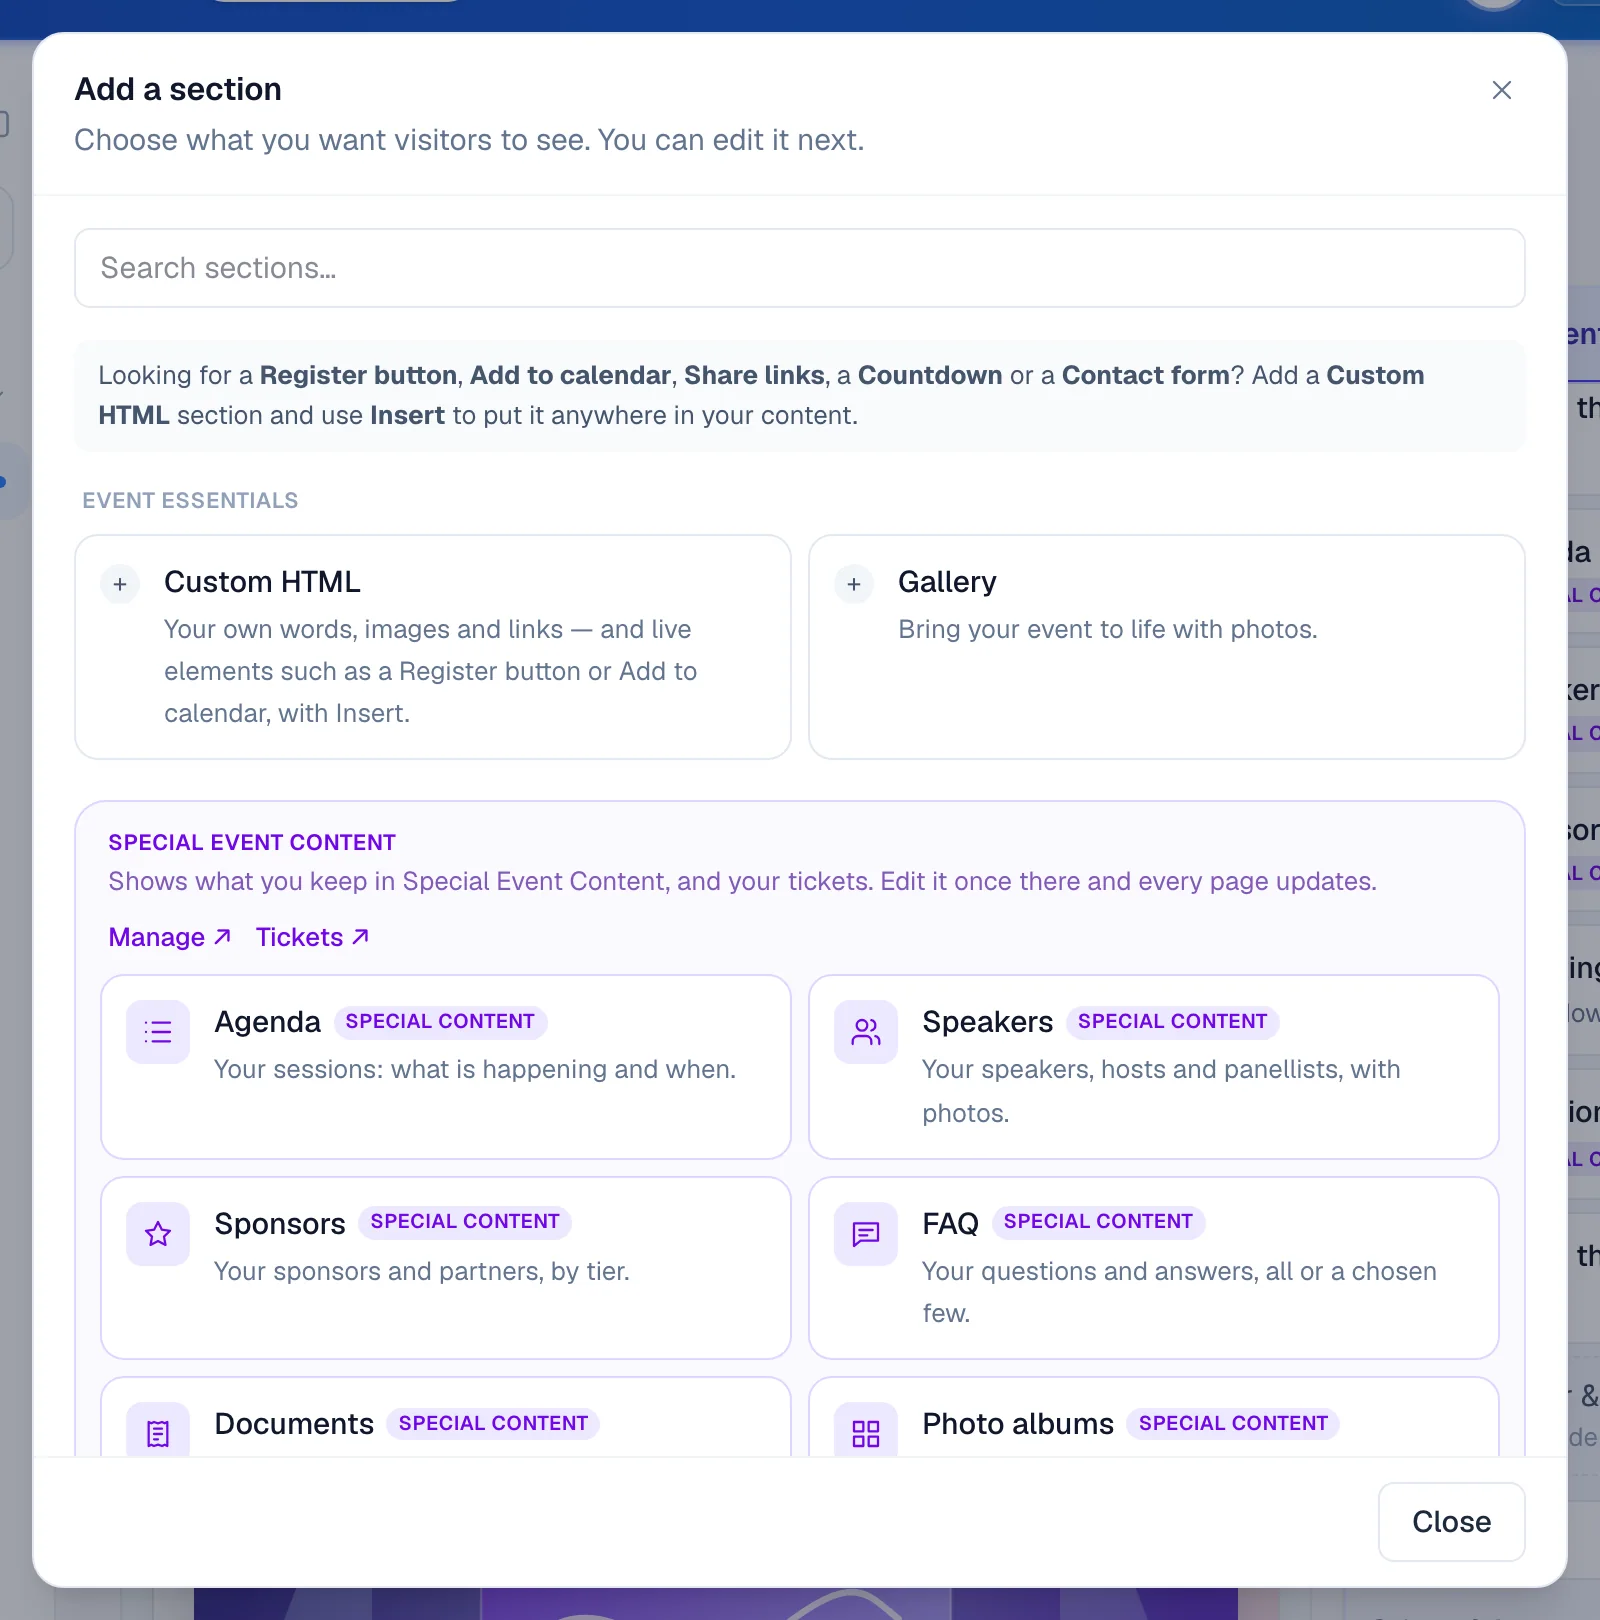
| Group | Sections |
|---|---|
| Event essentials | Custom HTML (your own text, pictures and buttons), Gallery |
| Special Event Content | Agenda, Speakers, Sponsors, FAQ, Documents, Photo albums (with the Photo Gallery app), Ticket widget, Registration form (one ticket's form, with no ticket step) |
| Getting there | Venue map, Countdown |
| More sections | Hero, Embed (YouTube, Vimeo, Google Maps or Spotify) |
To move or hide a section, point at it in Your page and use the arrows or the eye. Hidden sections stay in your draft. To duplicate or remove one, choose it and open Move, hide or remove section.
Agenda, speakers, sponsors, FAQ and documents#
These sections show what you keep in Special Event Content, never copies. Add or change sessions, people and questions there, with Edit in Special Event Content at the foot of the section's form, and every page that shows them updates at once. See Add pages, event content and pictures.
In the section's form, choose What to show (every item, or the ones you pick), Show at most, and the Layout. Use the default follows the layout set in Special Event Content.
Register buttons, countdowns and contact forms in your text#
A Register button, Add to calendar, Share links, a Countdown and a Contact form can go anywhere in your words. Open a Custom HTML section and click one under Insert. It goes where your cursor is, and the site draws it live. The contact form sends messages to the organiser email in the event's details.
To add a picture to your text, click Image in the editor's toolbar to upload one or choose it from the media library.
Design with AI#
- Open the AI tab.
- Describe what you want, for example "a short welcome, then the agenda and our speakers", and click Send. The page changes as the AI works.
- To change one part, click Select, then that part of the page, and say what should change.
- Click Save changes when you're happy, then Publish.
Undo returns to the page before the last answer, and Restore on an earlier answer brings that version back. To add a picture, click Image in the chat. Ask for a link by name, such as "add a Manage my order link", and the AI puts in your event's real address. Nothing is saved until you click Save changes.
Other settings for this page#
- Colours, fonts and page width: click Colours & fonts in Your page, or Layout & Design in the Settings tab. See Site settings and design.
- The menu bar, logo, footer and dates: click Site settings at the top of the page. Save or discard your page edits first.
- How the page shows in search and when shared: Settings › Page Settings, under Search & social.
- A code to open the page: Settings › Access Code.
- An earlier version: Settings › History.
If something looks wrong#
- Preview is missing my changes. Preview shows the last saved draft. Click Save changes first.
- Visitors still see the old page. Click Publish after saving.
- The page in the editor looks slightly different from the site. The editor draws your design with approximate spacing. Preview shows the real saved page.
- An agenda, speakers, sponsors, FAQ or documents section is empty. Add items in Special Event Content, or check What to show: its picks may match nothing.
- A section says "Switched off in Special Event Content". That kind of content is turned off for the event. Use the link in the section's form to turn it on again.
- Design with AI says it isn't available. AI may be off for your organisation, or its allowance used up. You can still edit the page in Content.
- Someone else saved first. Copy what you need, click Reload, and make your change again.
Who can do this#
Everyone with access to the event can look at the page and preview it. Editors and event admins can save and publish it.
Related guides
- Add pages, event content and picturesAdd more pages to your event site, keep your agenda, speakers, sponsors, FAQ and documents in one place for every page, and manage the pictures the site uses.
- Set up the site's menu, design and settingsChoose the colours, fonts and width every page starts from, set the menu bar, logo, footer and favicon, keep the site out of search, protect it with a code and add your own CSS.
- Design the register and thank-you pagesWrite what stands around your tickets on the register page, and what people see right after they register, by typing on the page, picking a ready-made design or asking AI.
- Share your event's links and embed the registration widgetChange the event's web address, copy its links and QR codes, put the registration widget on your own website, and make private, pre-filled and custom-domain links.
Still stuck? In EventNook, ask HeyNook. It knows the page you're on and your event, and can take you straight to the right setting.