Add pages, event content and pictures
Add more pages to your event site, keep your agenda, speakers, sponsors, FAQ and documents in one place for every page, and manage the pictures the site uses.
Where to find it: Event admin › Website › Website pages
Your event site starts with the landing page. Add more pages for anything that needs room of its own, such as a visitor guide or the full programme. Content you show on several pages, like the agenda and speakers, is kept once in Special Event Content, so one change updates every page.
Add a page#
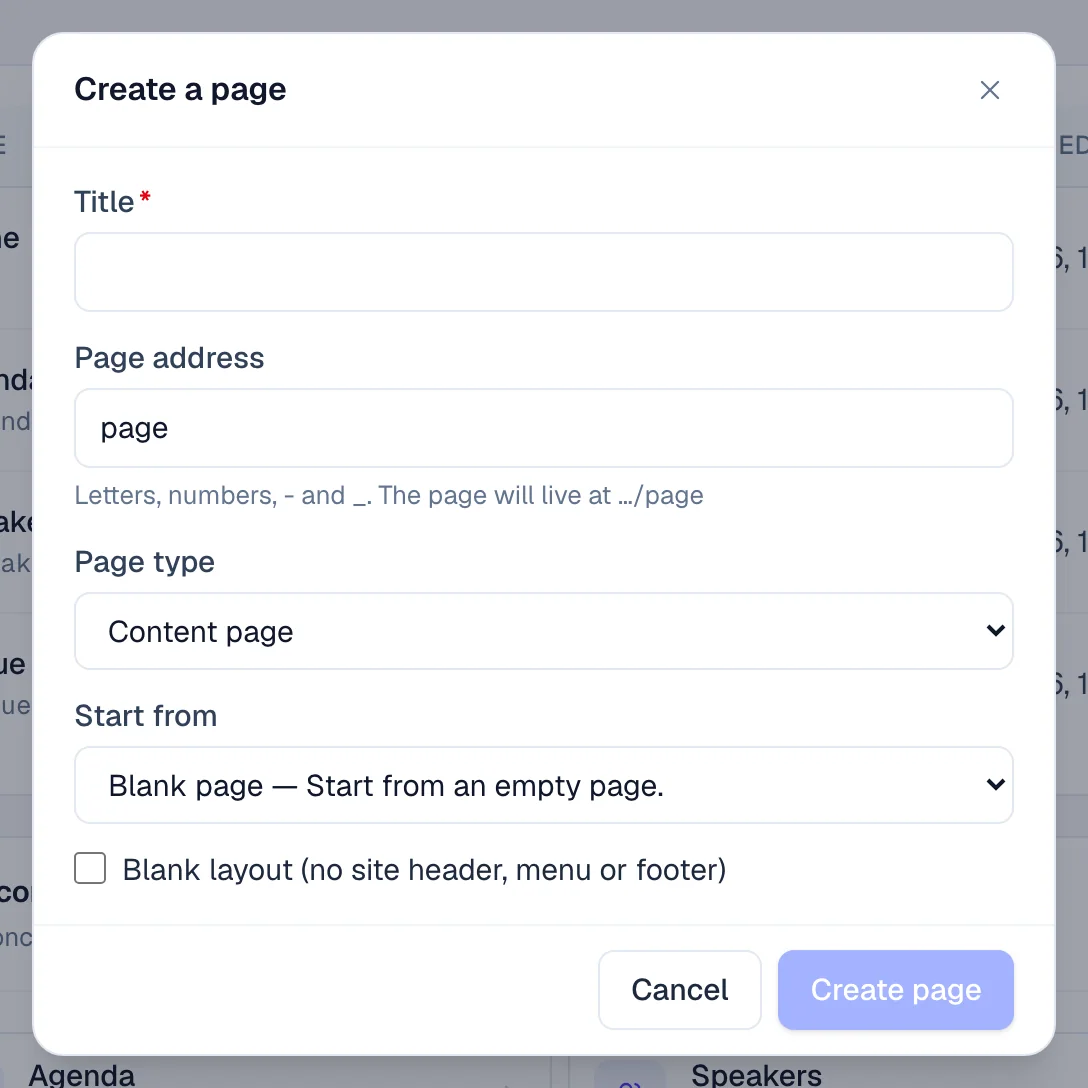
- Open Website Builder › Website pages and click Create a page.
- Type a Title. The Page address is made from it; change it if you like.
- Choose a Page type: Content page, or Menu link to another website to add a link in the site's menu.
- For a content page, choose what to Start from. Tick Blank layout (no site header, menu or footer) for a page on its own.
- Click Create page. The page editor opens.
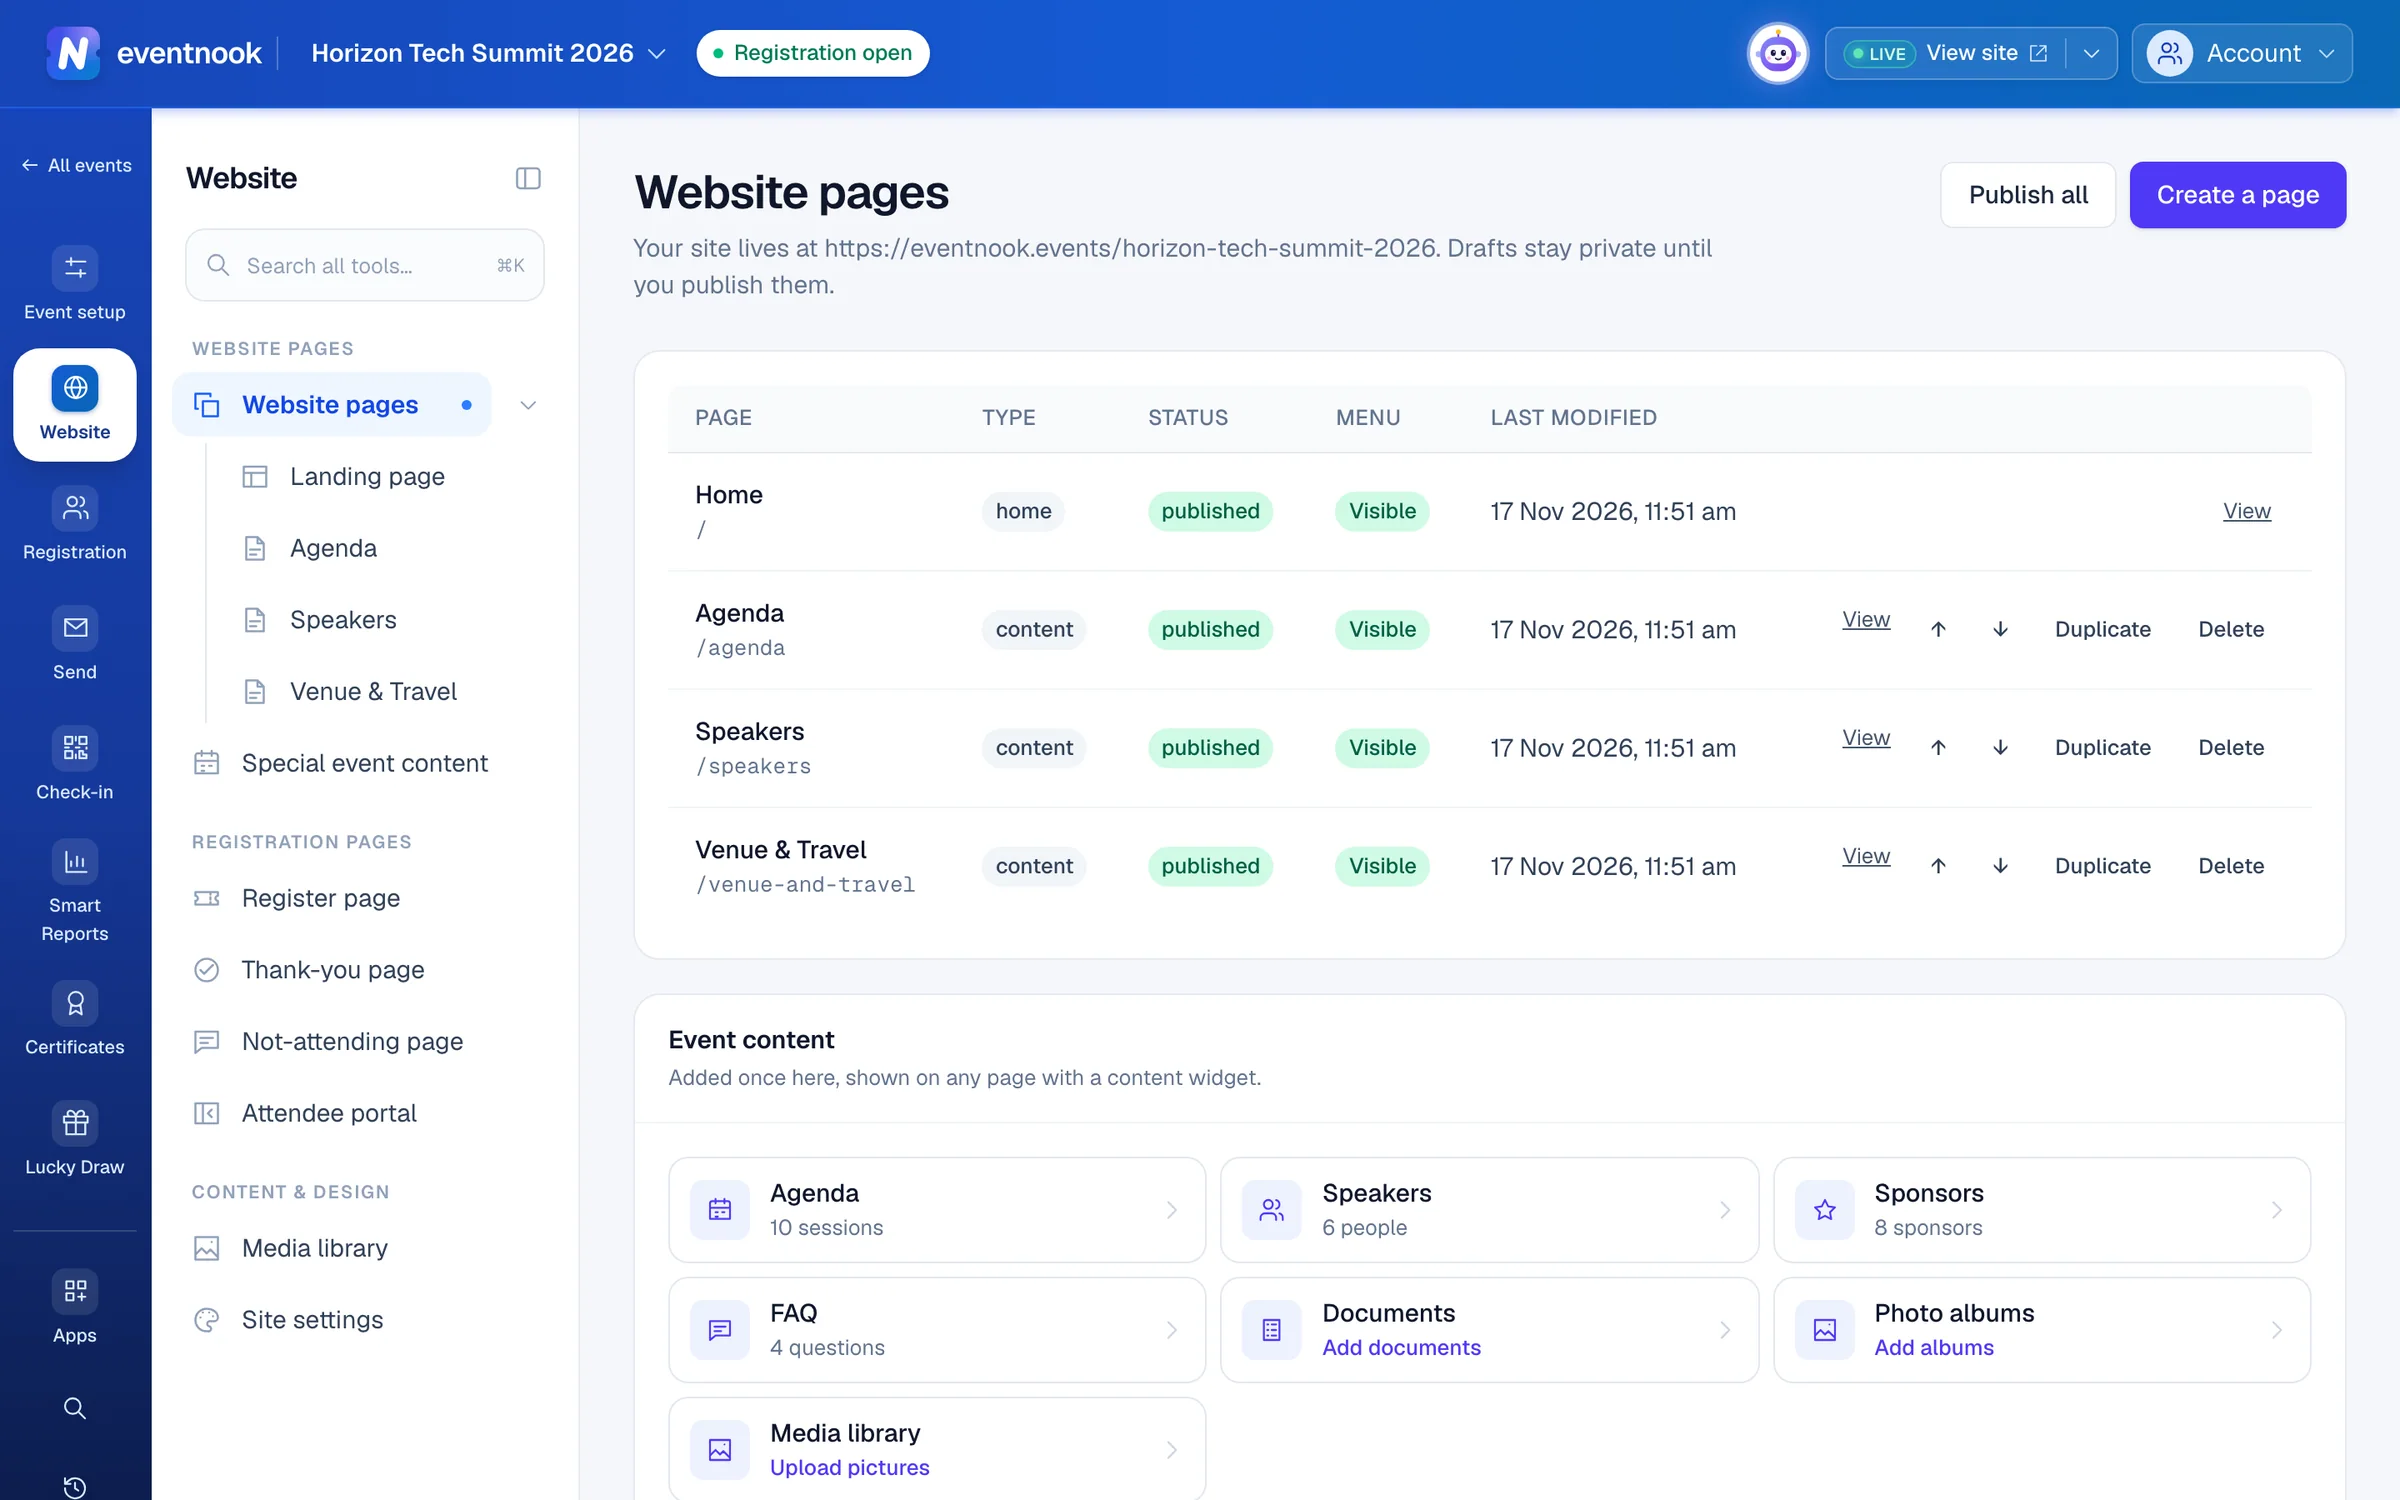
- 1Add a page or a menu link
- 2Make every saved change live at once
- 3Your agenda, speakers, sponsors, FAQ and documents
The list shows each page's Type, Status (draft, published, unpublished, or scheduled), whether it's Visible or Hidden in the Menu, and Access code when it's protected. Clicking the home page opens the landing page editor. The register and thank-you pages aren't in this list: see Design the register and thank-you pages.
Build and publish a page#
The page editor works like the landing page editor: your page in view, with a panel of AI, Content and Settings tabs beside it.
- Choose Title & banner to set the page's heading, image and layout.
- Click + Add section for text, pictures, the agenda, speakers, FAQ and more. Choose a section in Your page to edit it in the panel.
- Click Save changes. Drafts also save themselves every 30 seconds.
- Click Preview to check the saved page on a computer and a phone.
- Click Publish in the bottom bar. Saving never publishes.
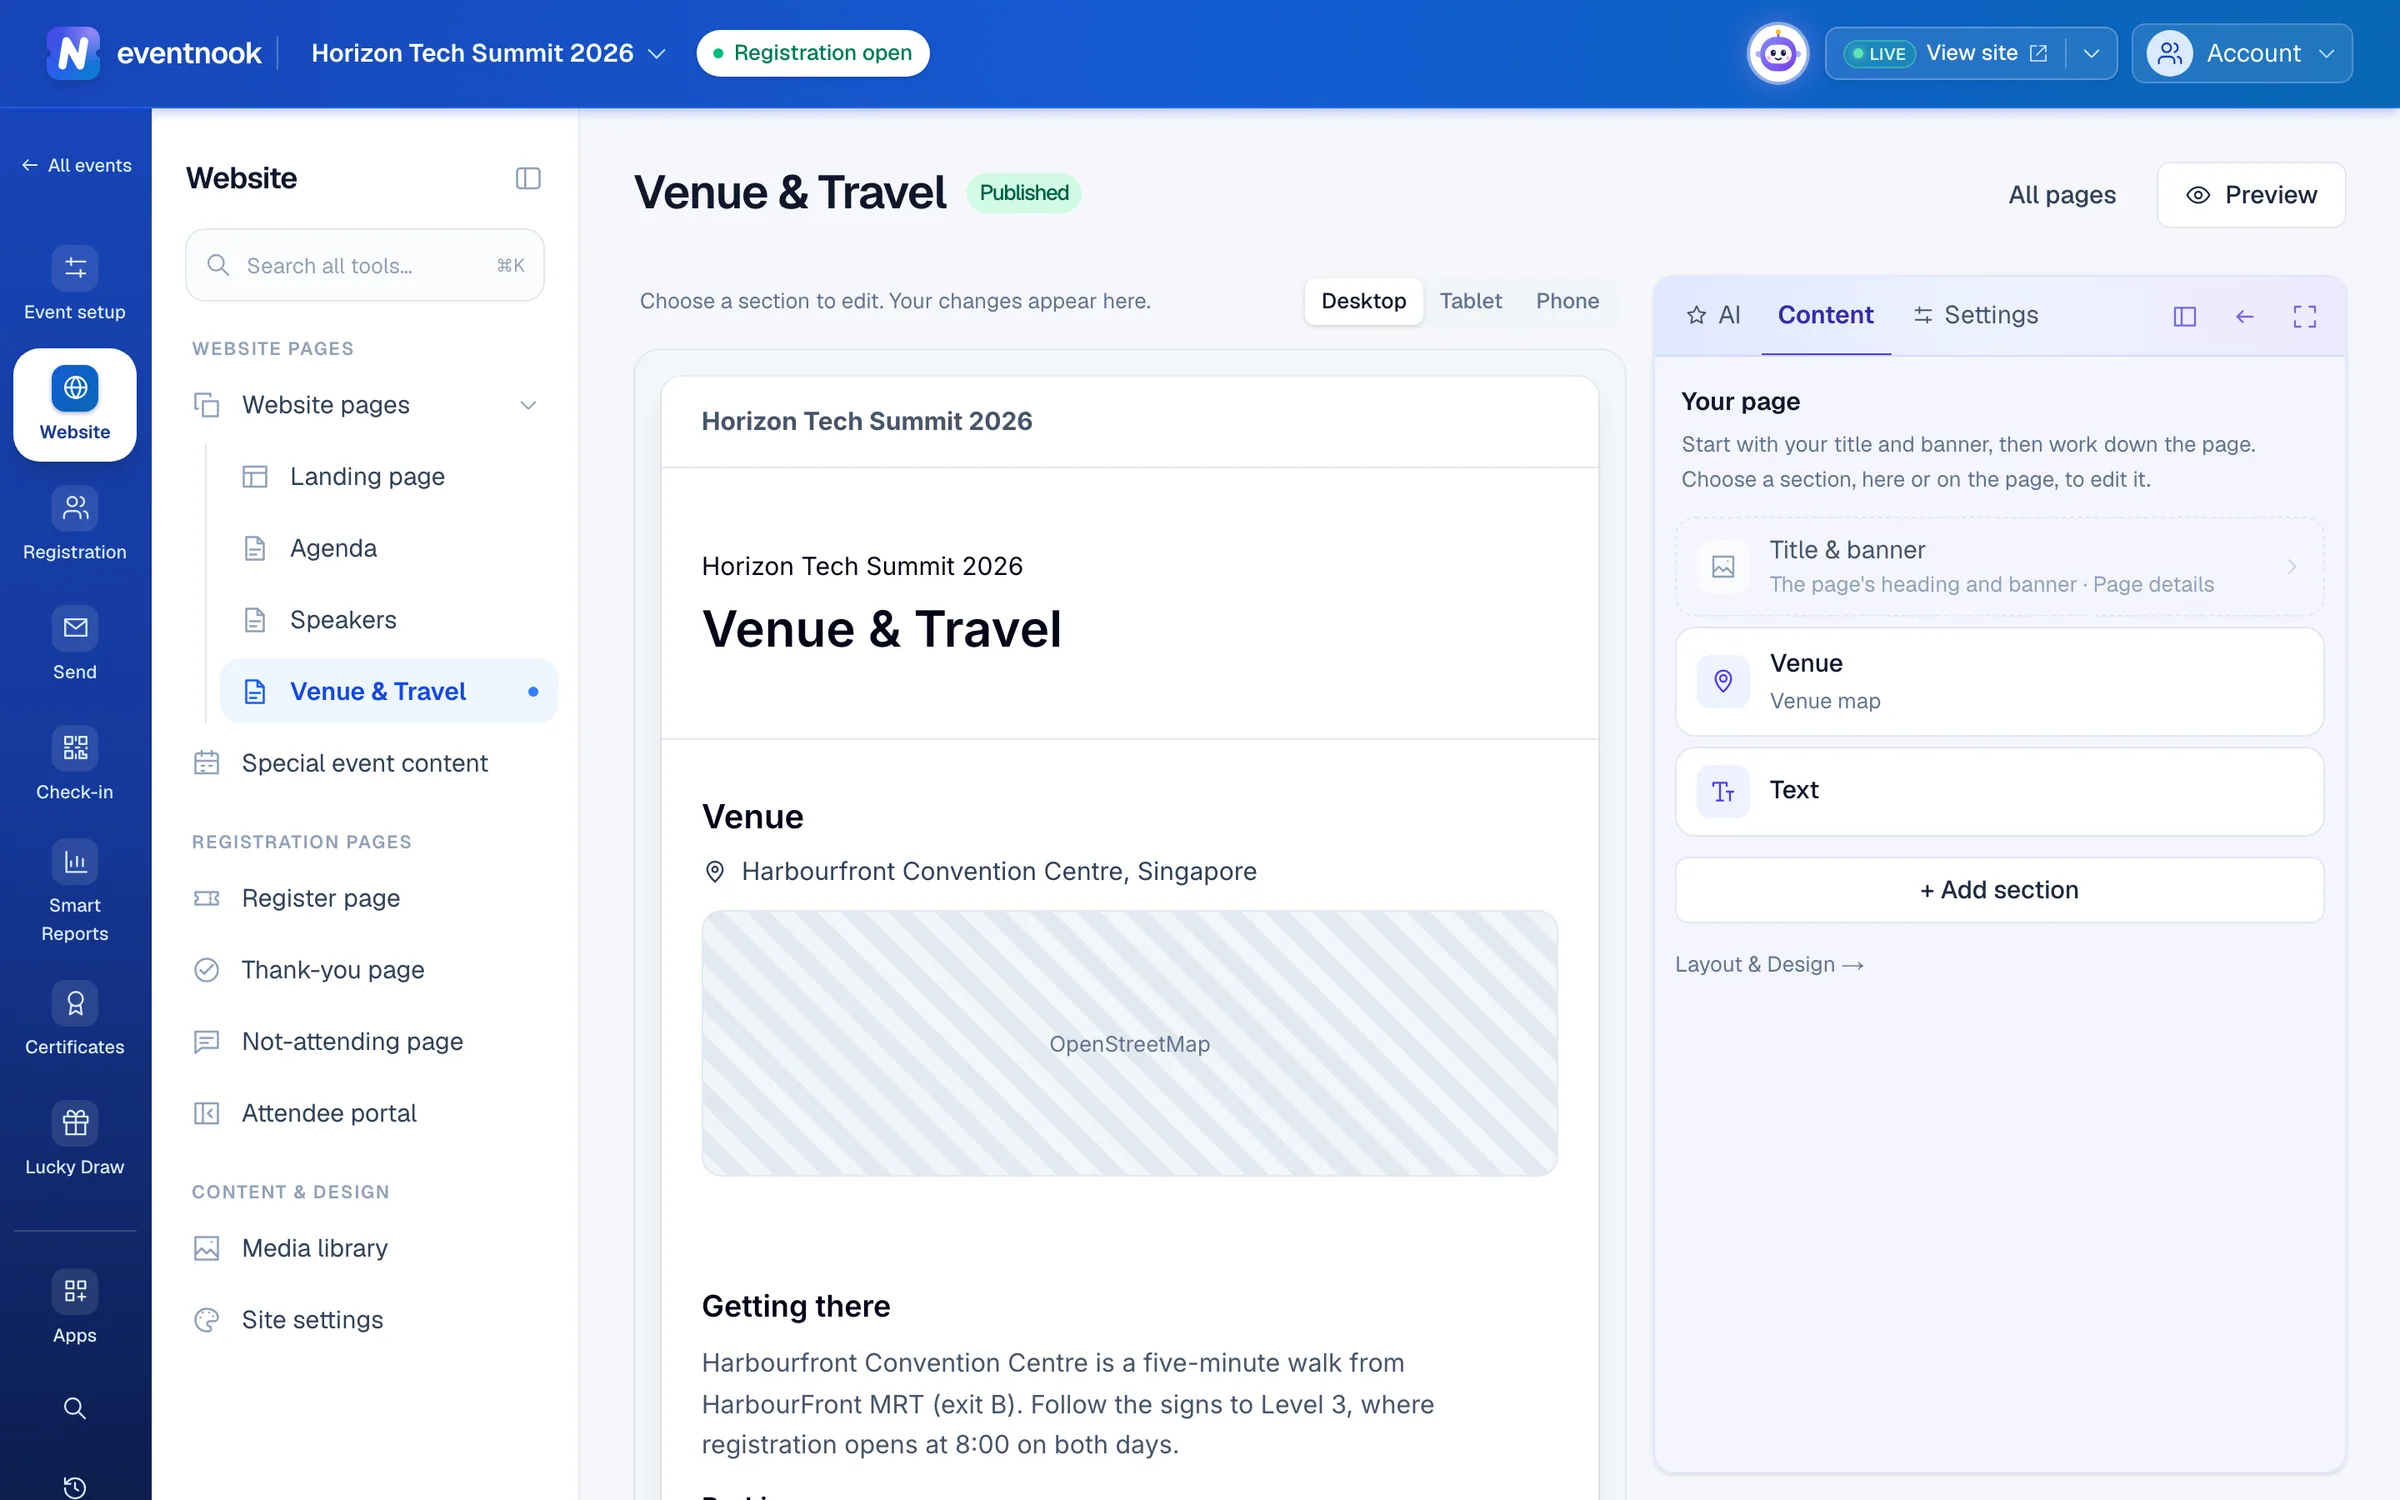
- 1The page's sections
- 2Publishing, address, menu and search listing
In the Settings tab, Page Settings shows whether the page is live, with Publish (or Publish changes), Schedule to publish at a time in the event's time zone, Unpublish and Discard changes. Below that are the page's title, address and menu visibility, and how it shows in search and when shared. Access Code protects a page with a code, and History restores an earlier version.
For sections, the AI tab and live elements such as a Register button in your text, see Build your event's landing page. They work the same here.
Reorder, copy and delete pages#
- Change the menu order: use the ↑ and ↓ buttons on the list. The home page always stays first.
- Copy a page: click Duplicate. The copy opens as a draft.
- Delete a page: click Delete, type the page title and click Delete page. It moves to Recently deleted, where Restore brings it back for 30 days.
- Make everything live: click Publish all. You see the pages with unpublished changes first, then publish them in one step.
Add your agenda, speakers and FAQ#
Open Website Builder › Special event content. Its menu lists Agenda, Speakers, Sponsors, FAQ and Documents, each with how many items it has. Photo albums joins them once the event has the Photo Gallery app.
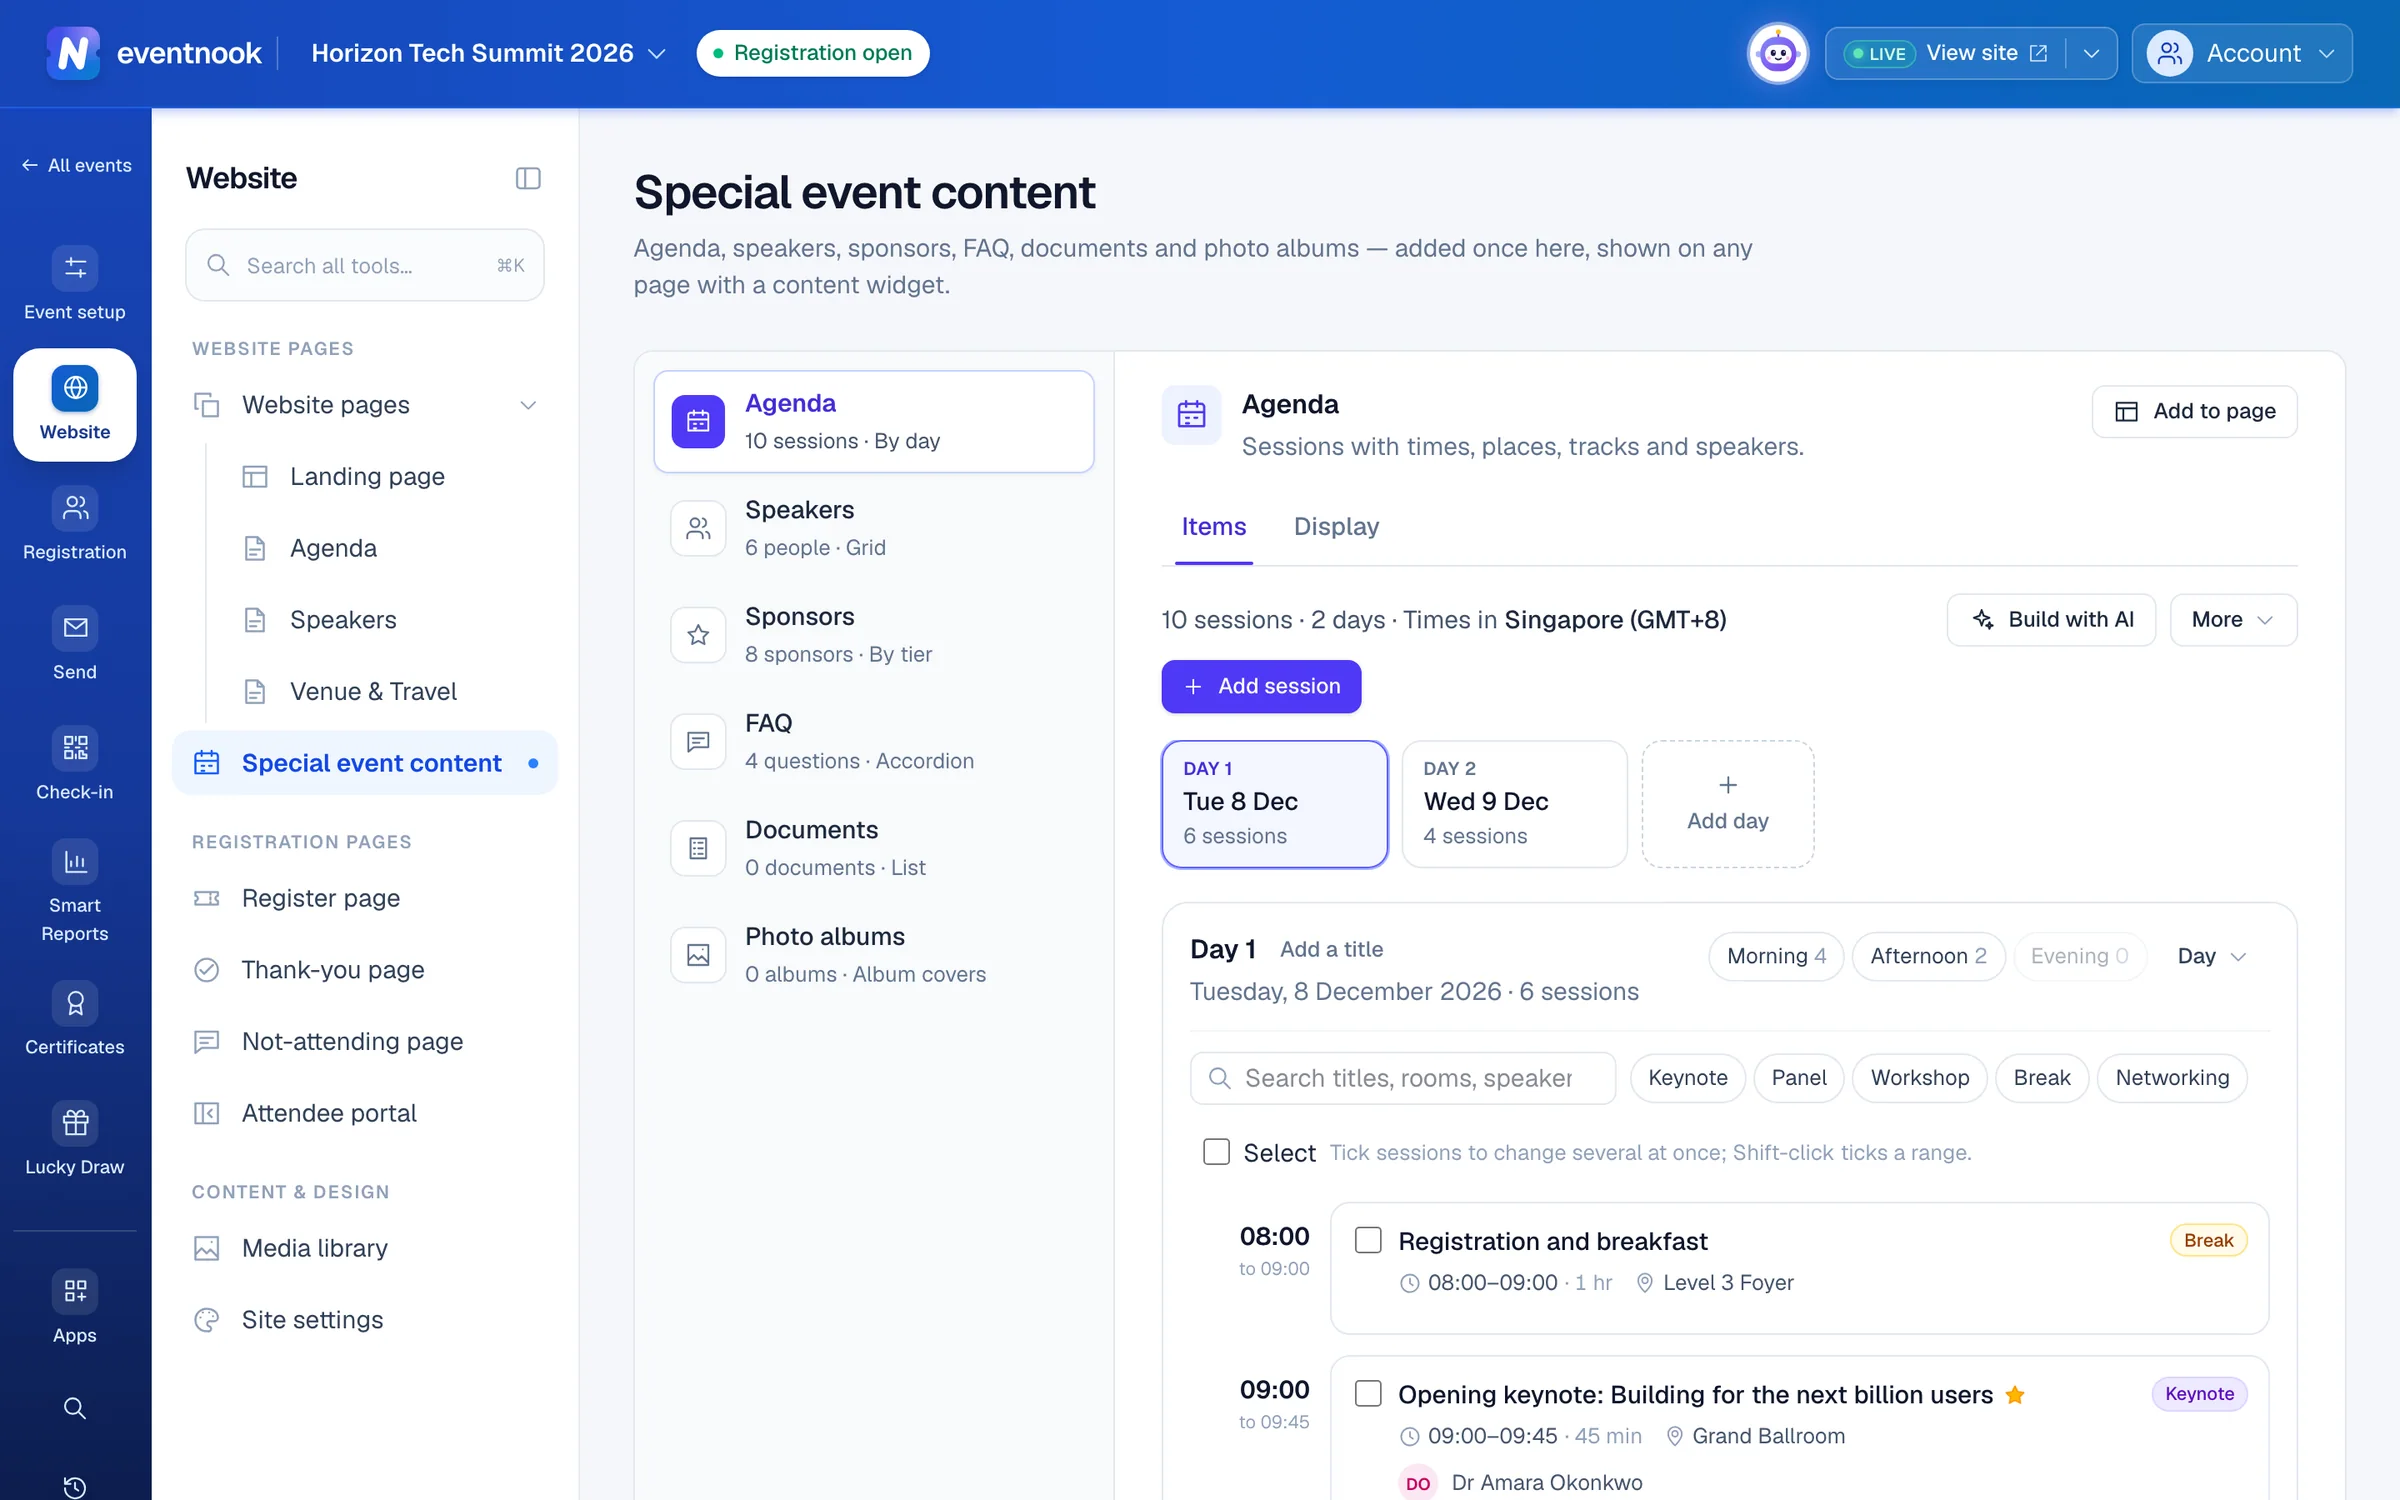
- 1Put this content on a page
- 2How it looks on every page
| Content | How to add it |
|---|---|
| Agenda | Pick a day and click Add session, or Add day for the next day. Save and add another starts the next session when this one ends. Starting from nothing? Use Paste an agenda, Use a sample, Import CSV… or Build with AI, which reads an agenda you paste as text. |
| Speakers and Sponsors | Click Add. For a speaker's picture, click Upload photo and crop it. Paste a bio and click Fill in to fill the form with AI. Copy from another event of your organisation reuses last year's. |
| FAQ | Click Add question, type the question, the answer and a category if you group them. Use ↑ and ↓ to order them. |
| Documents | Click Upload PDF (up to 20 MB). It shows Checking for viruses… until it's safe, then visitors can download it. |
The agenda warns you when a speaker is in two sessions at once or a room is booked twice. Times are in the event's time zone.
Nothing shows on the site until a page has a section for it:
- Open the kind of content and click Add to page.
- Click Add beside a page, or create a New page with it.
- Open the page, move the section where you want it and publish the page.
To change how a kind of content looks everywhere, open it, click Display, choose a layout and save. Every section that uses the default changes. To stop showing it at all, turn off Show … on this event's website there: your items are kept.
Manage pictures in the media library#
The media library holds every picture your site, design and emails use. Upload a picture once and reuse it anywhere.
- Open Website Builder › Media library and click Upload image. Use a JPEG, PNG, WebP or GIF.
- Type a short description in Default alt text and click Save. Screen readers use it.
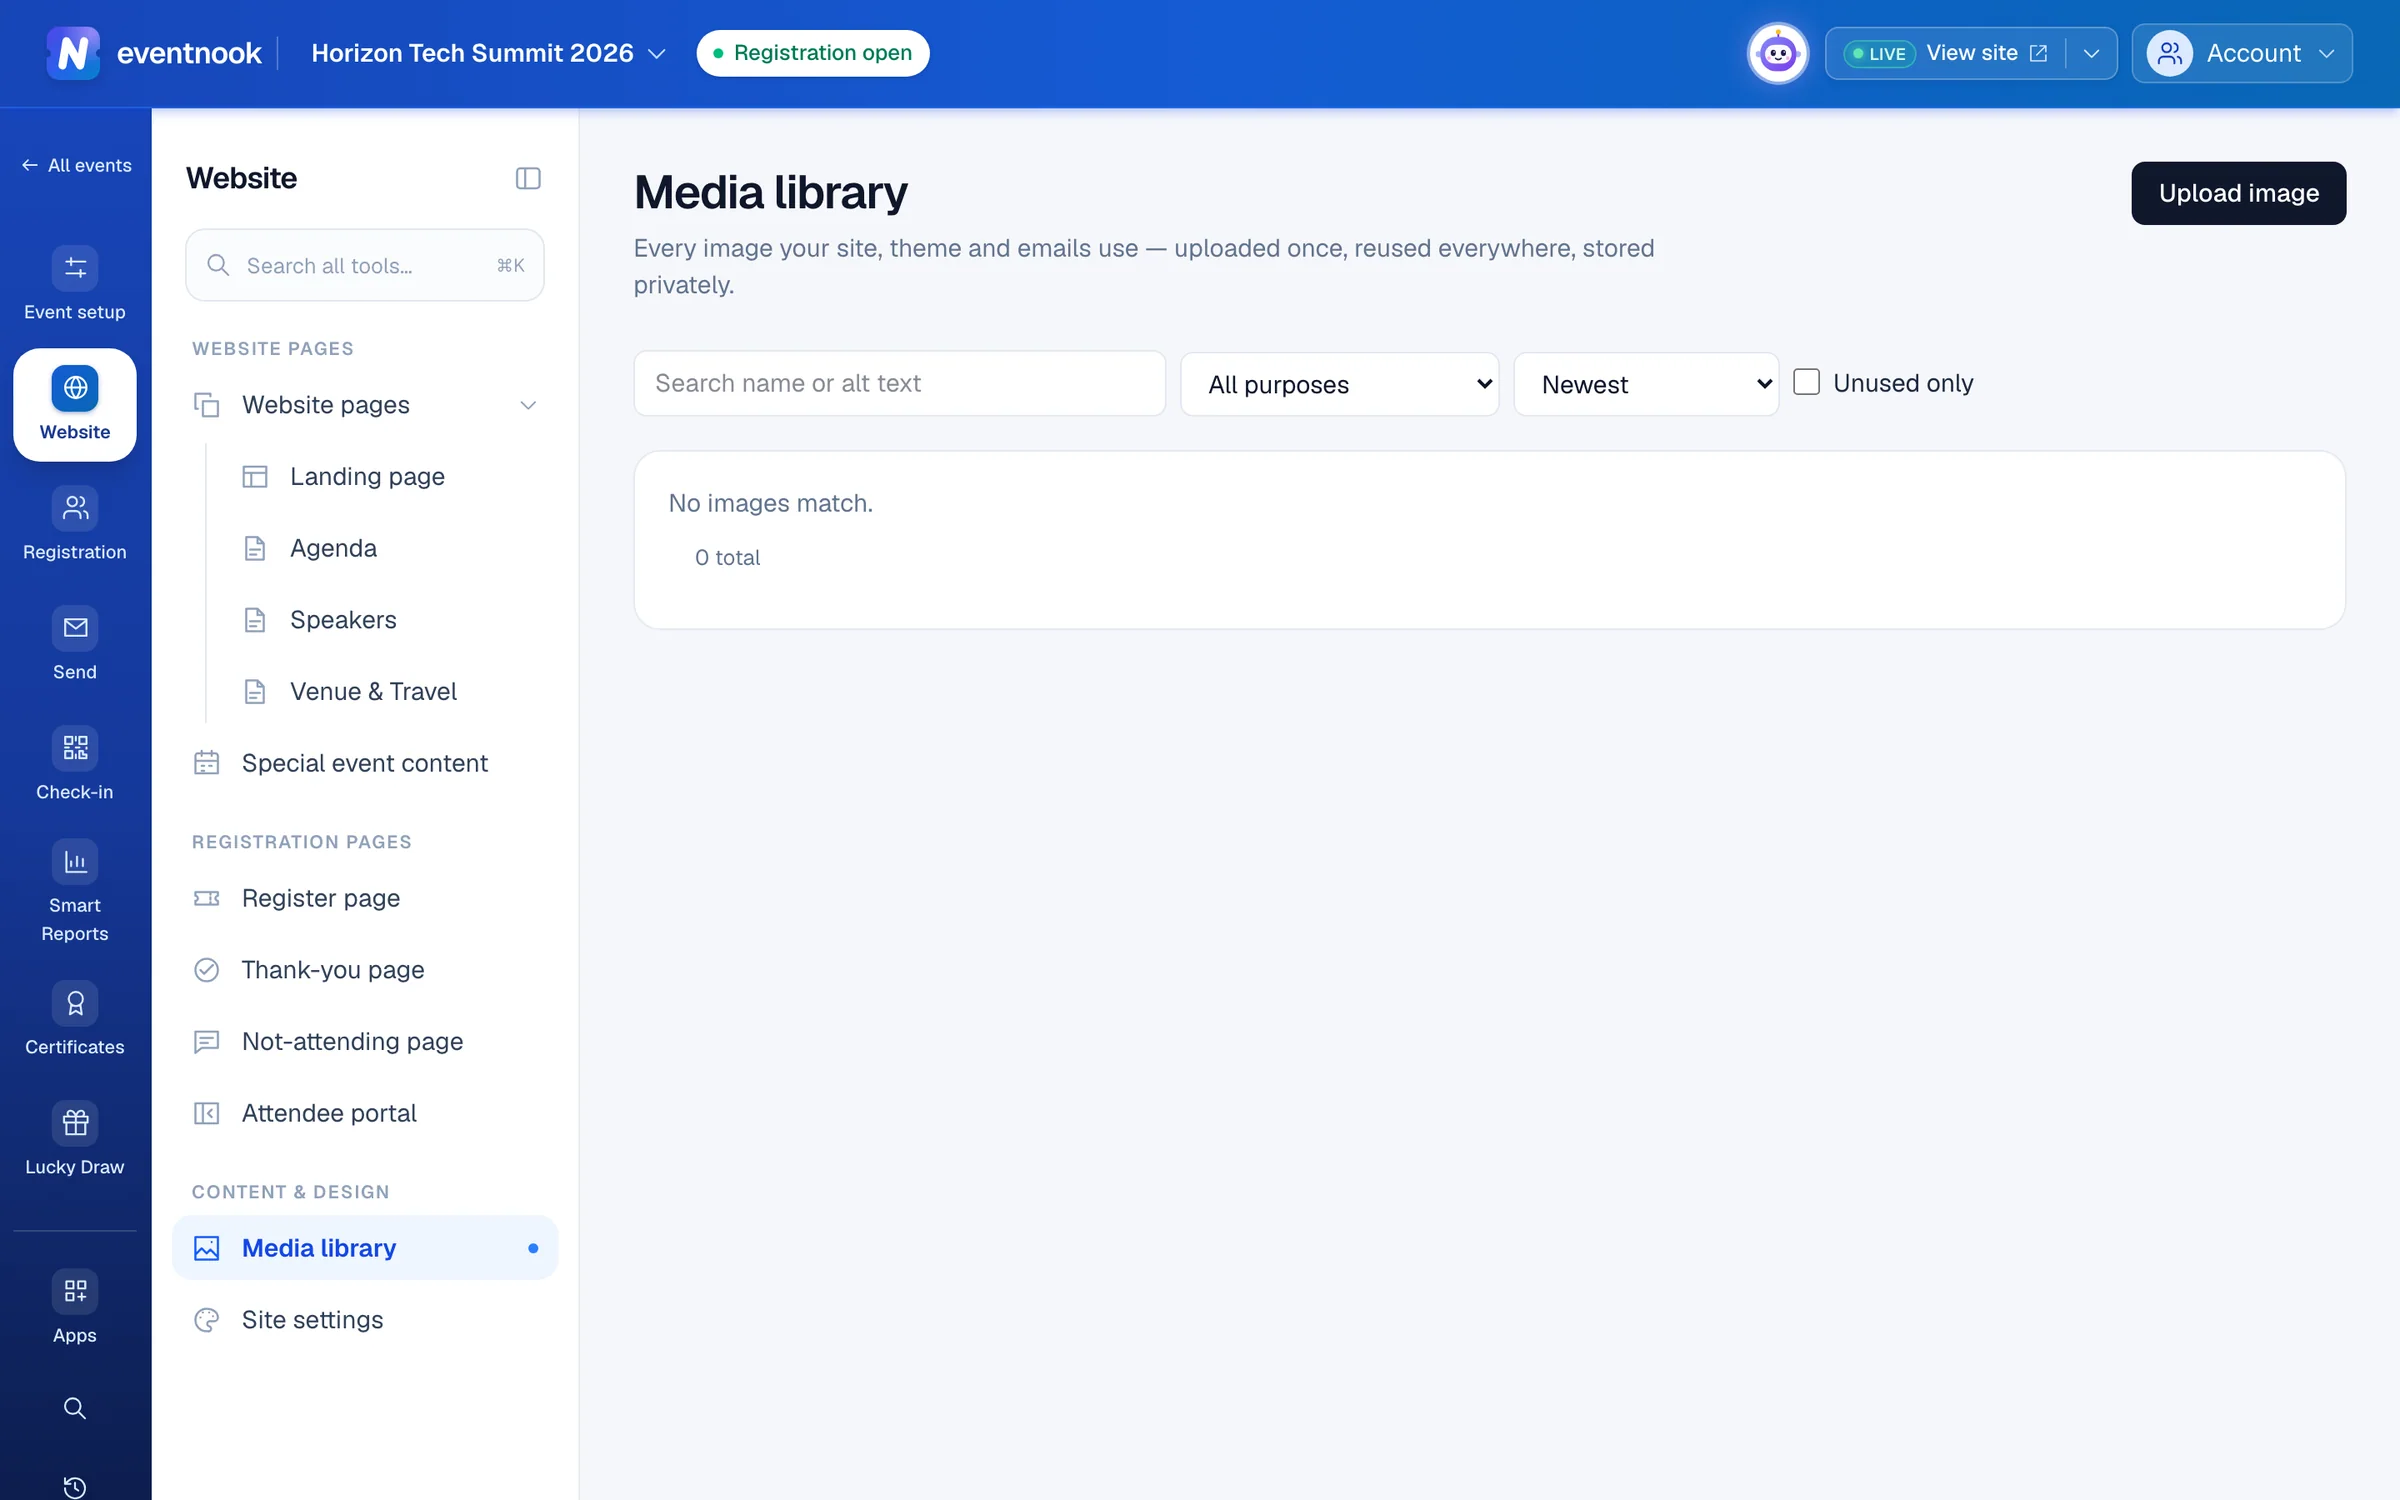
- 1Add a JPEG, PNG, WebP or GIF
- 2Find pictures nothing uses
Each picture shows whether it passed the safety scan (clean, pending or infected), where it's used, and warnings such as missing alt text. Replace file swaps a picture everywhere it's used. Copy URL copies its address. Delete removes a picture nothing uses; one still in use must be removed from those places first, or deleted by an event admin with Force delete, which leaves a placeholder.
If something looks wrong#
- Visitors see the old page. Save, then publish.
- "Another page already uses this address". Choose a different page address. Old addresses of live pages keep redirecting for 12 months, so they can't be reused either.
- A message about your plan when creating a page. The plan's page limit is reached. The list says how many pages are left. Delete a page you don't need, or ask EventNook about more.
- Scheduling isn't offered. Your plan may not include it. Publish now instead.
- An agenda, speakers or FAQ section is empty on the site. Check the items are visible in Special Event Content, and that the kind of content is switched on under Display.
- A new picture has no preview. It's still being scanned. Wait a moment and reload.
- A picture shows infected. It failed the safety scan and is never shown. Delete it and upload a clean copy.
Who can do this#
Everyone with access to the event can see the pages, content and pictures. Editors and event admins can create, change, publish and delete them. Only event admins can protect a page with a code, restore an earlier version, or delete a picture that's still in use.
Related guides
- Build your event's landing pageDesign the home page of your event site by typing on the page or describing it to AI, add sections such as the agenda and speakers, and publish it.
- Set up the site's menu, design and settingsChoose the colours, fonts and width every page starts from, set the menu bar, logo, footer and favicon, keep the site out of search, protect it with a code and add your own CSS.
- Show your event's photos in albumsMake photo albums, upload a whole shoot at once, put the photos in order and show the albums on your event website.
Still stuck? In EventNook, ask HeyNook. It knows the page you're on and your event, and can take you straight to the right setting.